
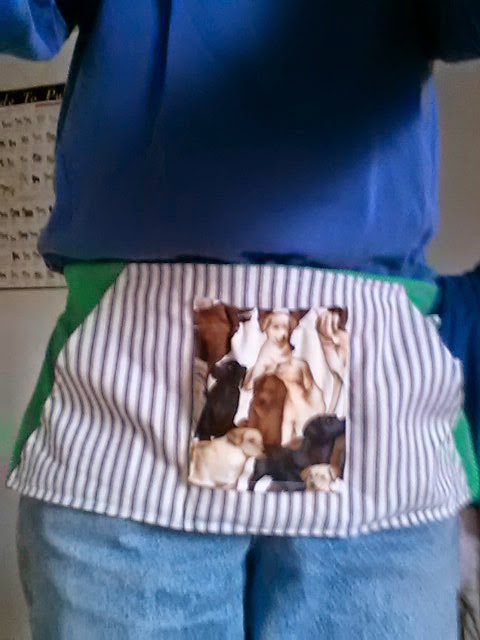
Make your own dog training apron with pockets for treats, clicker or other equipment, bags and a hidden pocket for your cell phone.
The finished size is 18 inches long, 8 inches wide.
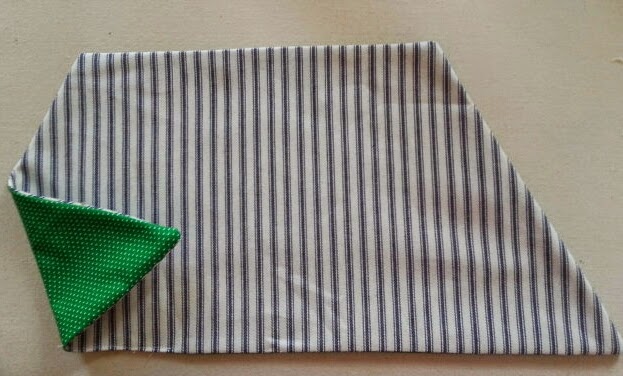
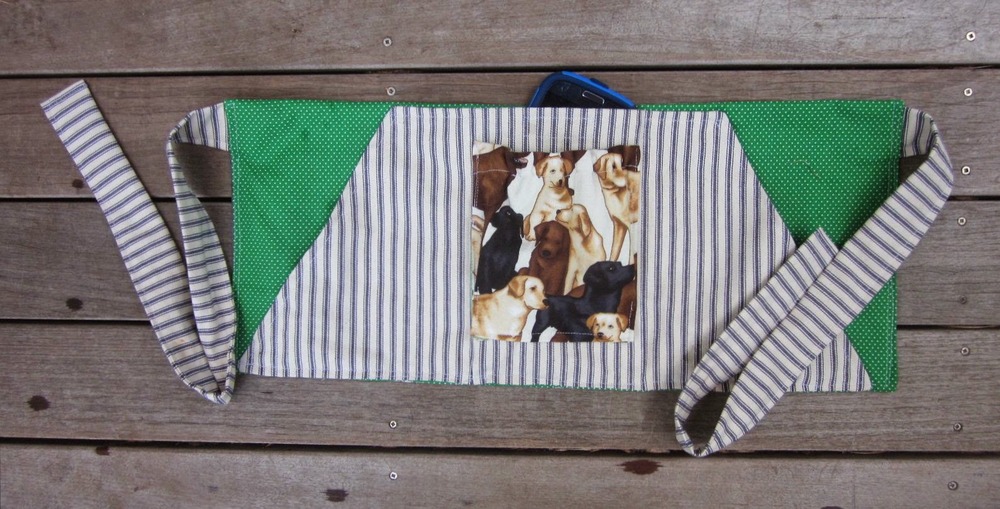 |
| Dog Training Apron with hidden cell phone pocket |
Supply list:
1/3 yard of mid-weight home dec material or bottom weight fabric
1/4 yard of quilting weight cotton
1 fat quarter or scraps to make the small patch pocket
1.5 inches of sew-on hook and loop closure
1/4 inch elastic, 8 inches long
Cutting instructions:
Body of apron:
From mid-weight fabric:
Cut 2 rectangles, 8.5 inches wide x 19 inches long
From quilting cotton:
Cut 2 rectangles, 8.5 inches wide x 19 inches long
Take one of the mid-weight rectangles and one of the quilting cotton rectangles. Cut both ends of each of the rectangles on a diagonal approximately somewhere between a 60 and 45 degree angle. You can get this slant by placing your ruler at the 2 inch mark at the top edge of the rectangle and line up the edge of the ruler with the bottom corner. I recommend that you cut both pieces, wrong sides together, at the same time so that the angles are identical on each piece.
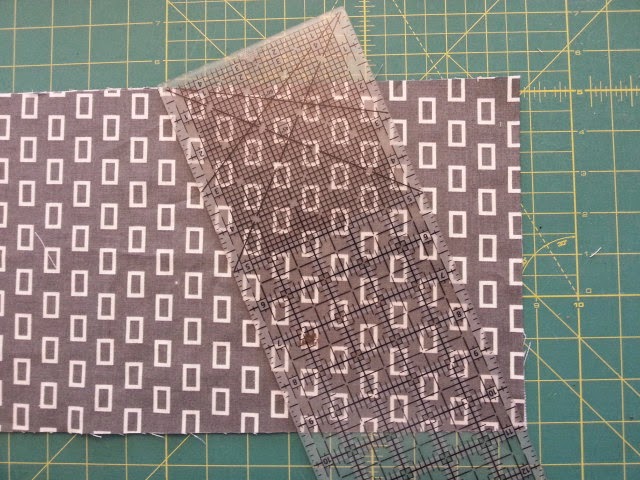 |
| Angle for cutting slant on large front pocket |
Ties:
From mid-weight fabric:
Cut 2 rectangles of mid-weight fabric, 5 inches wide x 21 inches
Small front pocket:
From Fat quarter or scraps:
Cut 2 squares, 6.5 inch x 6.5 inches
Here are all your pieces cut, ready for sewing:
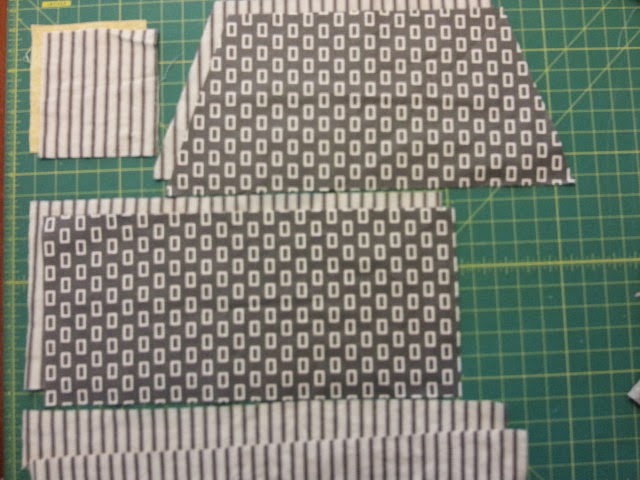 |
| Pattern pieces for the apron all cut out |
Directions:
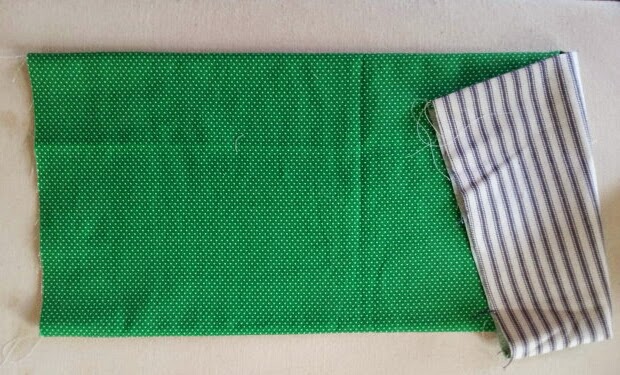
1. Place right sides together of the two 8.5 x 19 inch rectangles. One will be of mid-weight fabric and the other quilting weight fabric.
Sew top and bottom of the rectangle, creating a tube.
Turn fabric right side out. Press.
Turn under and press about 1/4 inch of the raw edges of the sides of the tubes.
Sew these two seams closed STARTING 2 inches below the top edge of the panel to leave an opening for the ties which will be inserted later.
Set aside for now.
 |
| Tube that will form the back panel of the apron. |
Sew around all 4 sides, leaving open 2 inches on the bottom (wider) edge.
Turn right side out.
Press.
Sew closed the opening on the bottom edge by sewing about 1/8 inch from the edge of the pocket.
Top stitch both the diagonal sides about 1/4 inch from edge.
 |
| Large front pocket ready to be sewn to the back apron panel |
3. Sew the soft side of the hook and loop closure at the midline of the back side of your large front pocket, about 1/2 inch below the top edge.
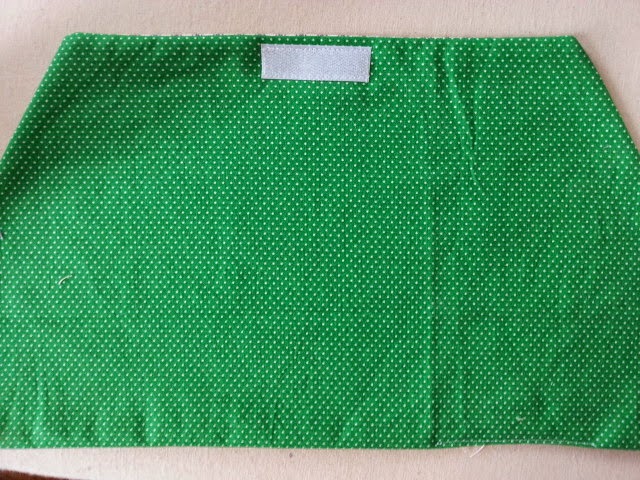 |
| Soft loop closure sewn to back side of large front pocket |
Sew the stiff loop side of the hook and loop closure at the midline of the front side of back panel of the apron, about 1/2 inch below the top edge. Make sure this strip will line up with the strip on the large front pocket.
4. Place right sides together of the two 6.5 x 6.5 inch cotton squares. Sew top edges together.
On one side, start sewing 1.5 inches BELOW the top seam and that side, the bottom edges and the opposite side but STOP 1/2 inch from the top edge.
Turn right side out.
Press.
Now sew a straight line 1/2 inch below the top edge of the small front pocket. This will make a tube with an opening on both sides.
Run the 1/4 inch elastic through the tube, leaving 1 inch out of each side of the pocket. Sew one side of the tube closed 1/8 inch from the edge of the pocket, leaving 1 inch of the elastic hanging out.
Now gently pull the other end of the elastic so that approximately 1.5 inches of the elastic extend beyond the margin of the pocket. There should be gentle gathering of the top edge of the pocket.
Sew closed the other end of the tube 1/4 inch from the margin of the pocket, securing the elastic at the same time.
Pull the exposed pieces of elastic taut and cut right at the edge of the pocket. The ends of the elastic should disappear into the 1/4 inch seam.
5. Sew the small front pocket onto the large front pocket, using a 1/4 inch seam on the 2 sides and bottom of the pocket. The small pocket should be placed centrally, about 1.5 inches below the top edge of the large pocket.
6. Sew the large front pocket to the back panel, using 1/4 inch top stitching.
Place the large front pocket on top of the back apron panel. The pocket will probably be about 1/4 inch narrower at the bottom than the back panel. That's fine. Pin in place.
Now sew across the top edge of the large front pocket, sewing through all the layers, until you are parallel to the small pocket. STOP and backstitch a few stitches. Restart sewing across the top on the other side of of the front pocket. This will be the opening for the cell phone pocket.
Then sew down the bottom of the large front pocket. Start the stitching on the diagonal, 2.5 inches from the left lower corner of the large pocket. sew down the 2.5 inches of the diagonal, sew across the bottom of the pocket and then sew up 2.5 inches of the opposite diagonal on the right side.
This will create a pocket on both sides of the apron. Sewing down the bottom 2.5 inches of the slant gives the pocket a corner to keep your things inside the pocket!
7. Now sew 2 straight lines from the top edge of the large pocket to the bottom edge through all the layers of the apron, starting at the point where you stopped sewing in the first part of step 6. The sewing line should be at least 1/4 inch away from the sides to the small pocket. Make sure to check that your phone will have enough room in the pocket. You can adjust these vertical sewing lines as needed.
This step creates your "hidden" cell phone pocket. The hook and loop closures close this pocket so your phone won't fall out if you lean over.
8. For the ties, fold the 5" x 21" rectangles in half wrong sides together and press. Open. Now fold BOTH edges of the long sides of the rectangle, wrong sides together, meeting the raw edges at the center line you just pressed.
Press again.
Fold the tie in half again along the length of the tie. This will give you a sturdy 4 layer tie.
Sew the edges of the tie closed on the 3 open sides.
9. Insert a tie in the opening of the back panel on one side---put a good inch inside the back panel. Now sew it in place, at the edge of the back panel of the apron, closing the opening at the side time. Sew back and forth several times. Then sew again 1/4" away from the first seam to securely attach your tie.
Repeat for the other tie.
That's it!
Enjoy training your dog(s)!
Copyright--Judith Tucker 2014. This tutorial is for home use only. You may make dog training aprons for yourself and may make and sell them at craft fairs or other similar small venues. Your may NOT use this pattern commercially without permission.
Please have your friends visit the blog to print their own copy of this tutorial if they wish to make the apron. Thanks!