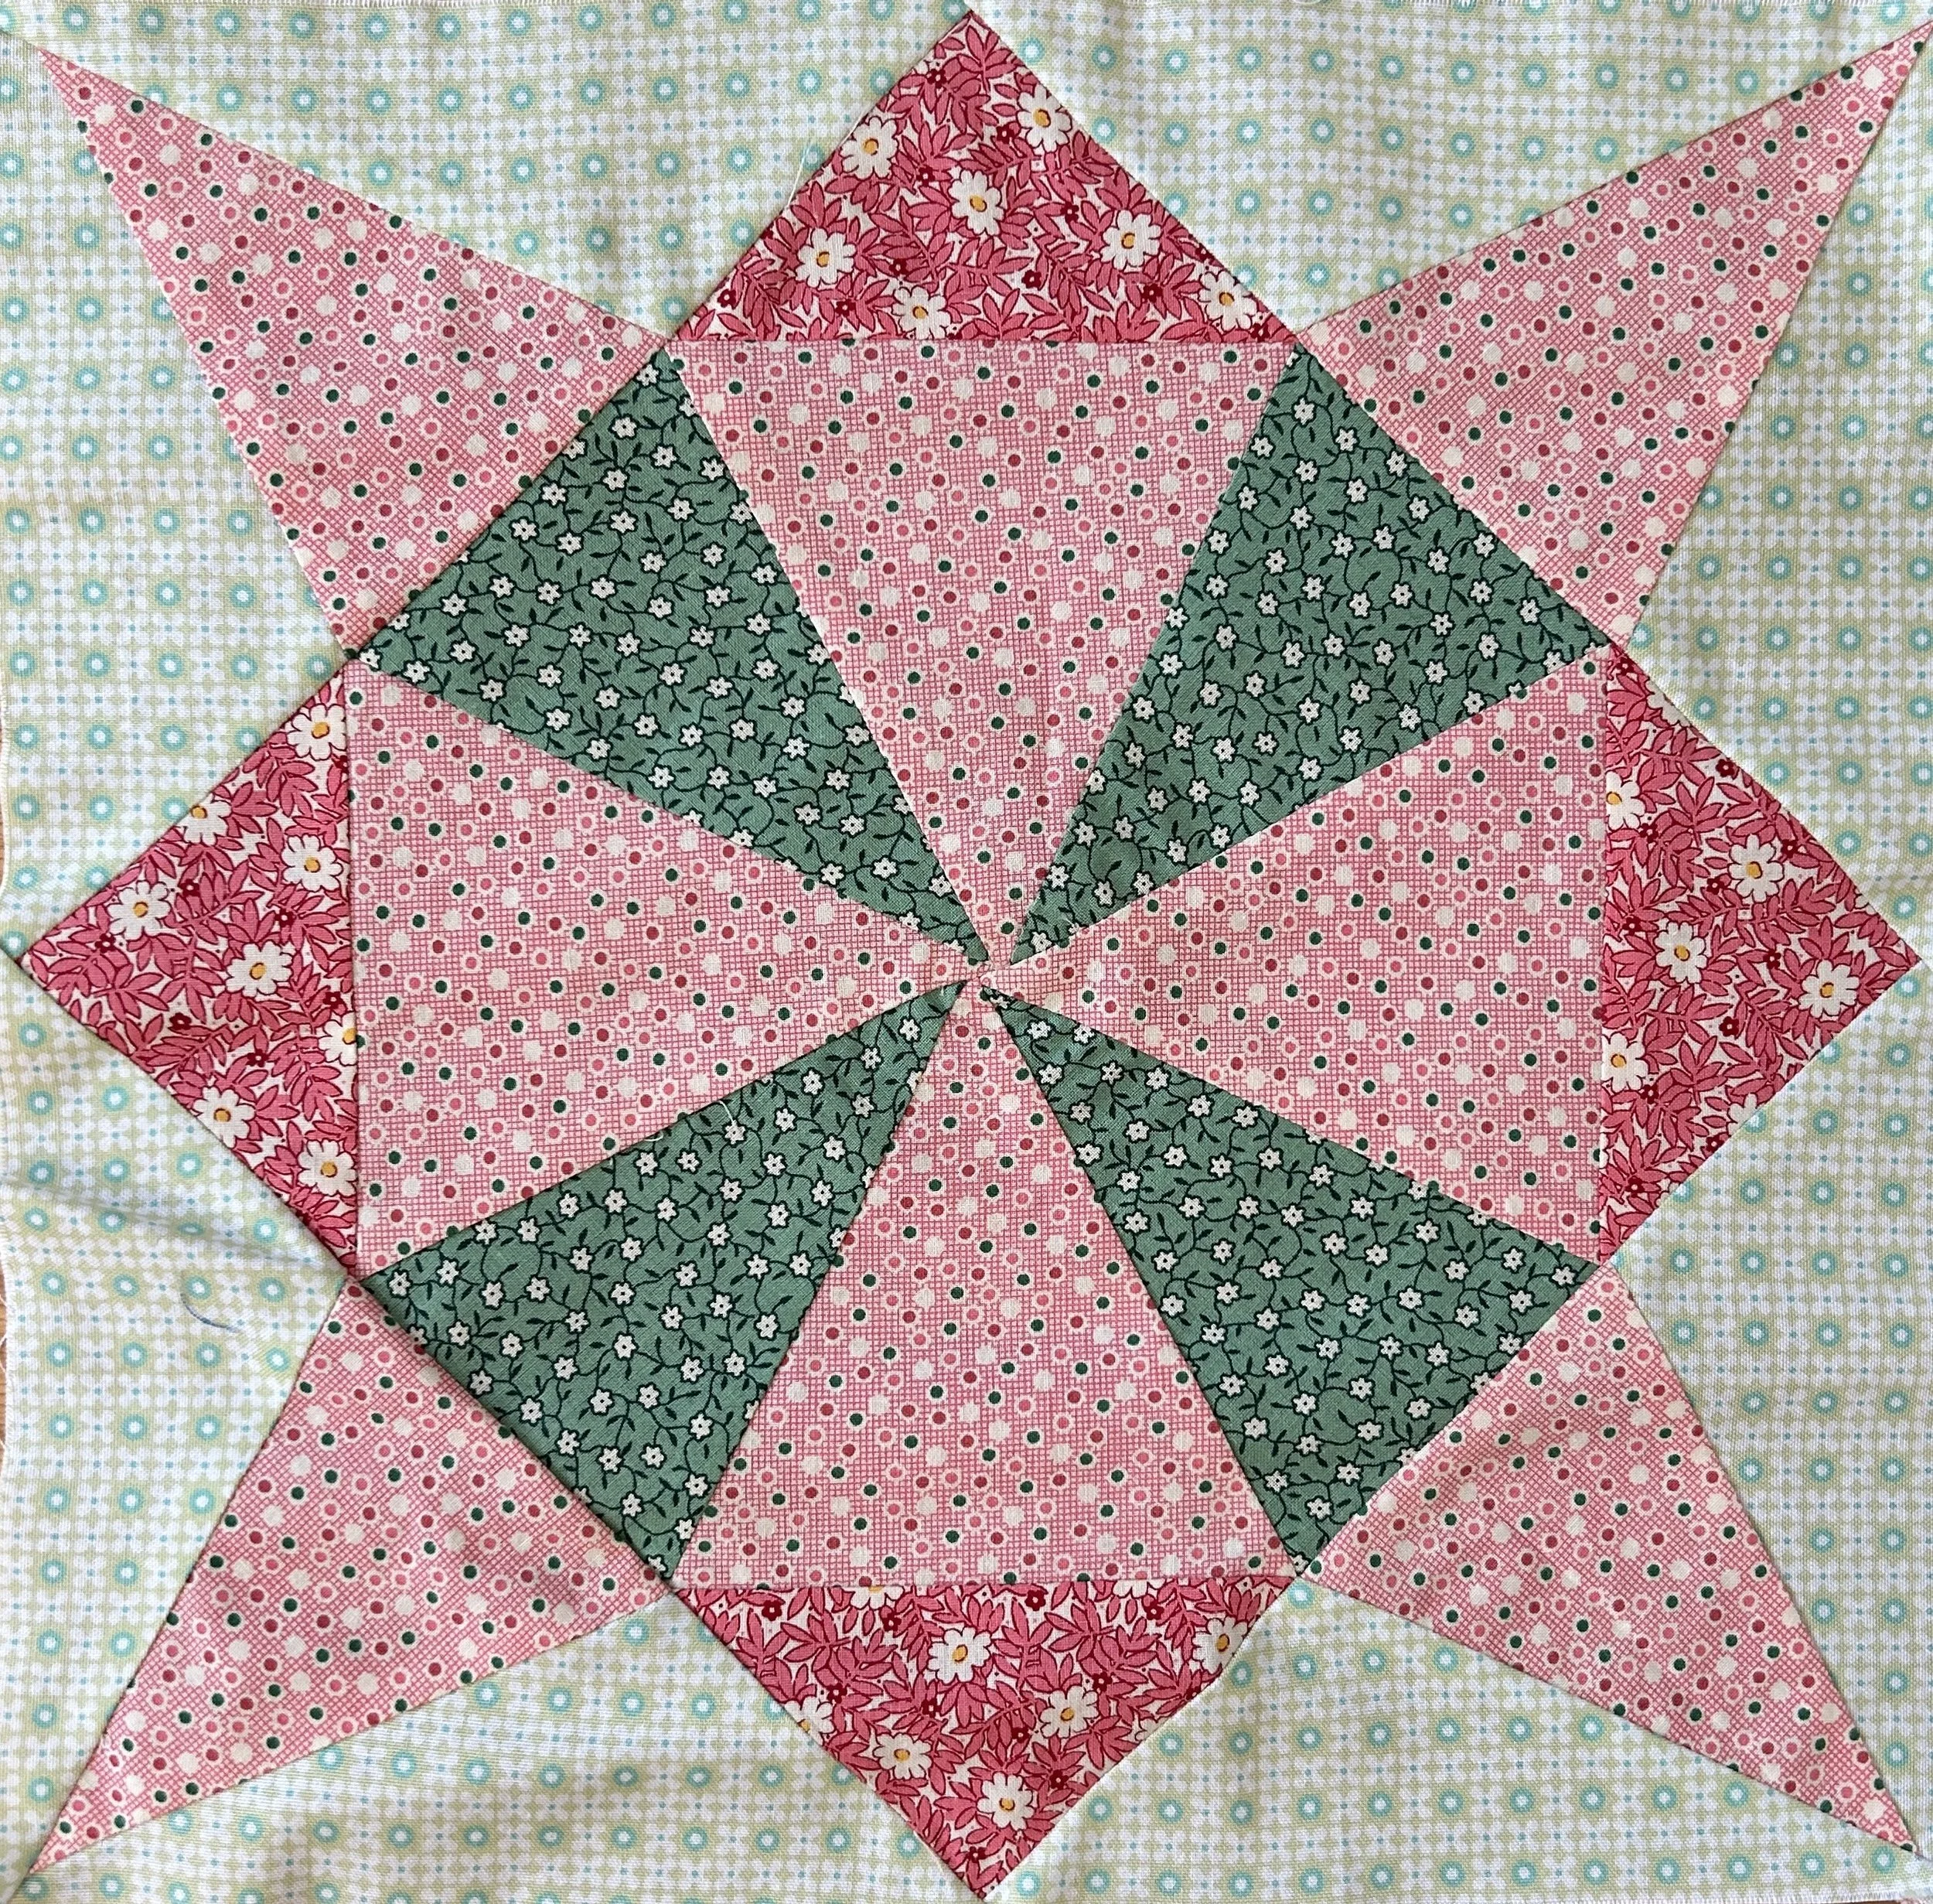
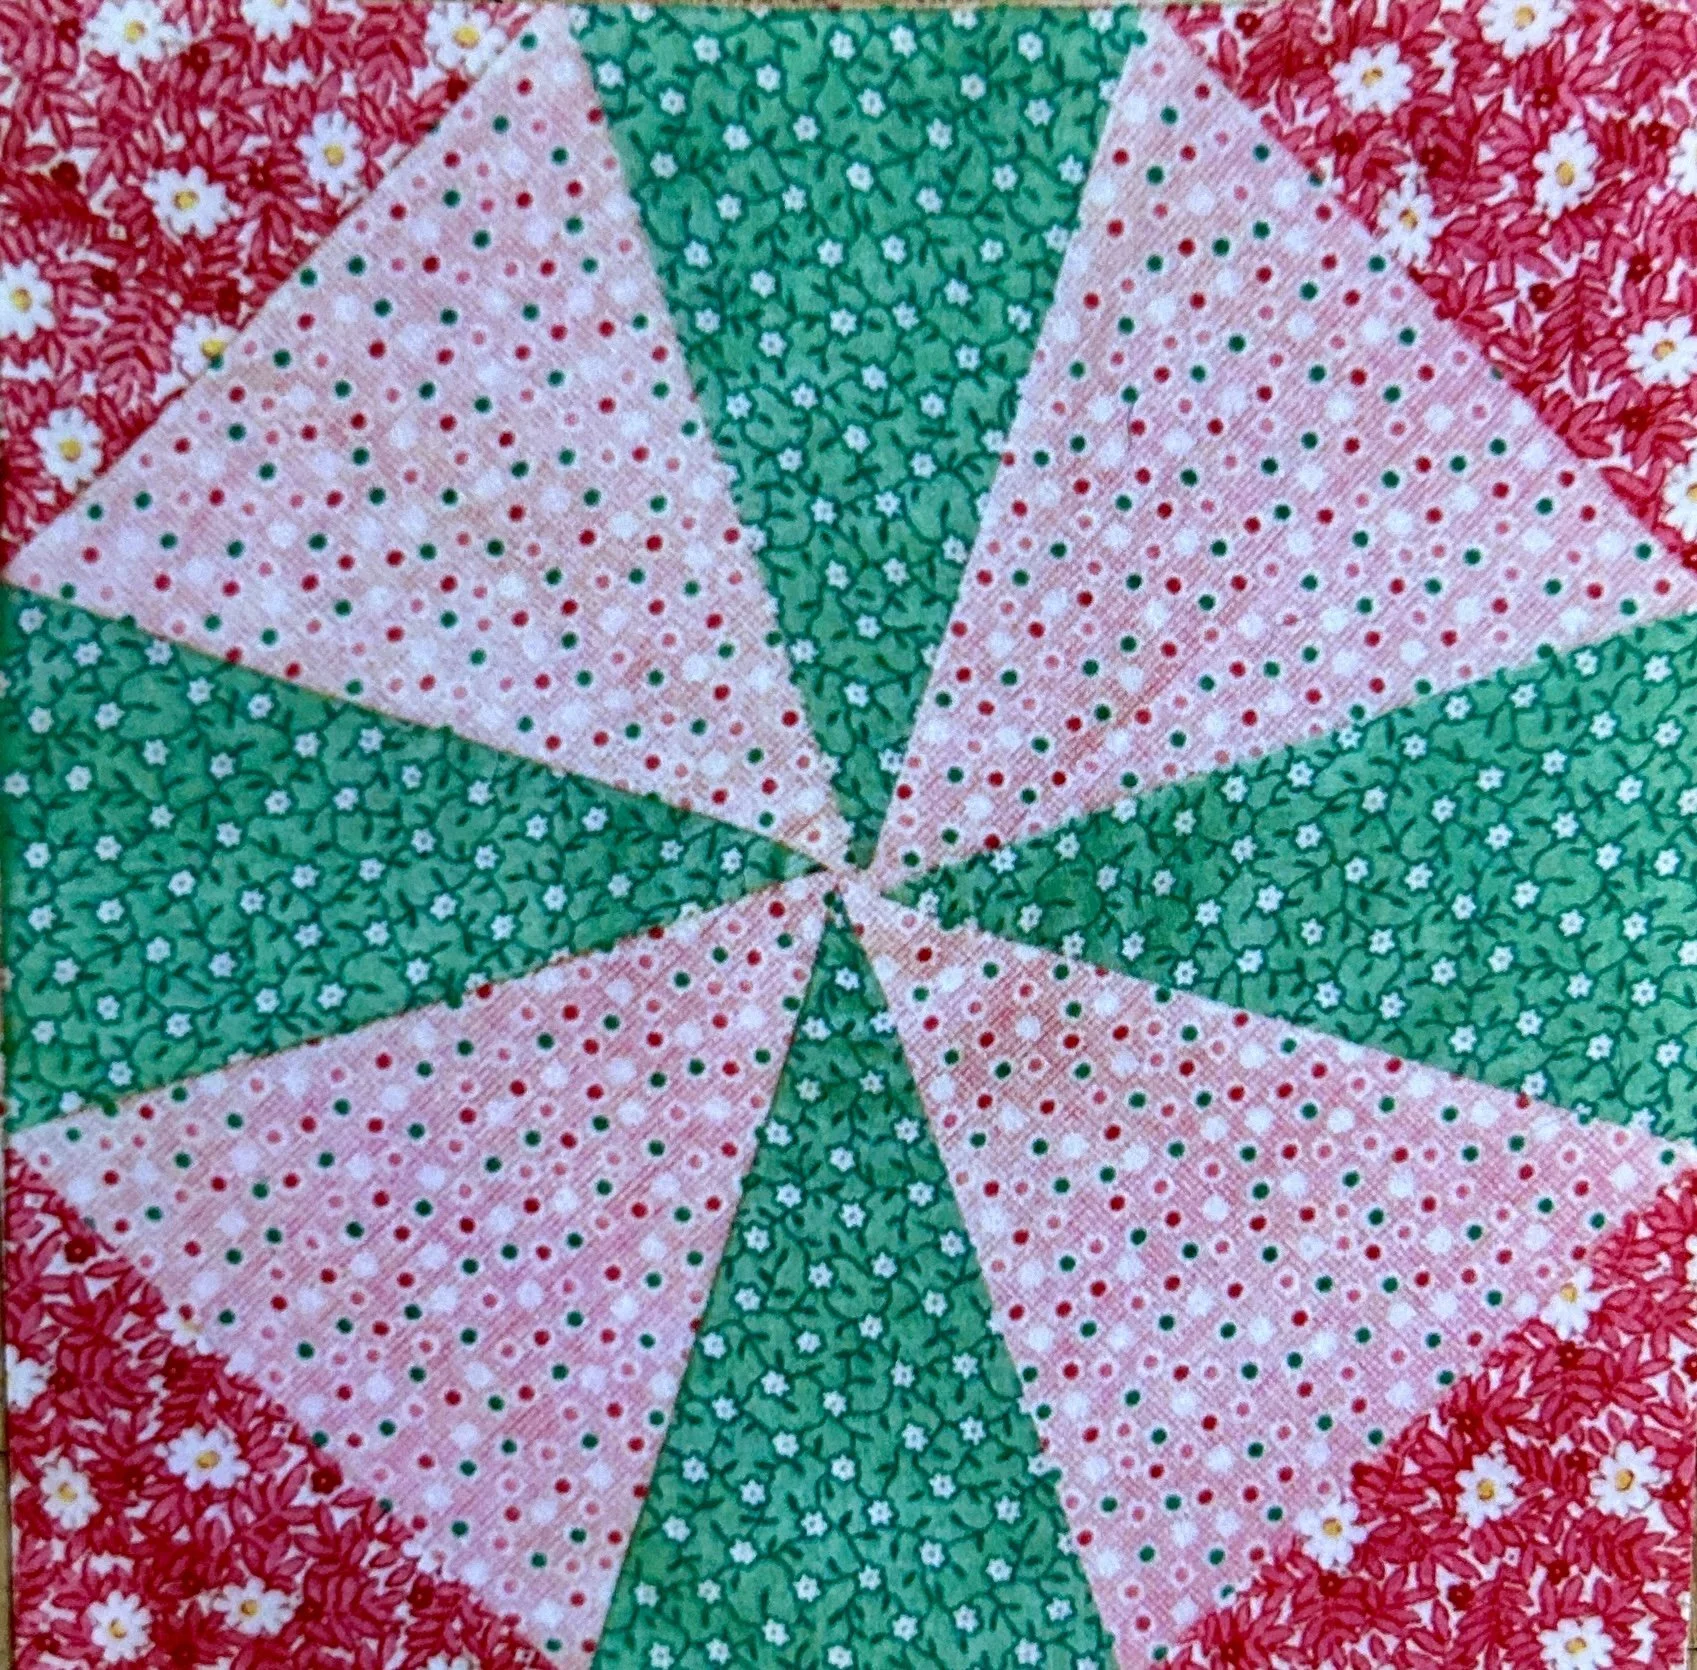
“Whirling Star” Blockbase+ #3295 A Nancy Cabot Attribution
The July block in the Civil War Quilts Sew Along 2024 is the “Whirling Star” block from BlockBase+. It is #3295 and attributed to Nancy Cabot. You can get the pattern from the preceding link if you don’t own a copy of BlockBase+.
The block above isn’t perfect, and I know why, as well how I could have made a pristine block. Here’s the scoop. This is a block that needs to be cut using templates. Not my favorite, but doable. I printed off the copy from the Civil Wars Quilts website at 100% and checked the one inch square box on the pattern to see if it was true. It wasn’t. I needed to put the printed sheet in my copier/printer and increase the pattern to 112%. (If you print a copy, check it. Yours might be just fine).
So far, so good. I pulled a cereal box out of the recycling bin to make templates. But then figured that since I was just sewing a single block, cutting the printer paper pattern would be fine. And it was. (If I were going to make multiple blocks, I would have cut them from plastic for quilt templates—readily available from multiple sources online).
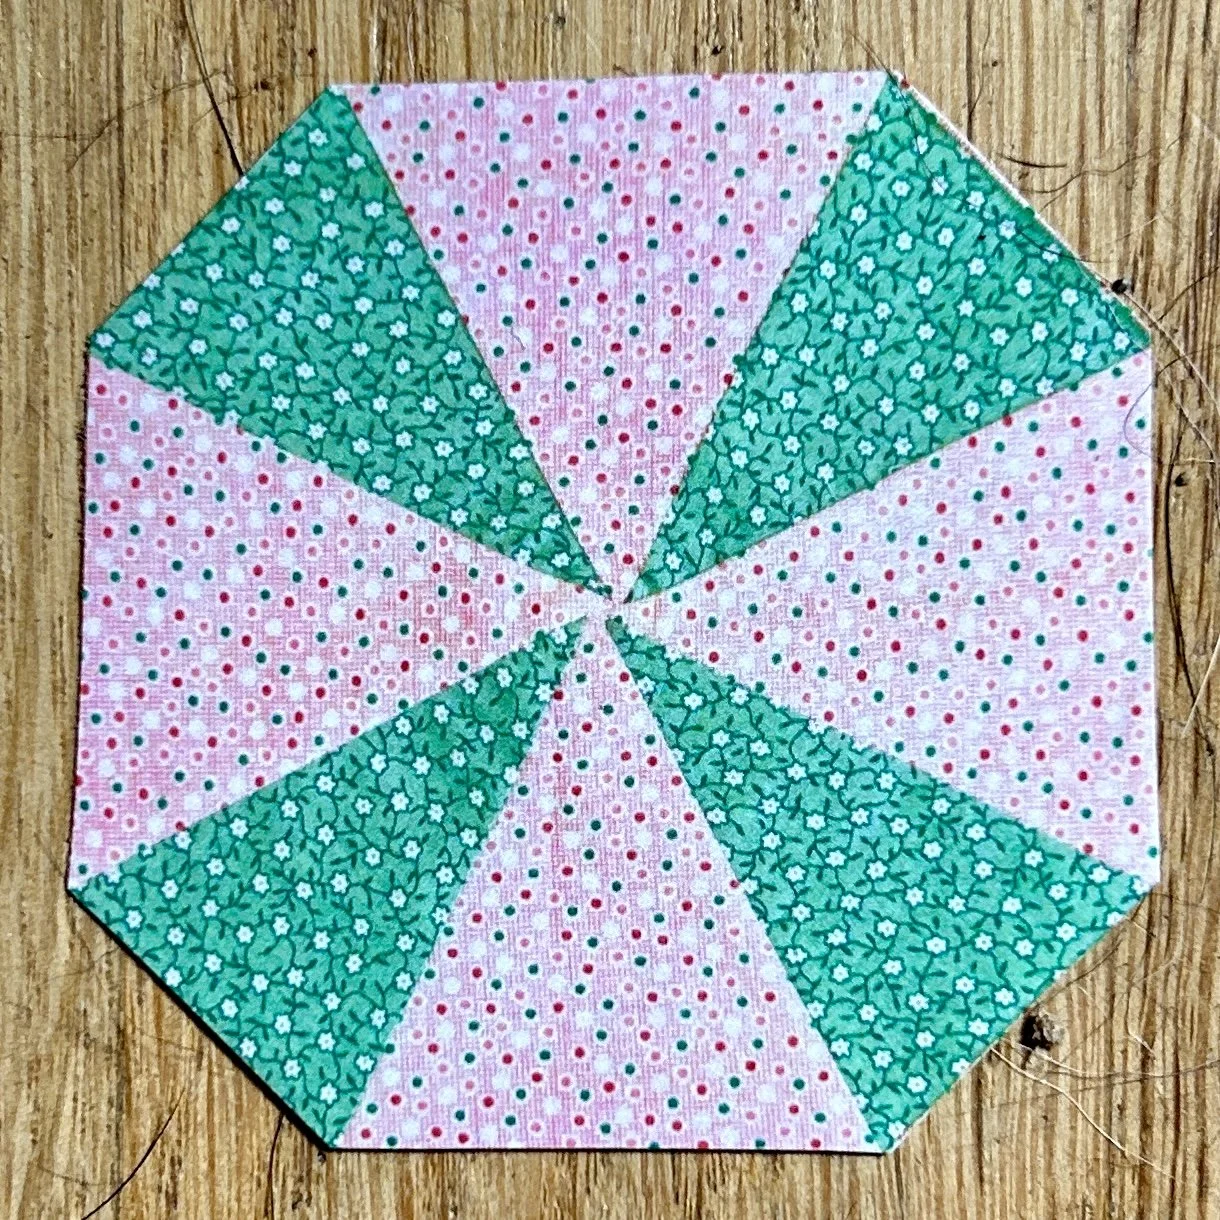
How does this block get assembled? Here are the components of the central section of the block:
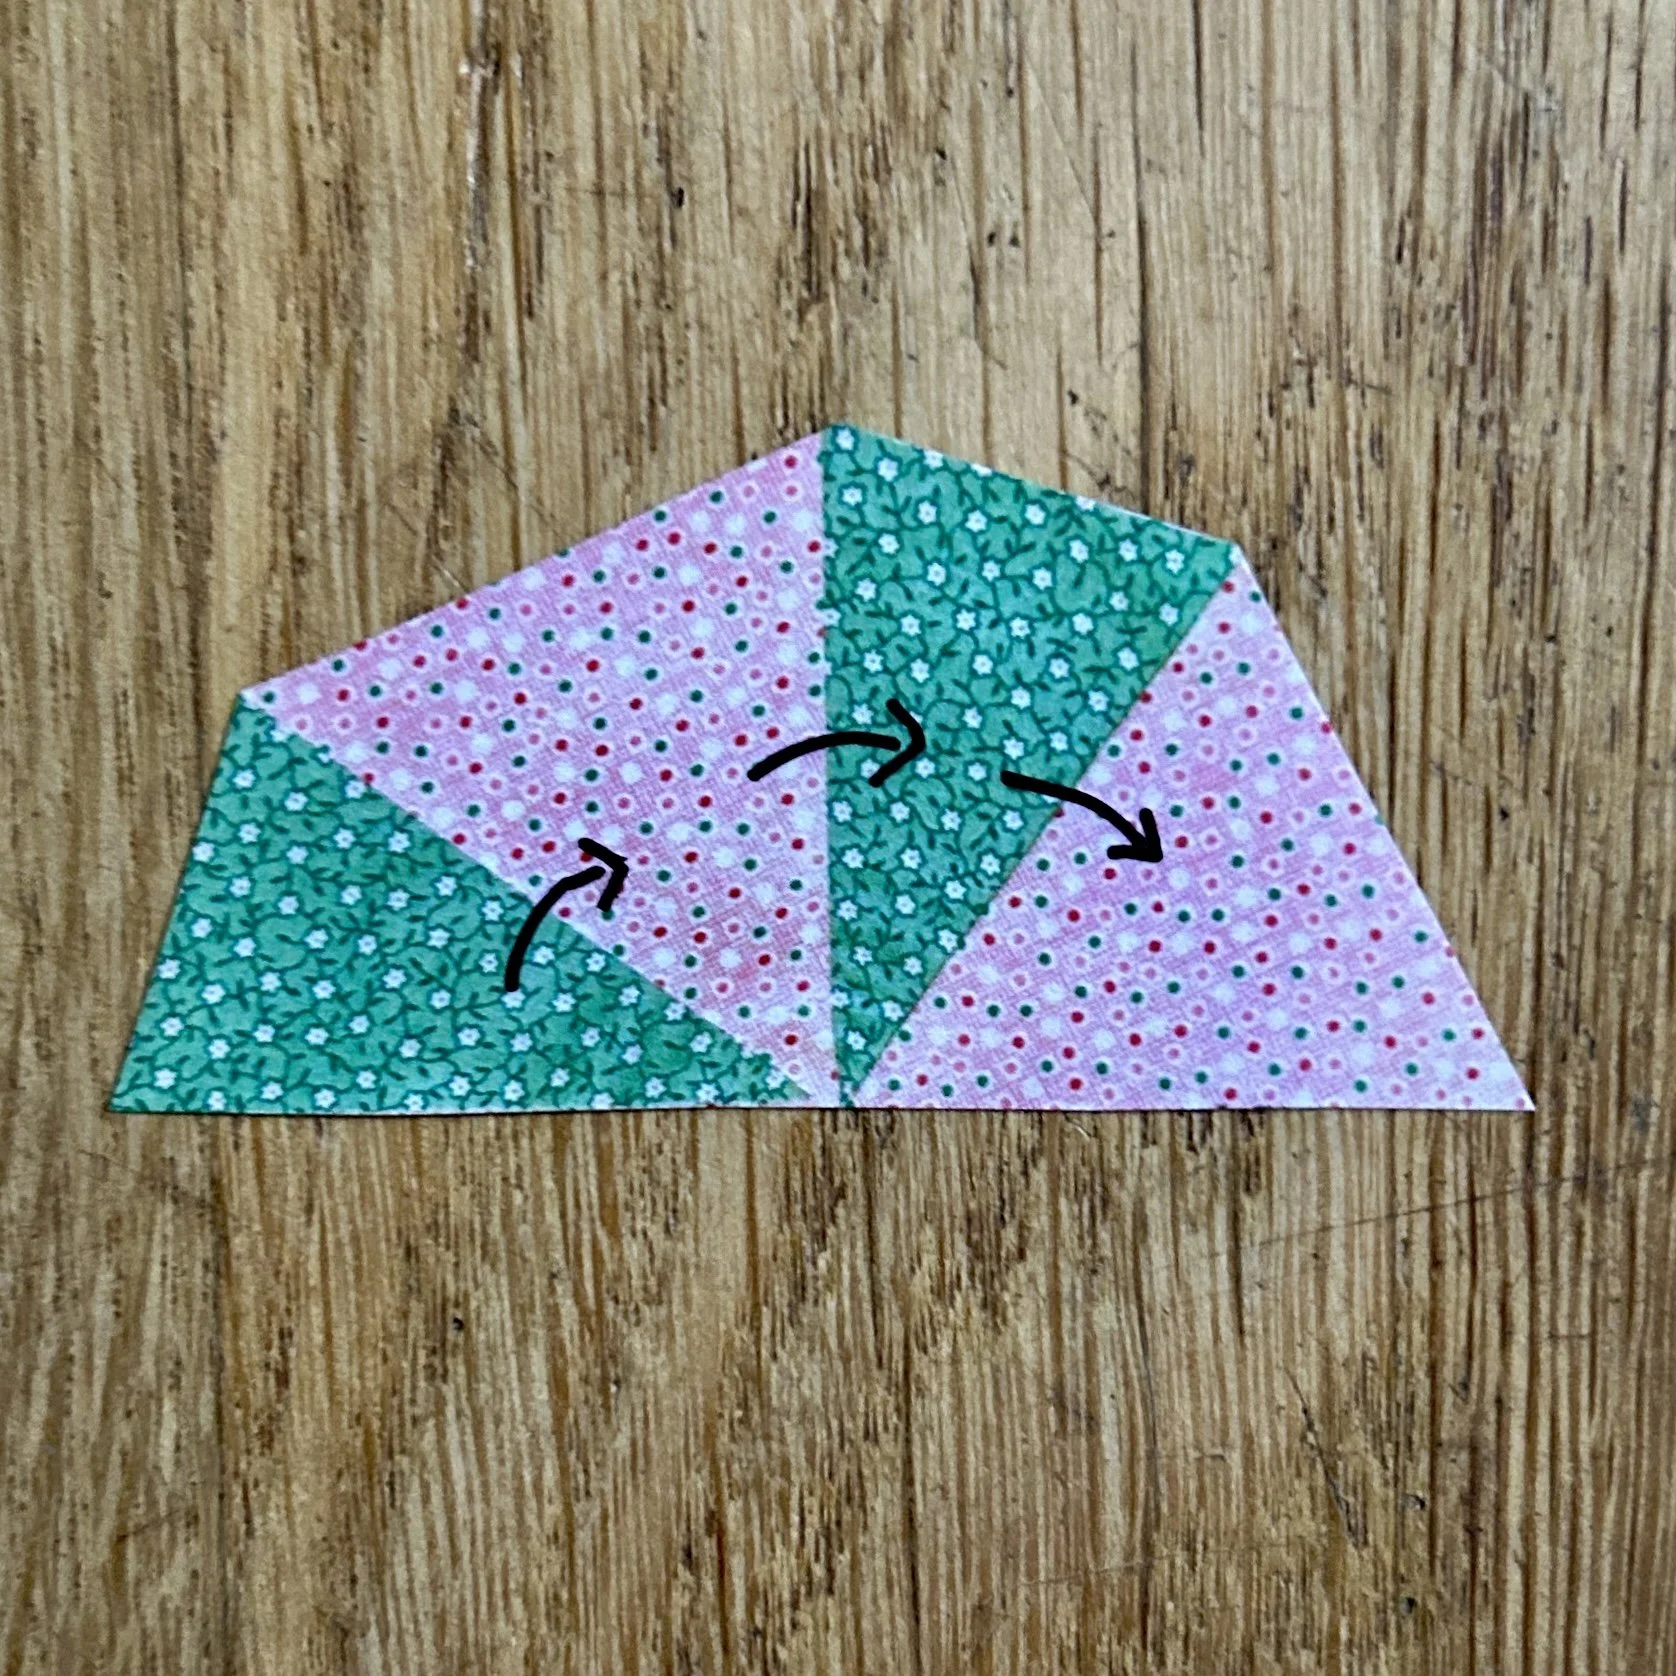
The center of the block needs to be “sliced” in half. There is a smaller triangle template and a wider one. Sew a pair of the the smaller and wider triangle together. PRESS. (This was my first oops. It was a really hot day, I was sewing upstairs using my Bernina which gives me the most accurate in 1/4 inch seams. The iron was downstairs. I figured I’d just finger press the pieces. NOT a good choice. Each of the seams in this block need to be pressed with a iron. Really!)
Sew 2 sets of triangles together to created half the central octagon. PRESS all the seams in the same direction, as shown in my photo above. This is critical to creating a block that is as flat as possible—not easy as 8 points come together in the center of the block.
Sew the two half octagons together. Then add the small half square triangle to create a square block. Awesome. The hardest part is all done.
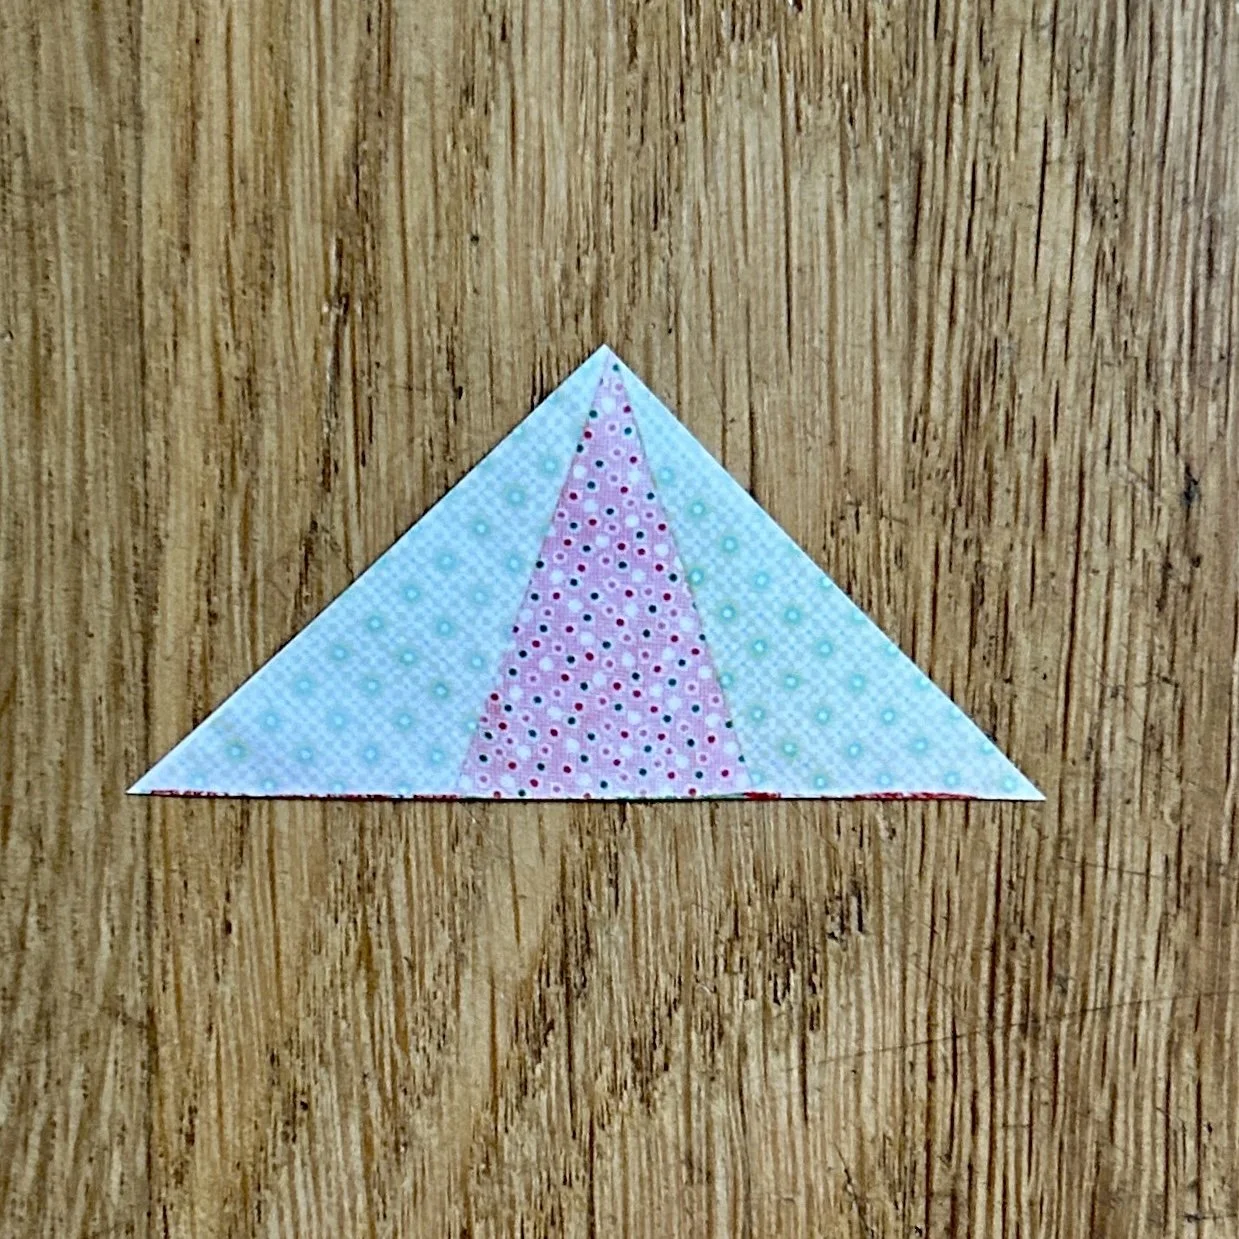
Sew together the trio of small triangles that will attach to the central square. Press all these seams in ONE direction, doesn’t matter which way, just be consistent.
Pin the outer triangle sections to the inner square. Check to make sure you have the narrow triangle in the outer section match to the narrow triangle in the central square. It helps to use a dress makers pin to do that. Attach the two pieces, pinning along the 1/4 inch seam (not across it as you would to sew it). Open the block to check for alignment and adjust the two pieces as needed.
That’s it. You should have 1/4 of the background beyond each of the eight points in this block. That allows you to sew this block to another block or sashing without loosing the sharp points.
My center isn’t perfect and the seam allowance beyond the points is better in some places than others. It’s all in the careful pressing…or in my case, the lack of it.
Nevertheless, it was a fun block to make and I learned a lot in the process!
