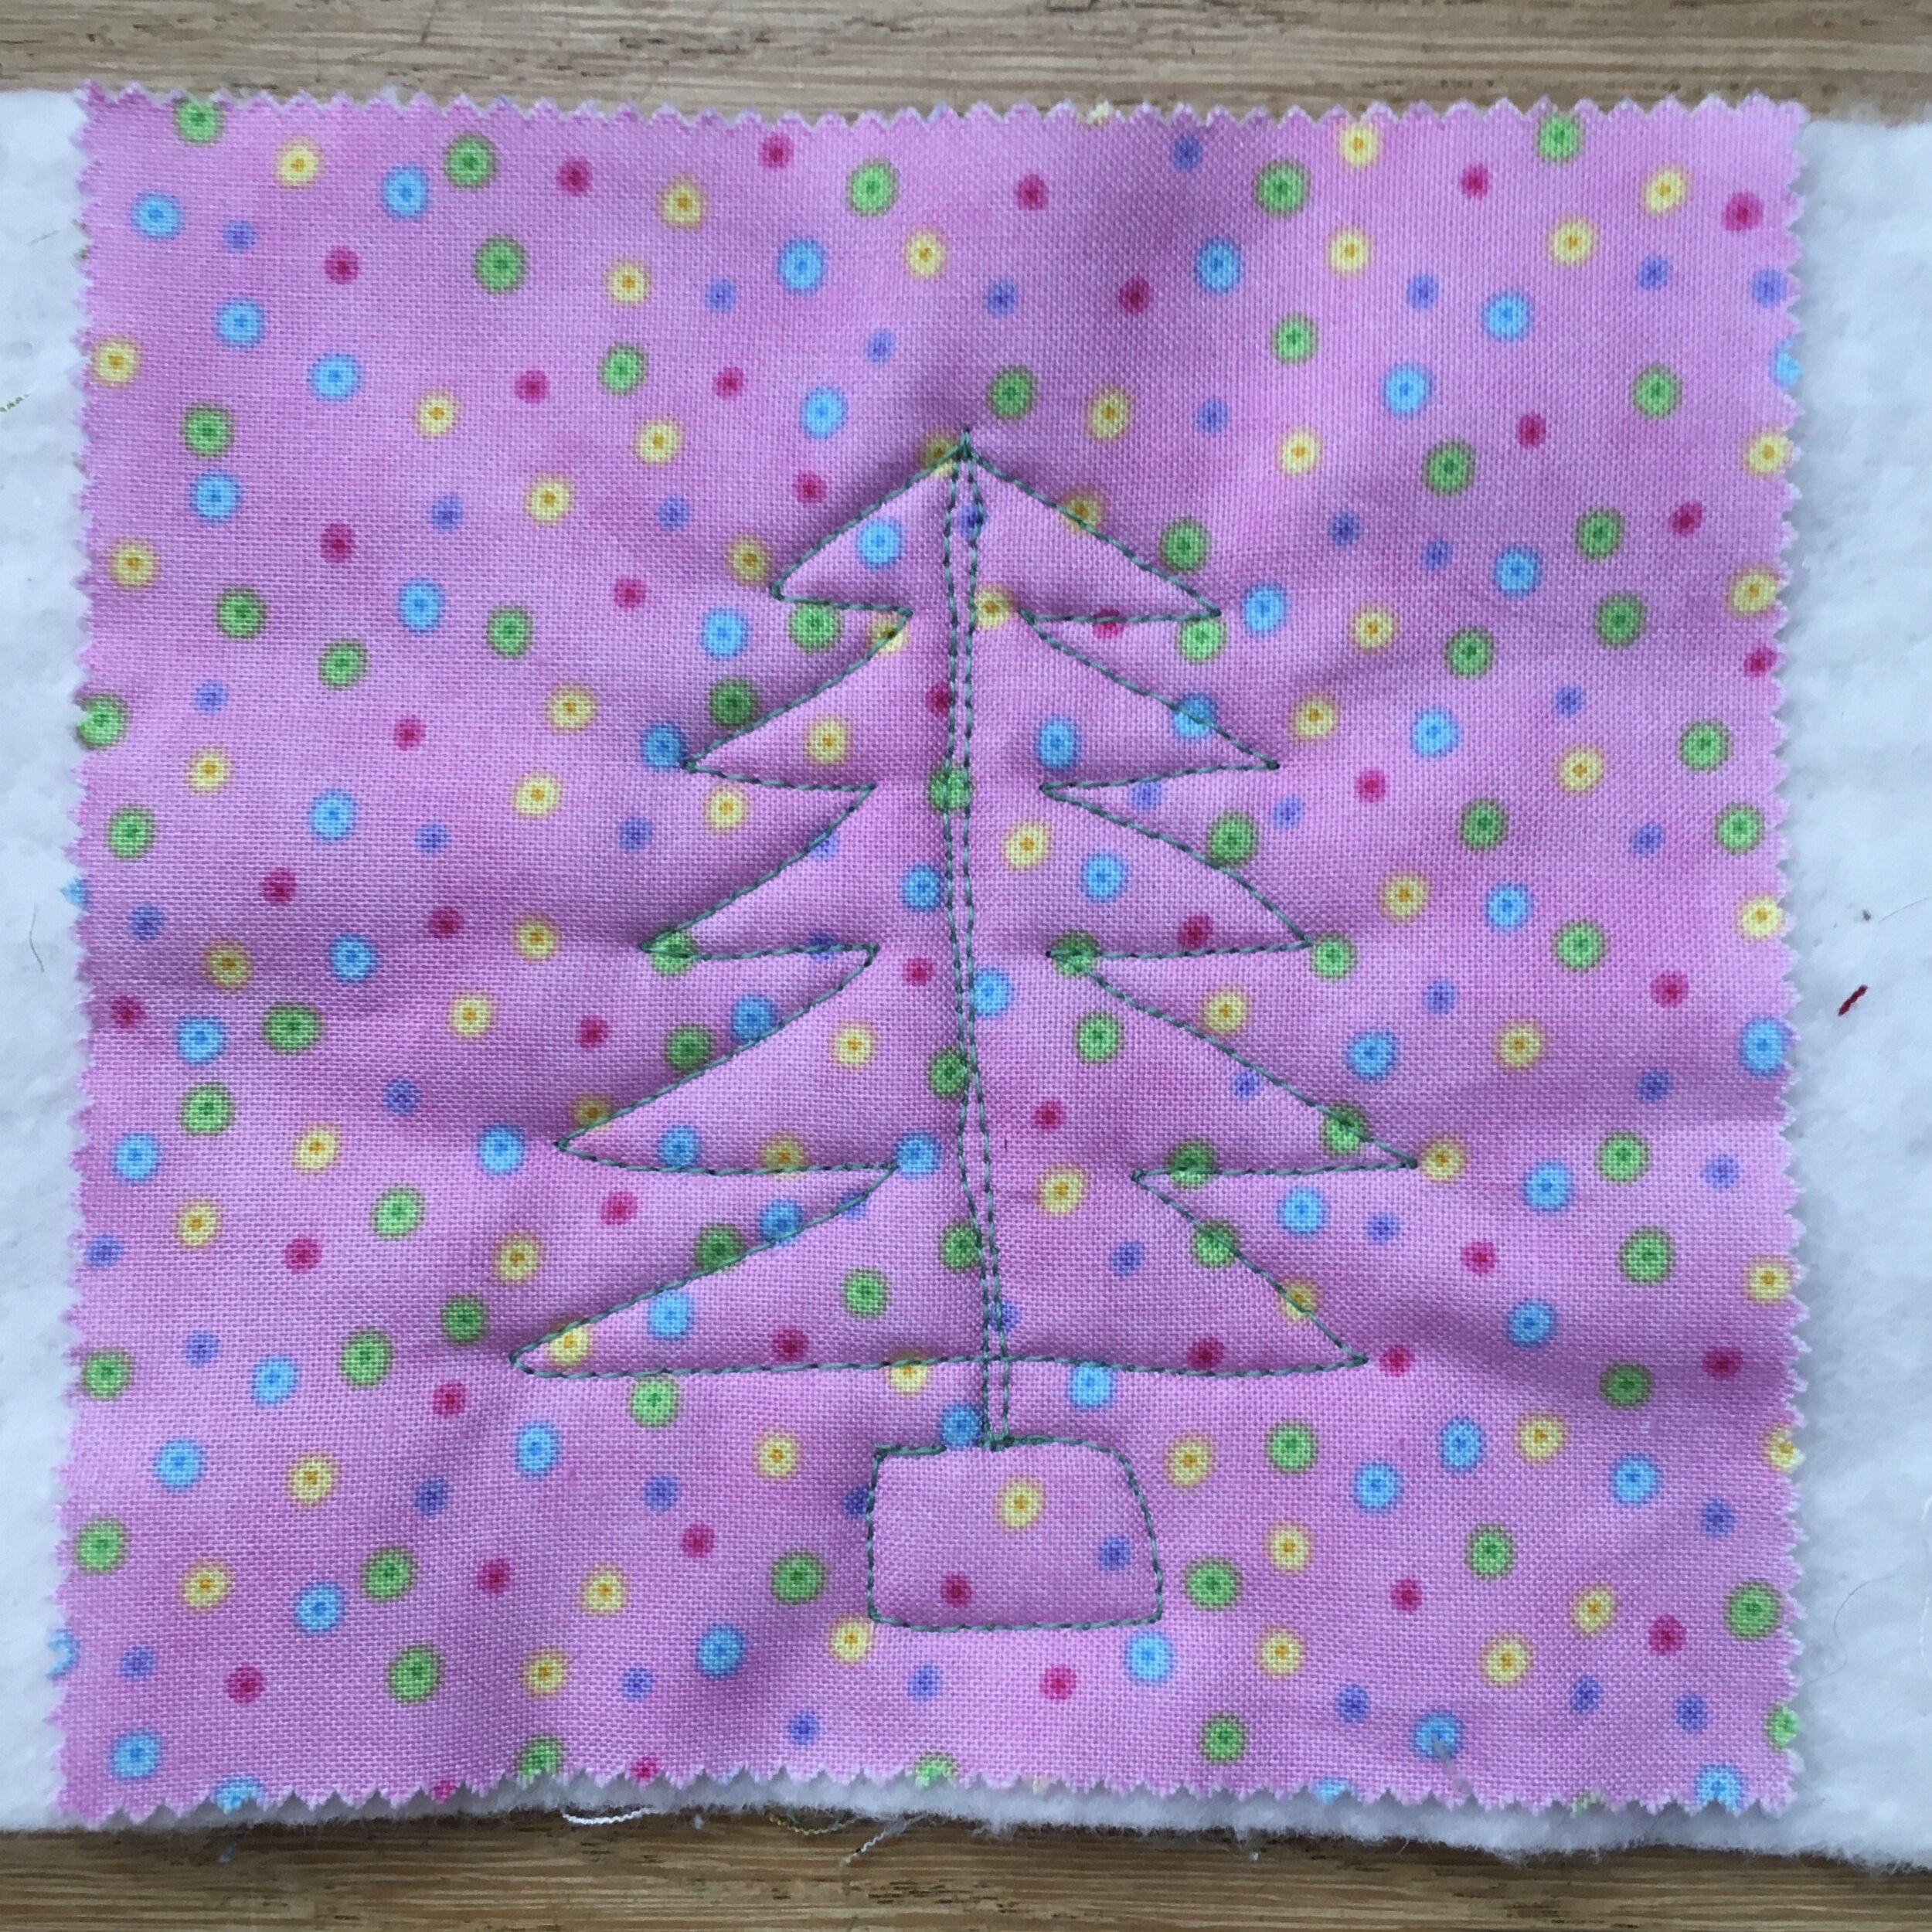
I just finished quilting a Christmas quilt. Half of the blocks were pieced 8 point stars while the alternate blocks were 8 inch squares. That’s a lot of negative space in a quilt. For days I thought about how I was going to quilt this quilt. Finally one morning I had a thought. Christmas trees and quilted feathers are essentially the same. Except instead of gradated curves, the Christmas trees have gradated, boughs. I’m not confident about quilting feathers but the tree has straight lines and sharp angles and that seems a lot easier. At least to me!
I quilted all my Christmas trees freehand, so each tree, though similar, is unique. However, by marking the block being quilted, trees can be free motion stitched to be almost identical.
How to Free-Motion Quilt a Christmas Tree
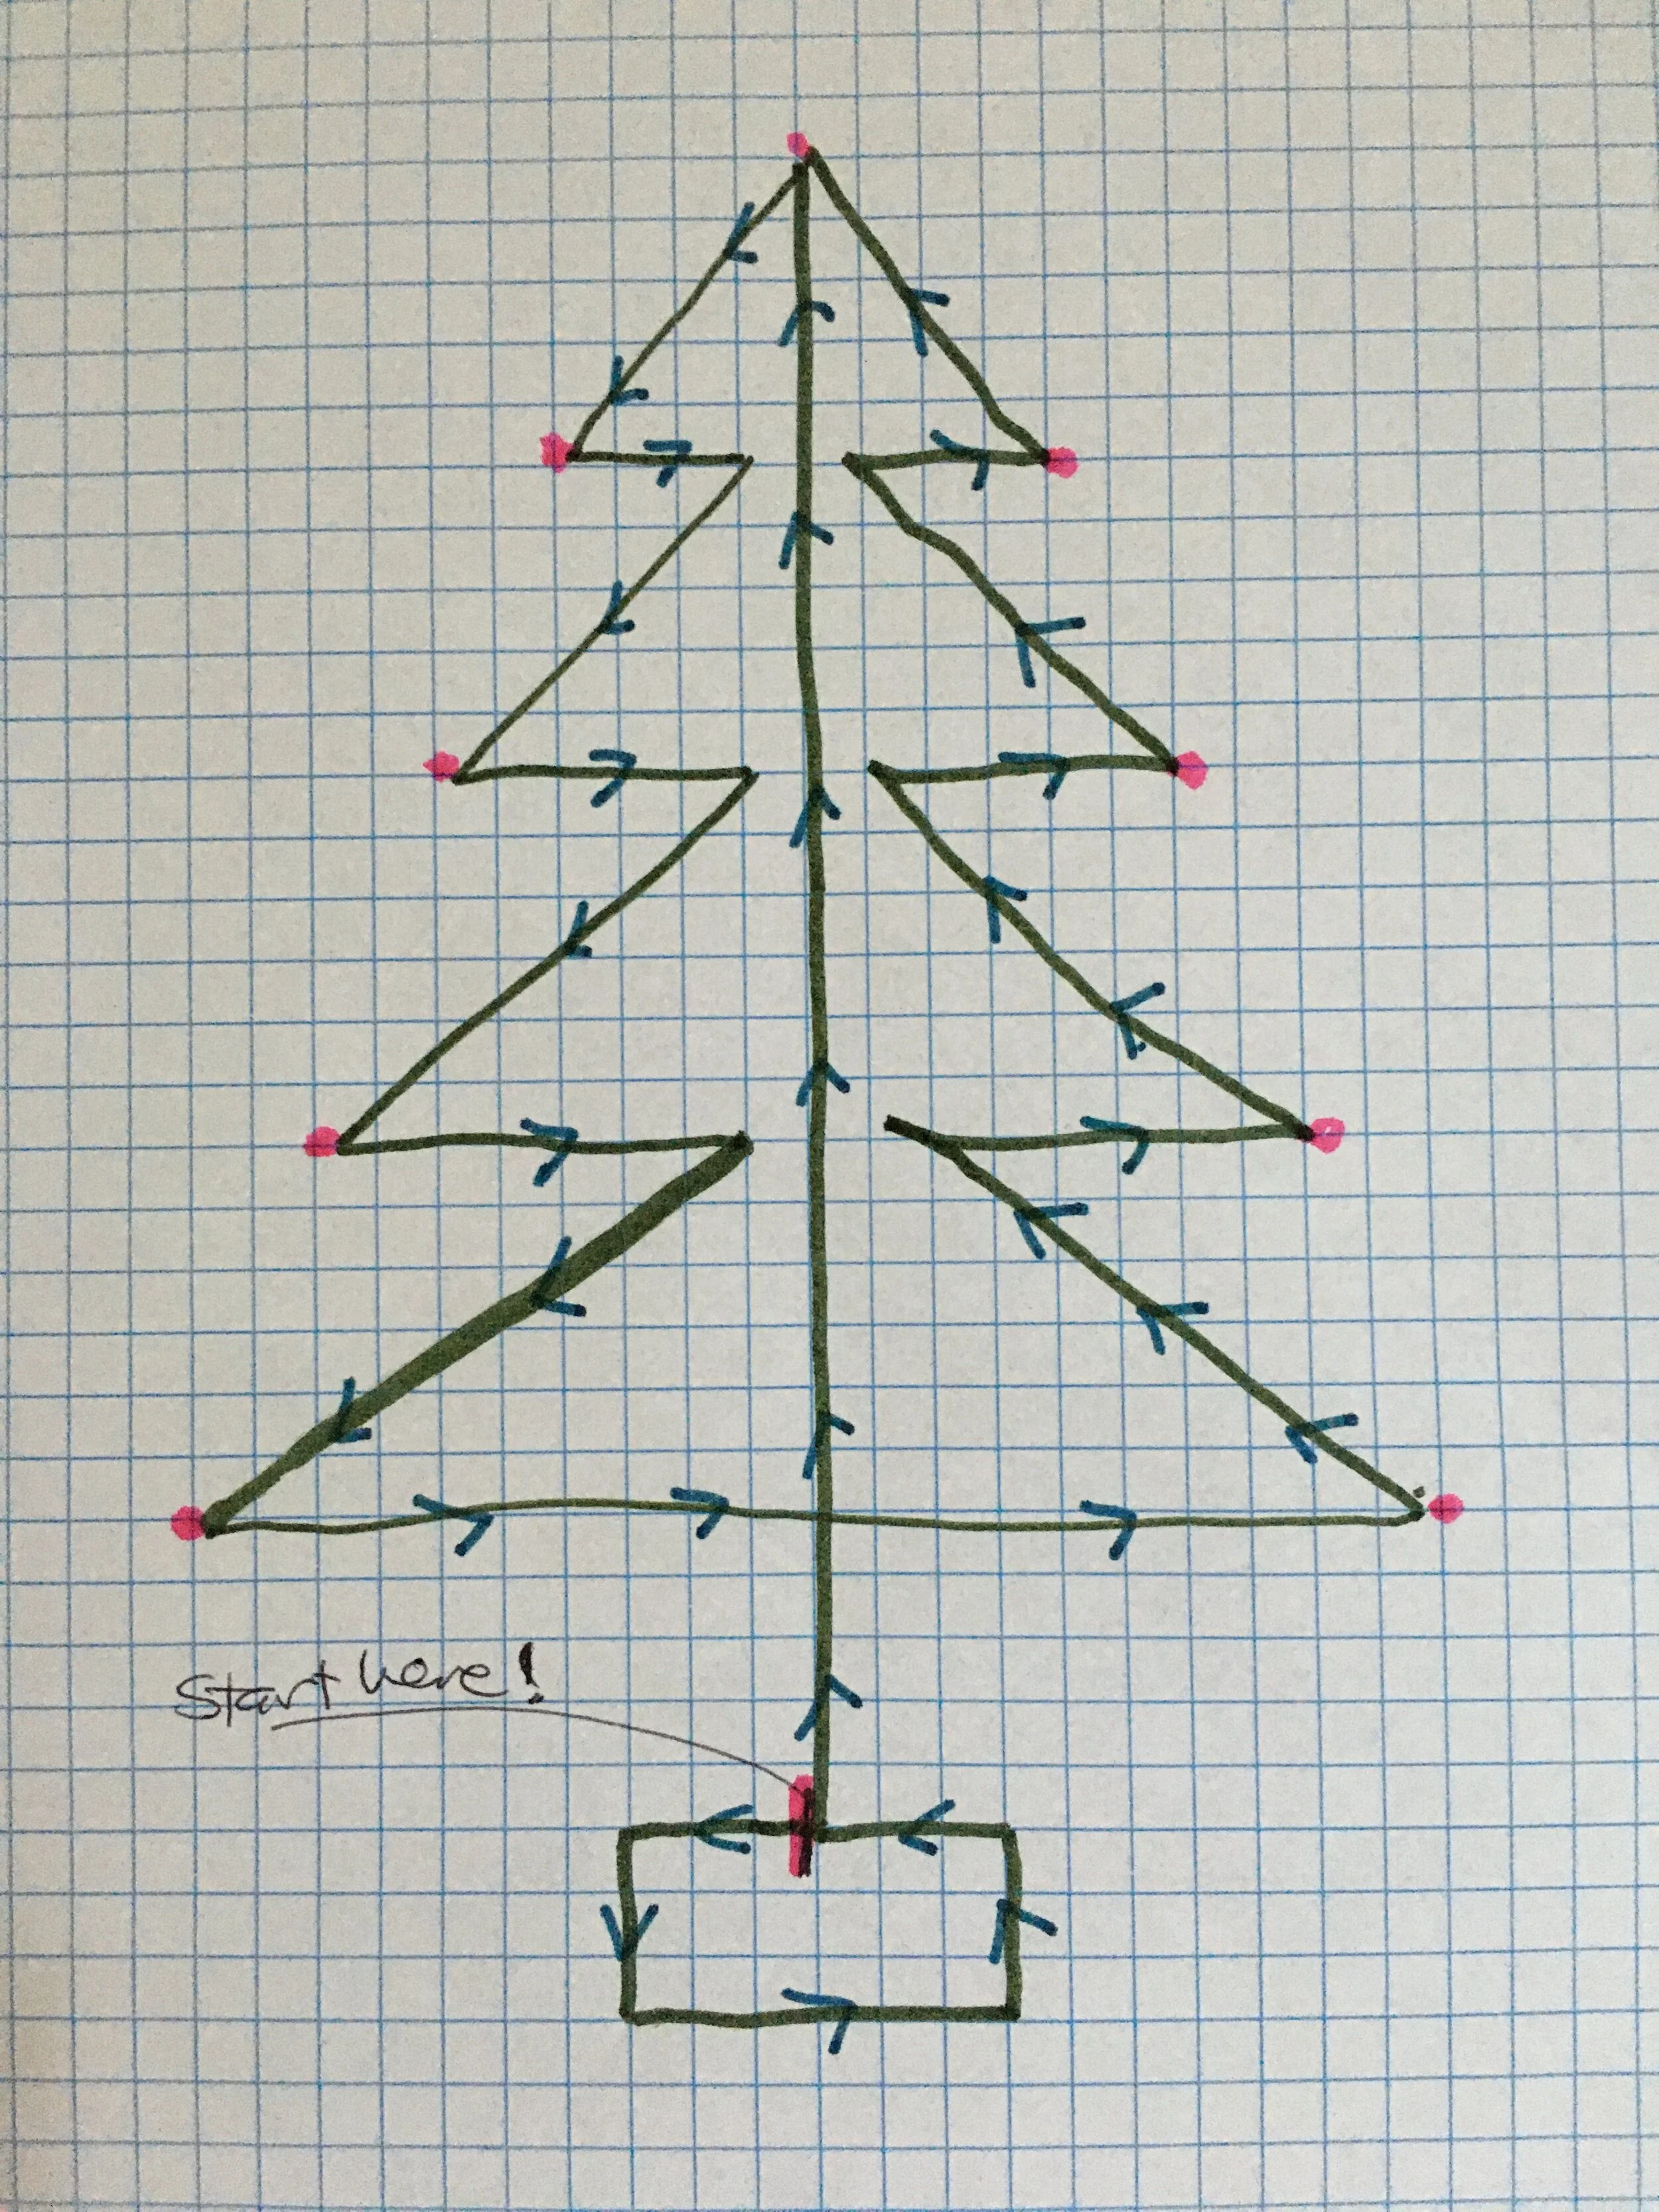
If you want to mark the points of the tree with dots, draw a template of a tree and cut it out. Place it on the block and mark the bough points and top of the tree with a chalk pencil or other marker which will erase. (See point dots on diagram below).
Start with tree stand, at the point that will be the middle of the top of the stand. Stitch out a rectangle (or any other shape you like), ending at the top center where the stitching started.
Stitch straight up to the top of the tree to create the trunk. Stop. It is important to stop at all the points. That insures a sharp corner. The point is more likely to look blunted or have a slight curve if you carry on stitching without a brief stop.
Stitch down to the level of the first bough. I stitch the left side first, but you may fee more comfortable stitching the right side first. Whichever direction feels comfortable is the way you should go!
Stitch straight inward toward the trunk but stop before you get there. How wide a gap you leave is up to you, and will depend on the size of your tree.
Continue stitching all the boughs on that side. At the bottom, stitch straight across to the opposite side and stop.
Stitch up the tree to add the boughs on the second side. This may feel a bit more difficult because it is harder to see where you are headed. Take your time. Stop as needed and peak ahead to make sure you are on the right track.
Stop at the top of the tree. You can end there, as I did in my diagram, or stitch a straight line down the tree to create a solid trunk. Either way is fine—it’s your design choice. Or, if you are stitching multiple trees on a quilt, you can stitch off the tip of the tree and loop or meander your way to the next tree.
You’ll do your best work if you can relax and have fun doing free motion quilting Christmas trees!
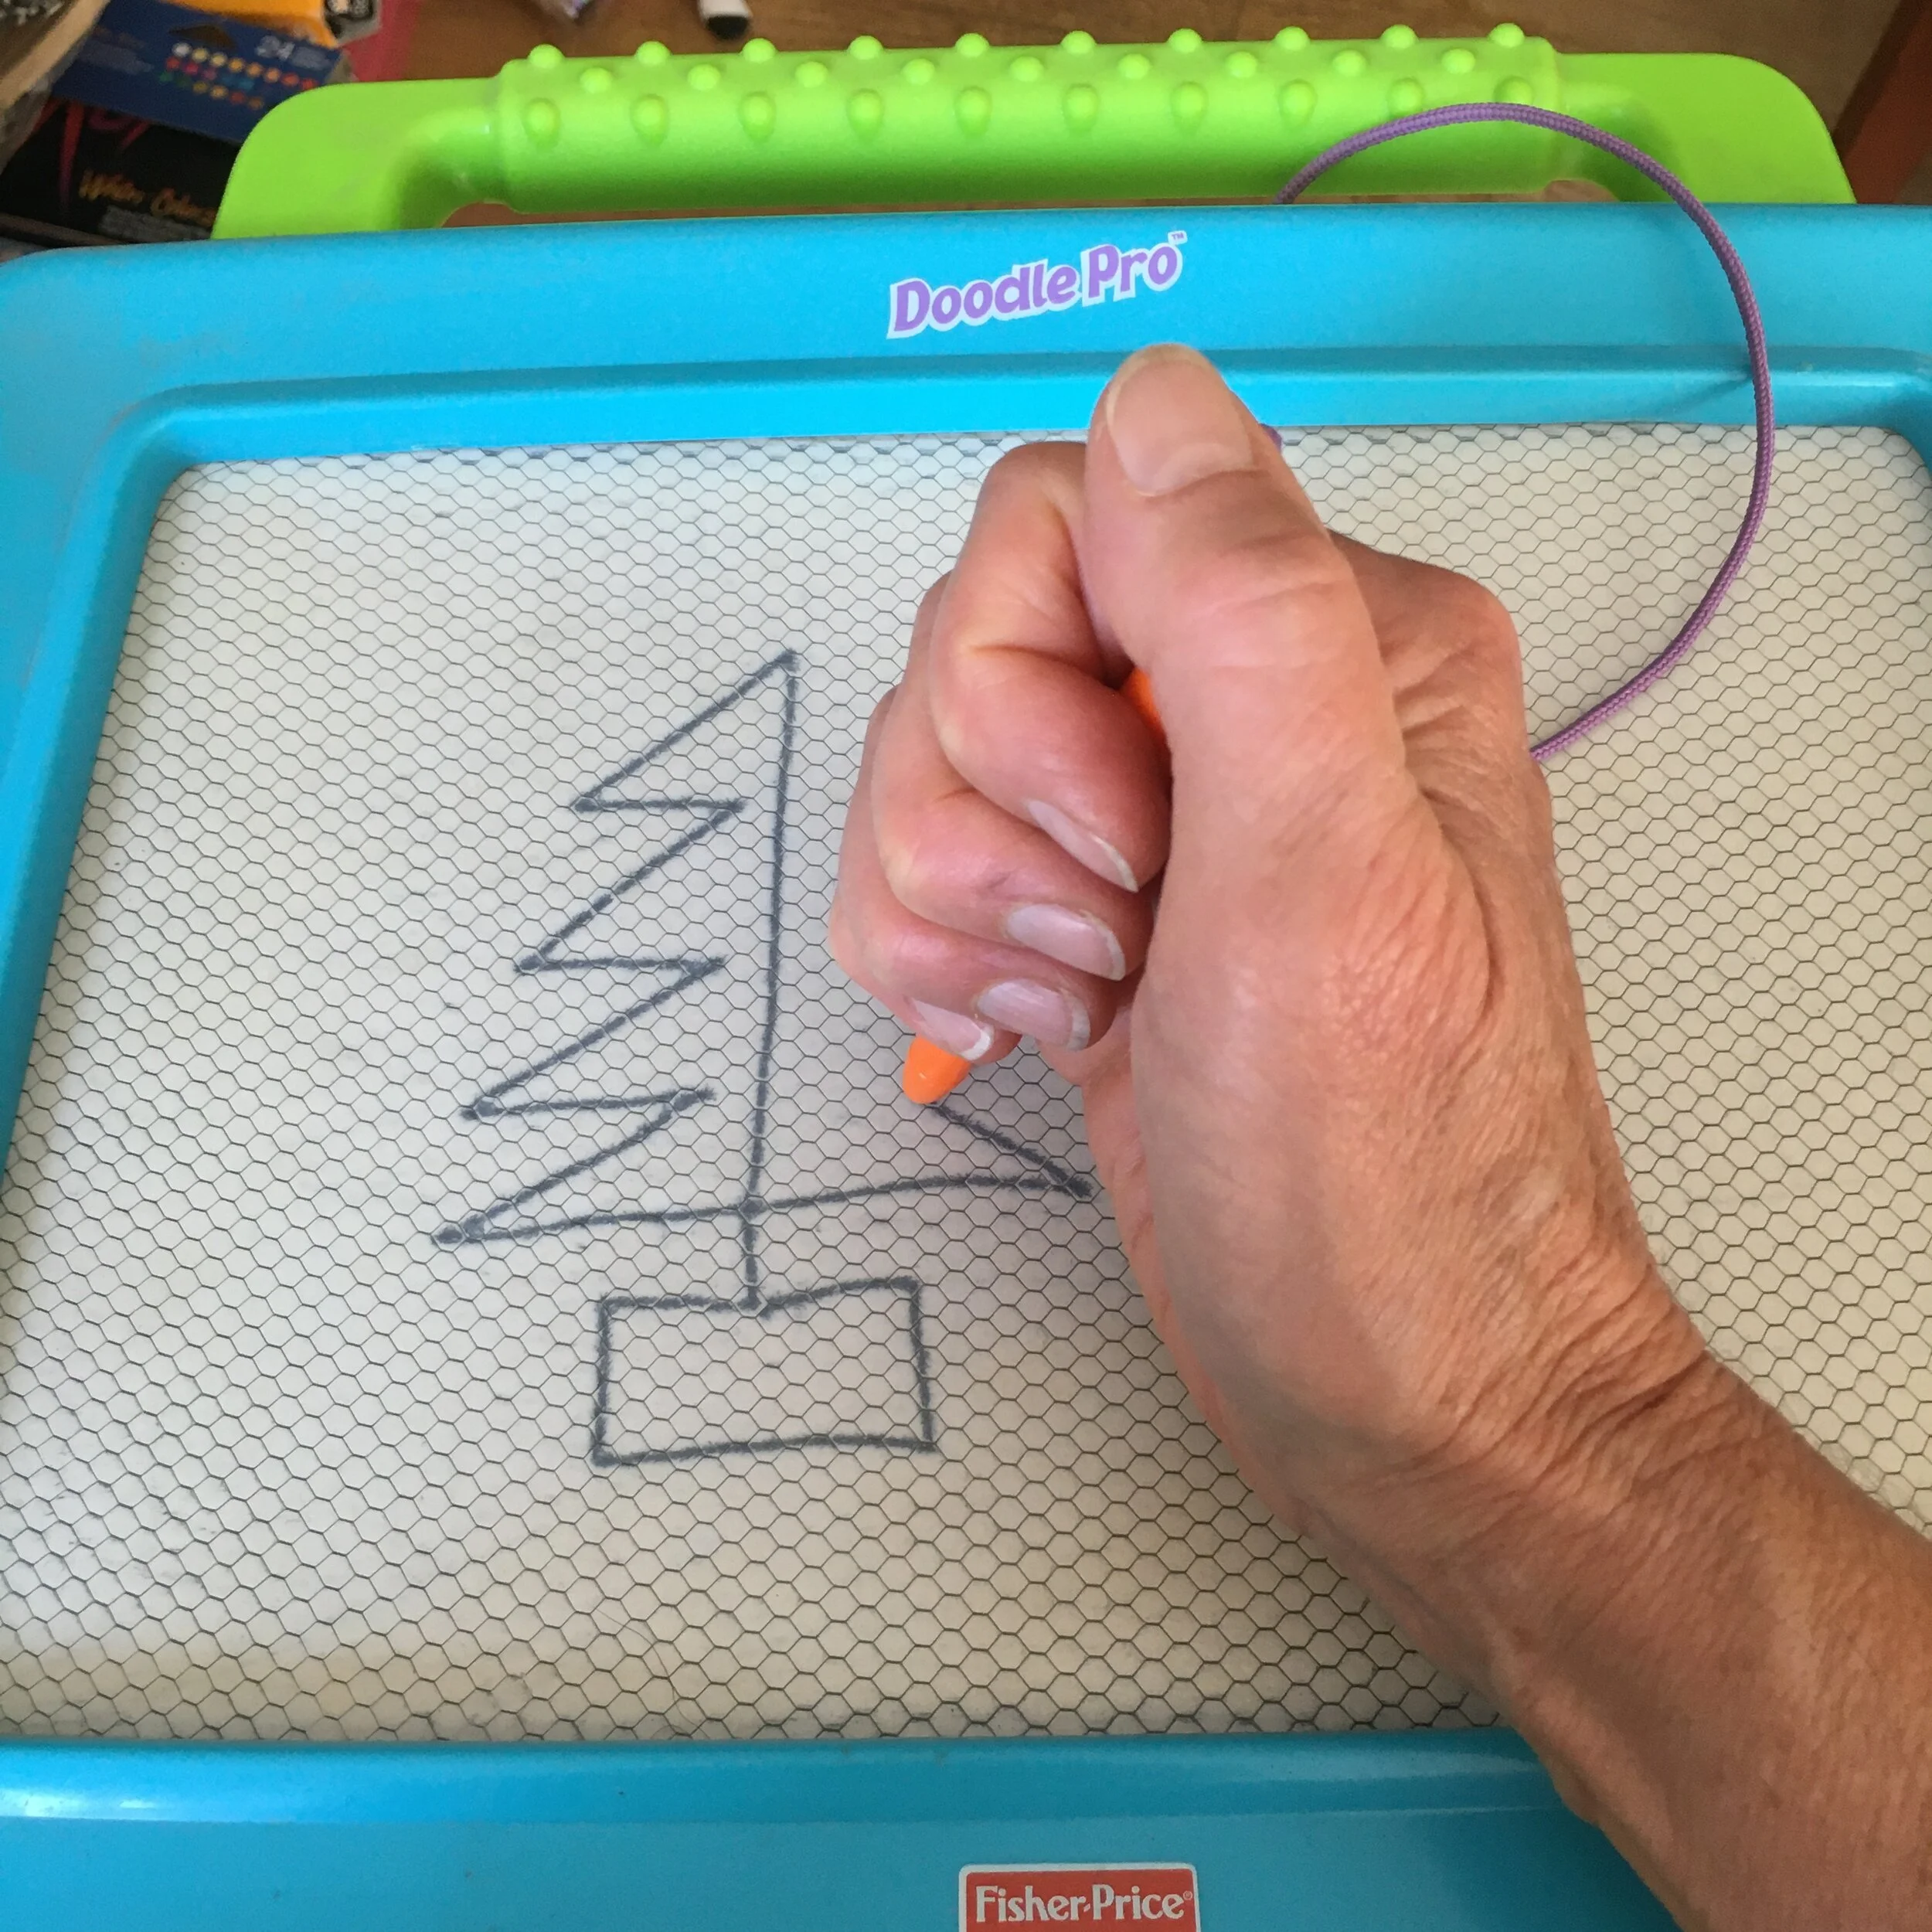
TIP: It helps to practice free-motion by drawing the designs multiple times until you feel comfortable and have created some motor-memory in your hands. Because you quilt with your hands, not your fingers, hold your drawing tool in a fist, rather than using it as a pencil. It really helps to do that. You can draw on paper but I love using a child’s erasable doodle pad. See below.
See my post on free motion quilting from October 24, 2019 to read about how to set up your work space and sewing machine to do free motion quilting. To see more posts with examples of my free motion quilting, type Free Motion into the search bar at the top of the page.
I didn’t see this exact Fisher-Price® doodle pad when I looked for it, but there are lots of other options available from a number of toy manufacturers.
Notice: This blog is not monetized: I do not use affiliate links. When there are links in a post, they are to give credit to another creative person, because I like or have used a product, or to help the reader easily find supplies for a project.


