

3 Prints, Left to right: Color Pencil on print, Watercolors on Print, Uncolored print
Way back before COVID-19, I joined a Kickstarter Campaign to get a tiny Open Press Project printing press from Germany. The plastic parts of these little printing presses are printed with a 3D printer. It is possible to 3D print the entire press , but they decided to use some metal components in the final product. (Here’s a link if you have access to a 3D printer and want to print your own Open Press Printer).
I have done screen printing and mono-prints but I have no prior experience with printing with a printing press. So I’m a complete novice. But with the E-book that comes with the press, this is totally doable.
So far, I’ve made prints from inking actual leaves with acrylic paint and a brayer.

Print using a leaf
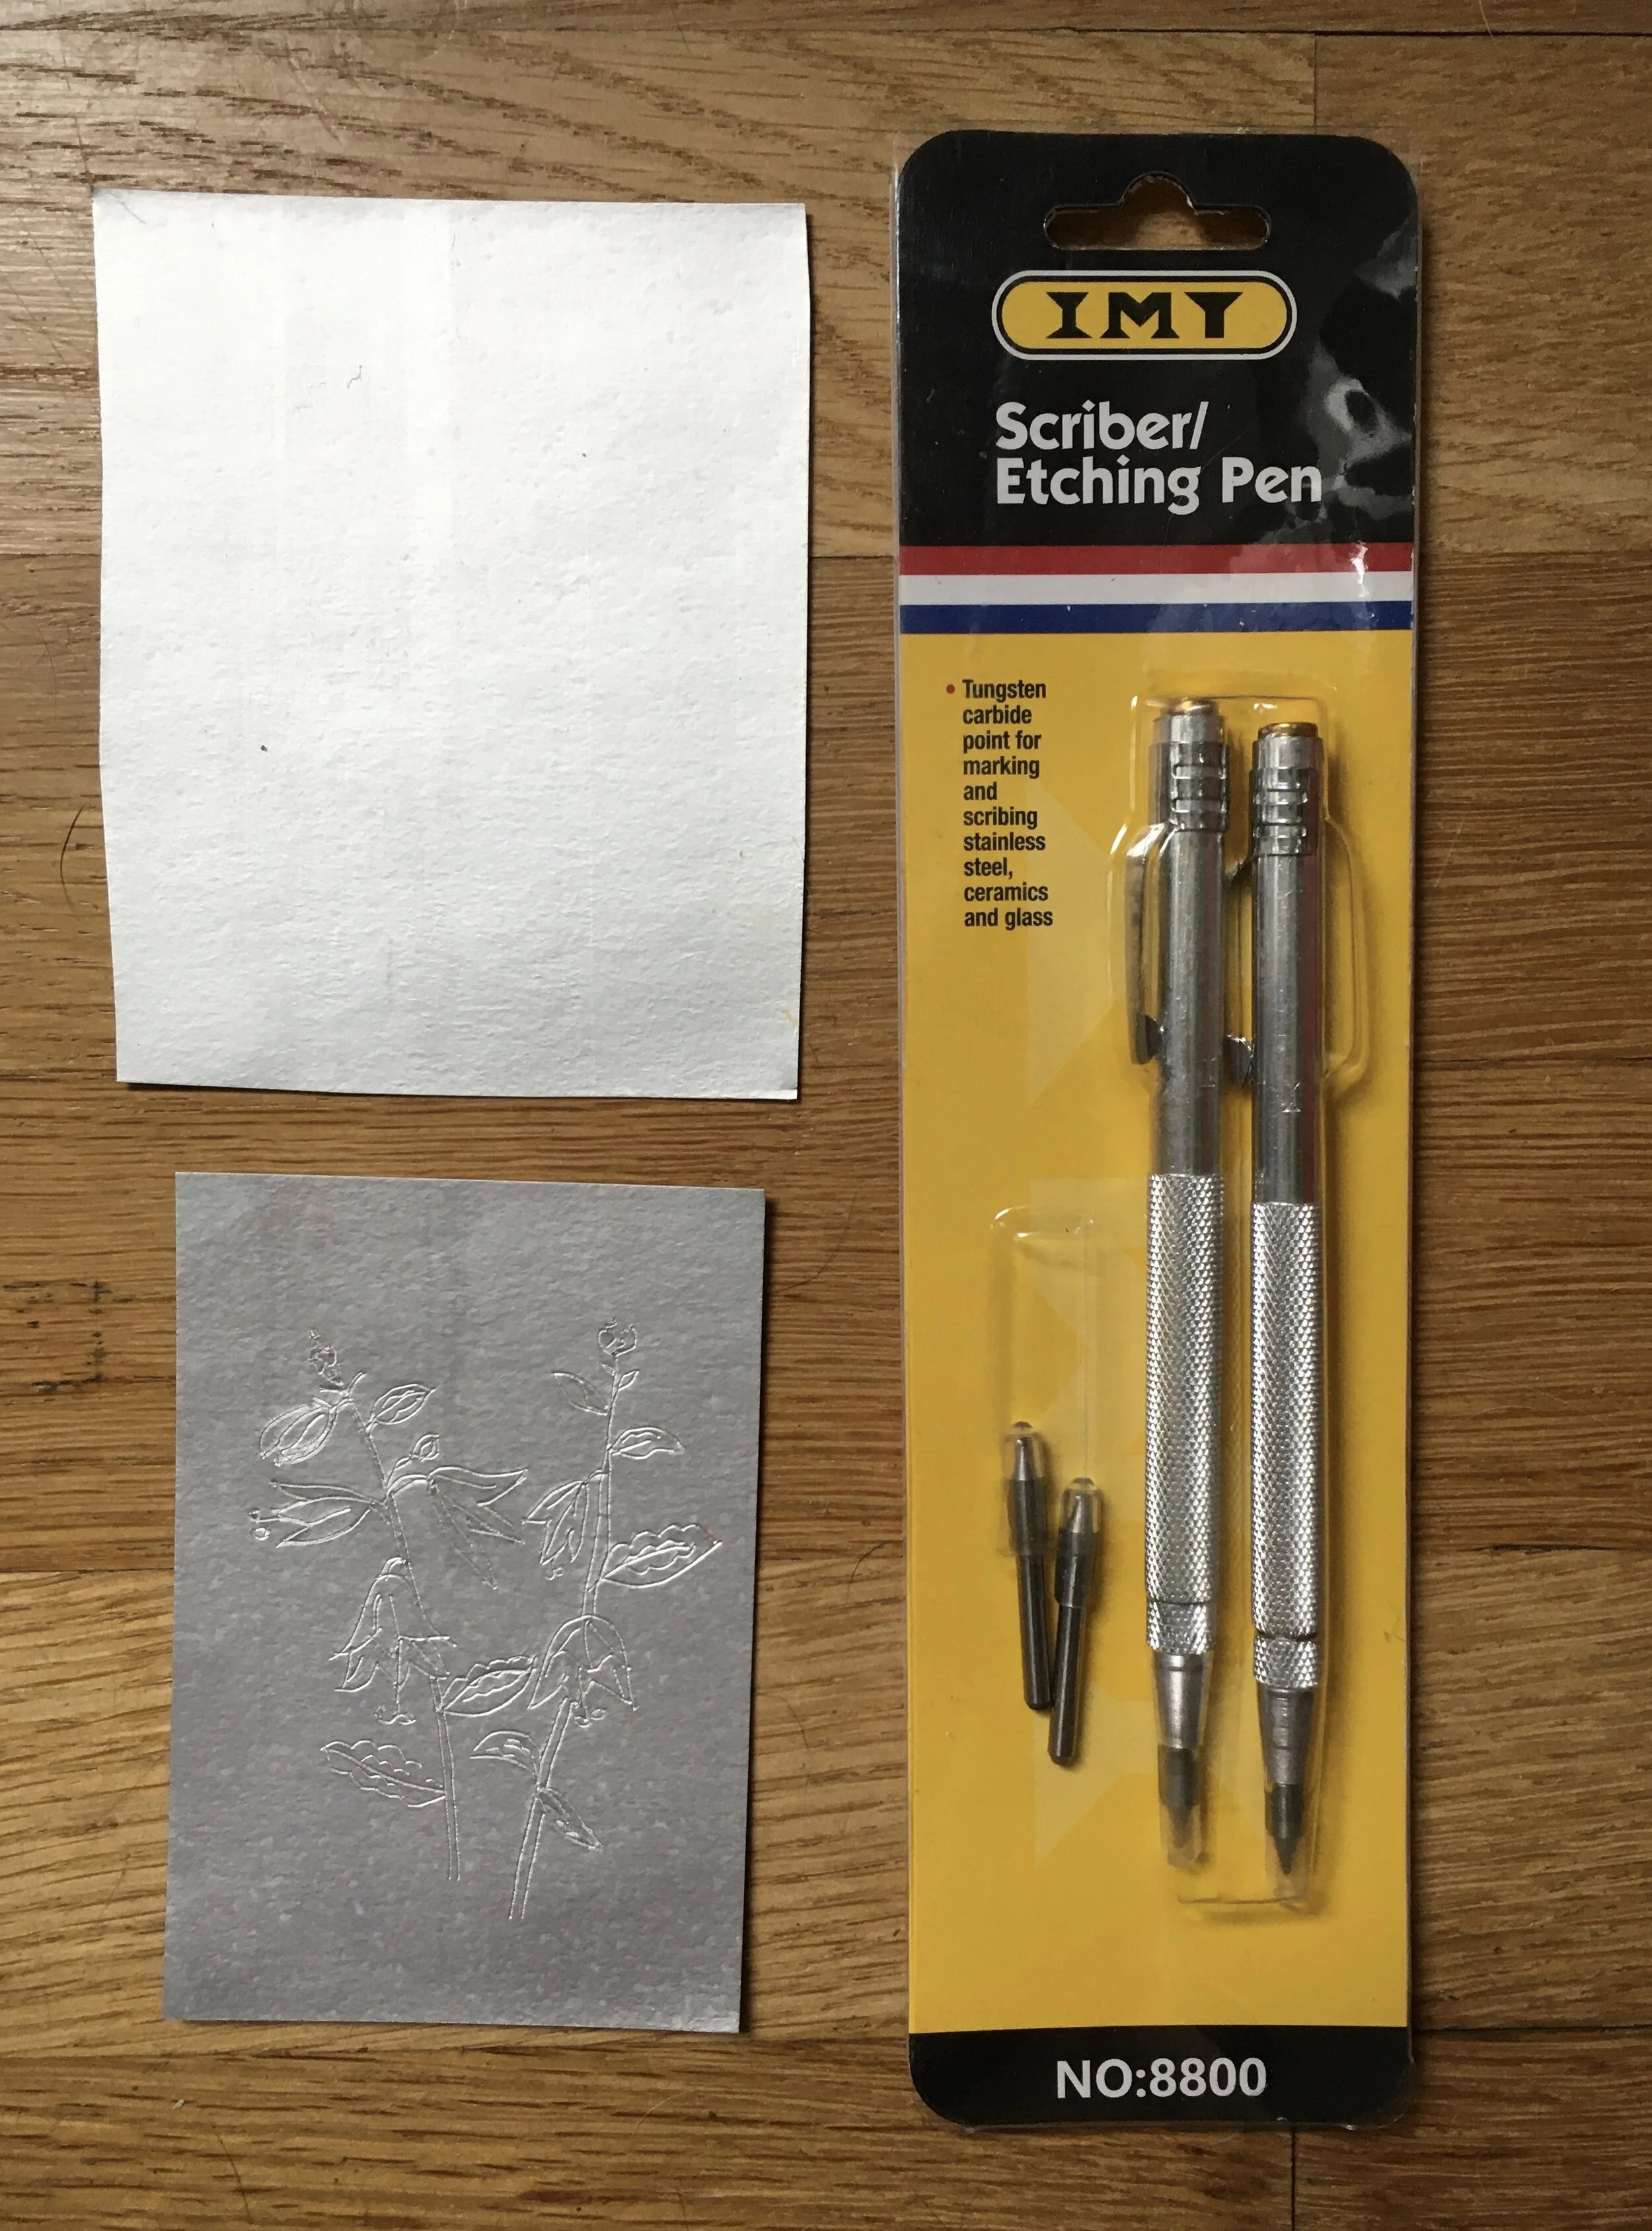
I’ve also made etchings using the silver side of cut up TetraPak® shelf-stable food containers like juice boxes. A 3D dry point needle came with the press but I purchased an etching pen. Below are a series of photos showing my process for making a etching.
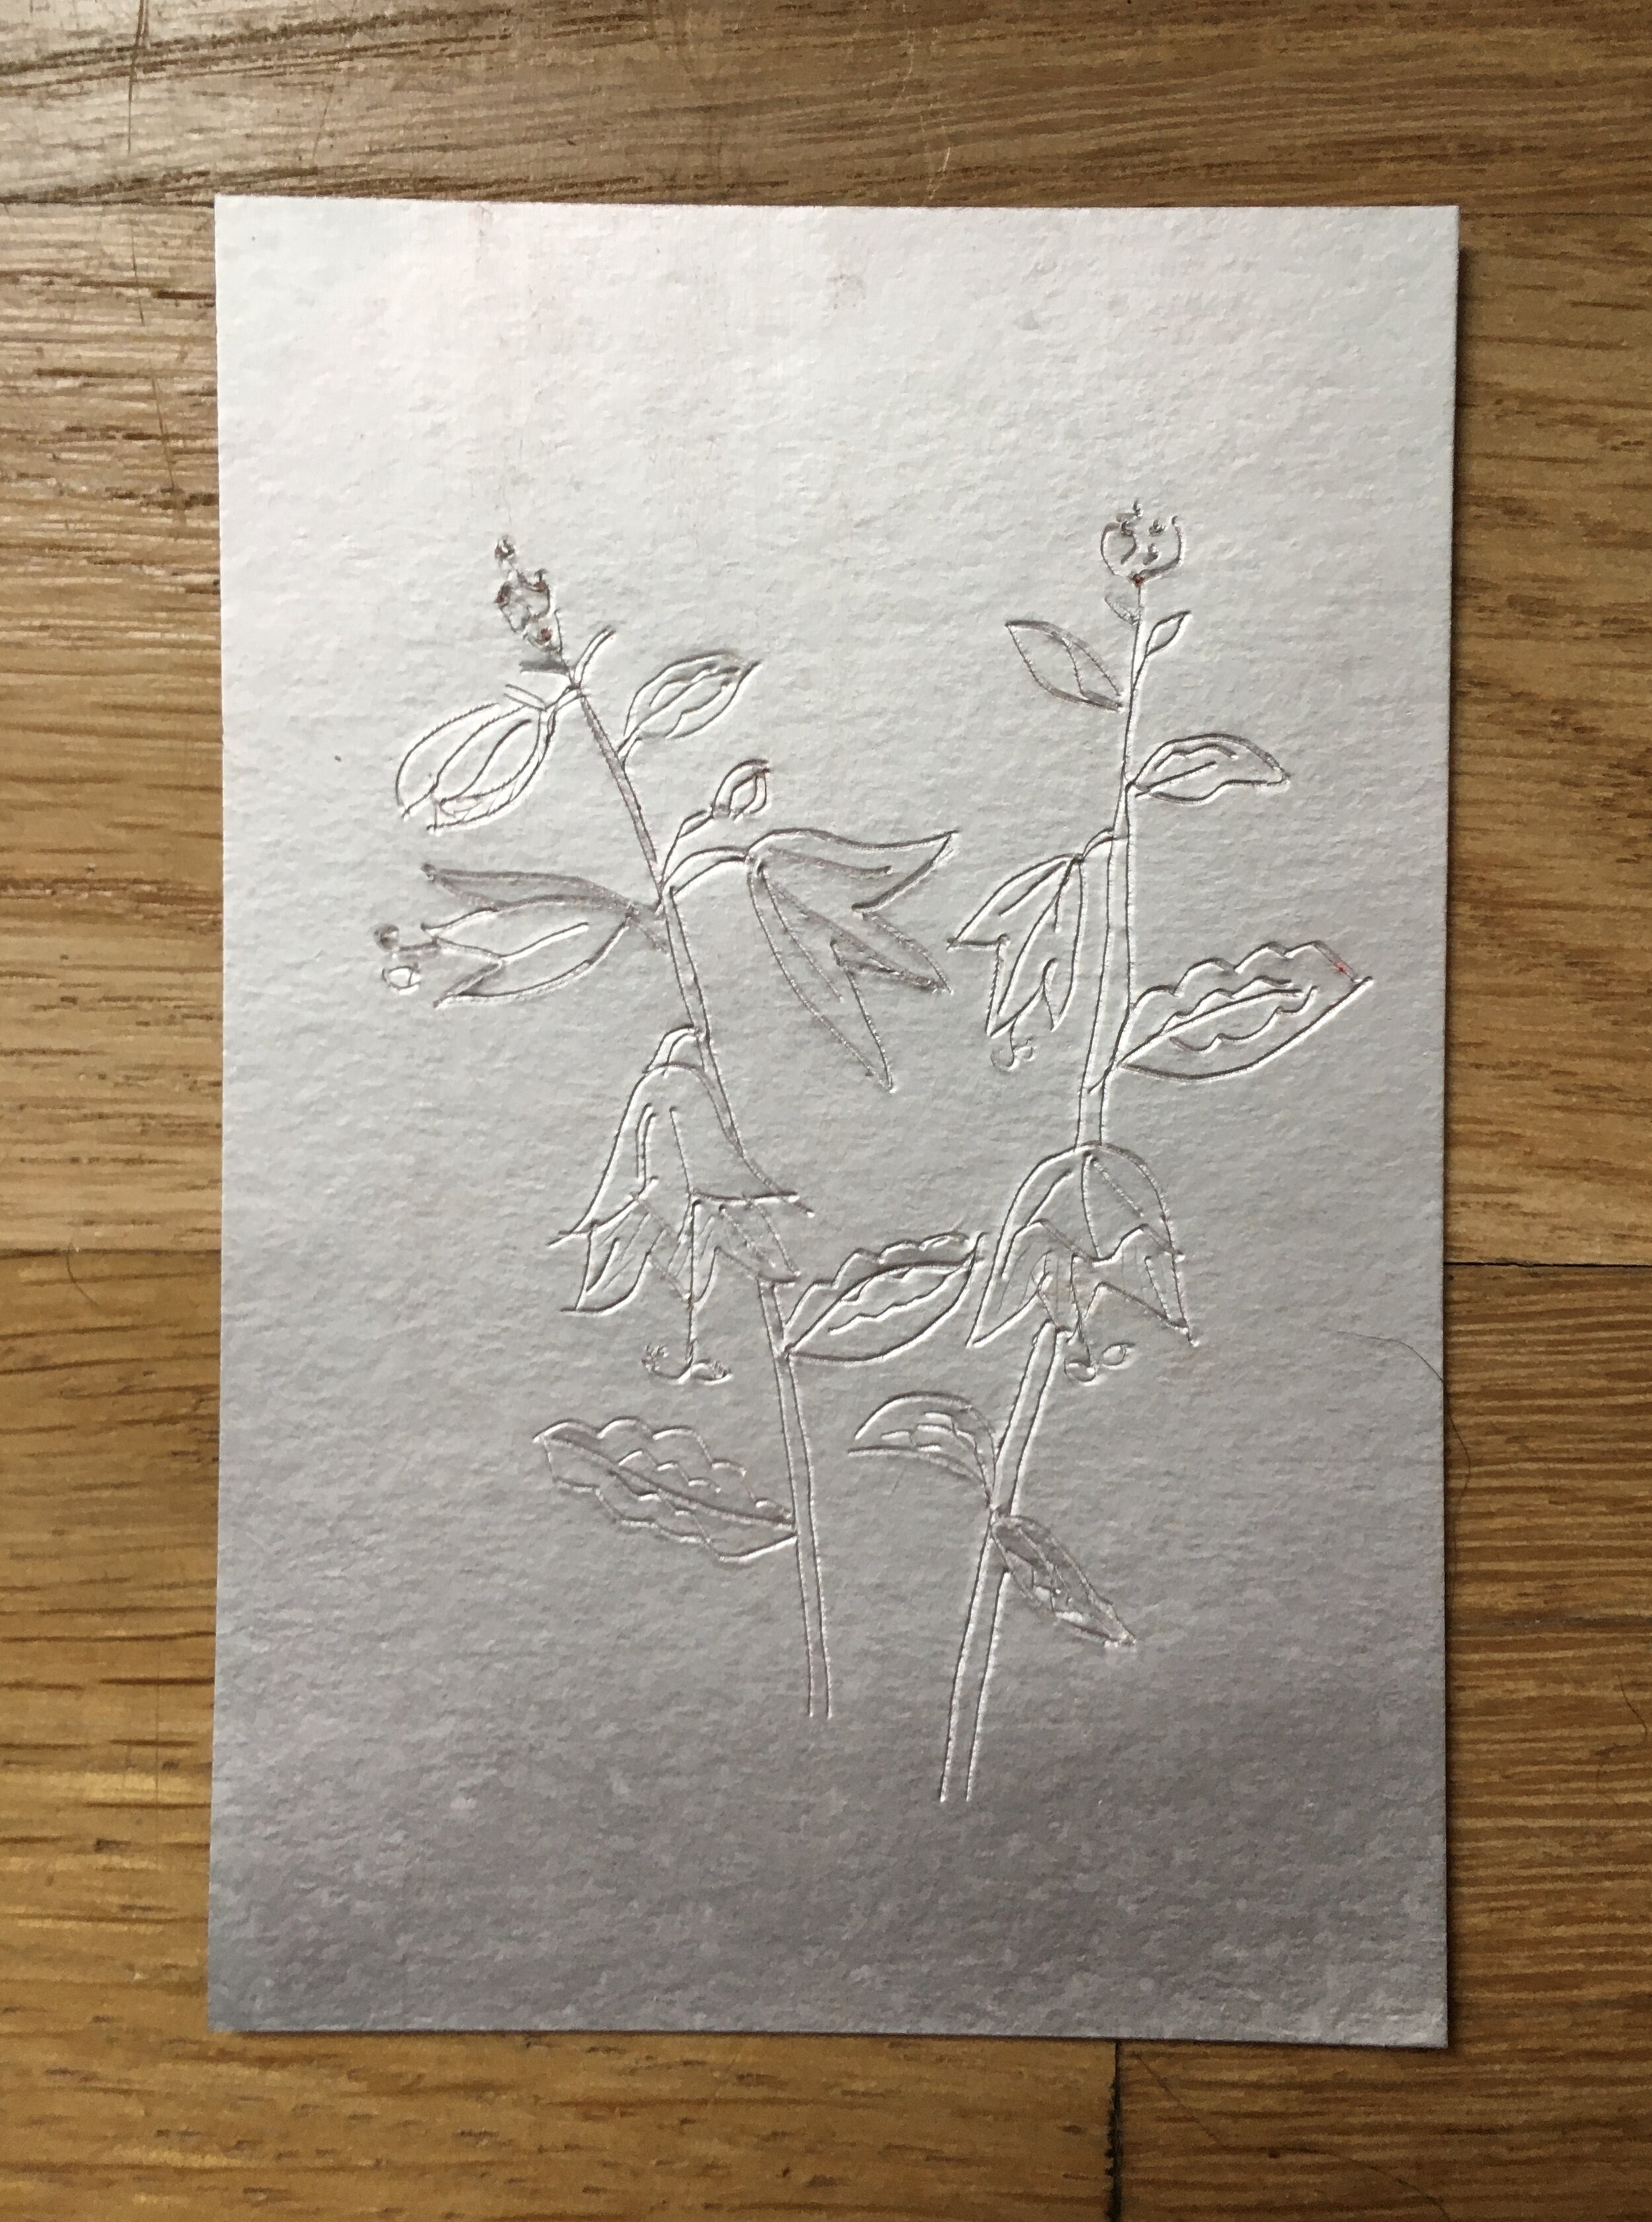
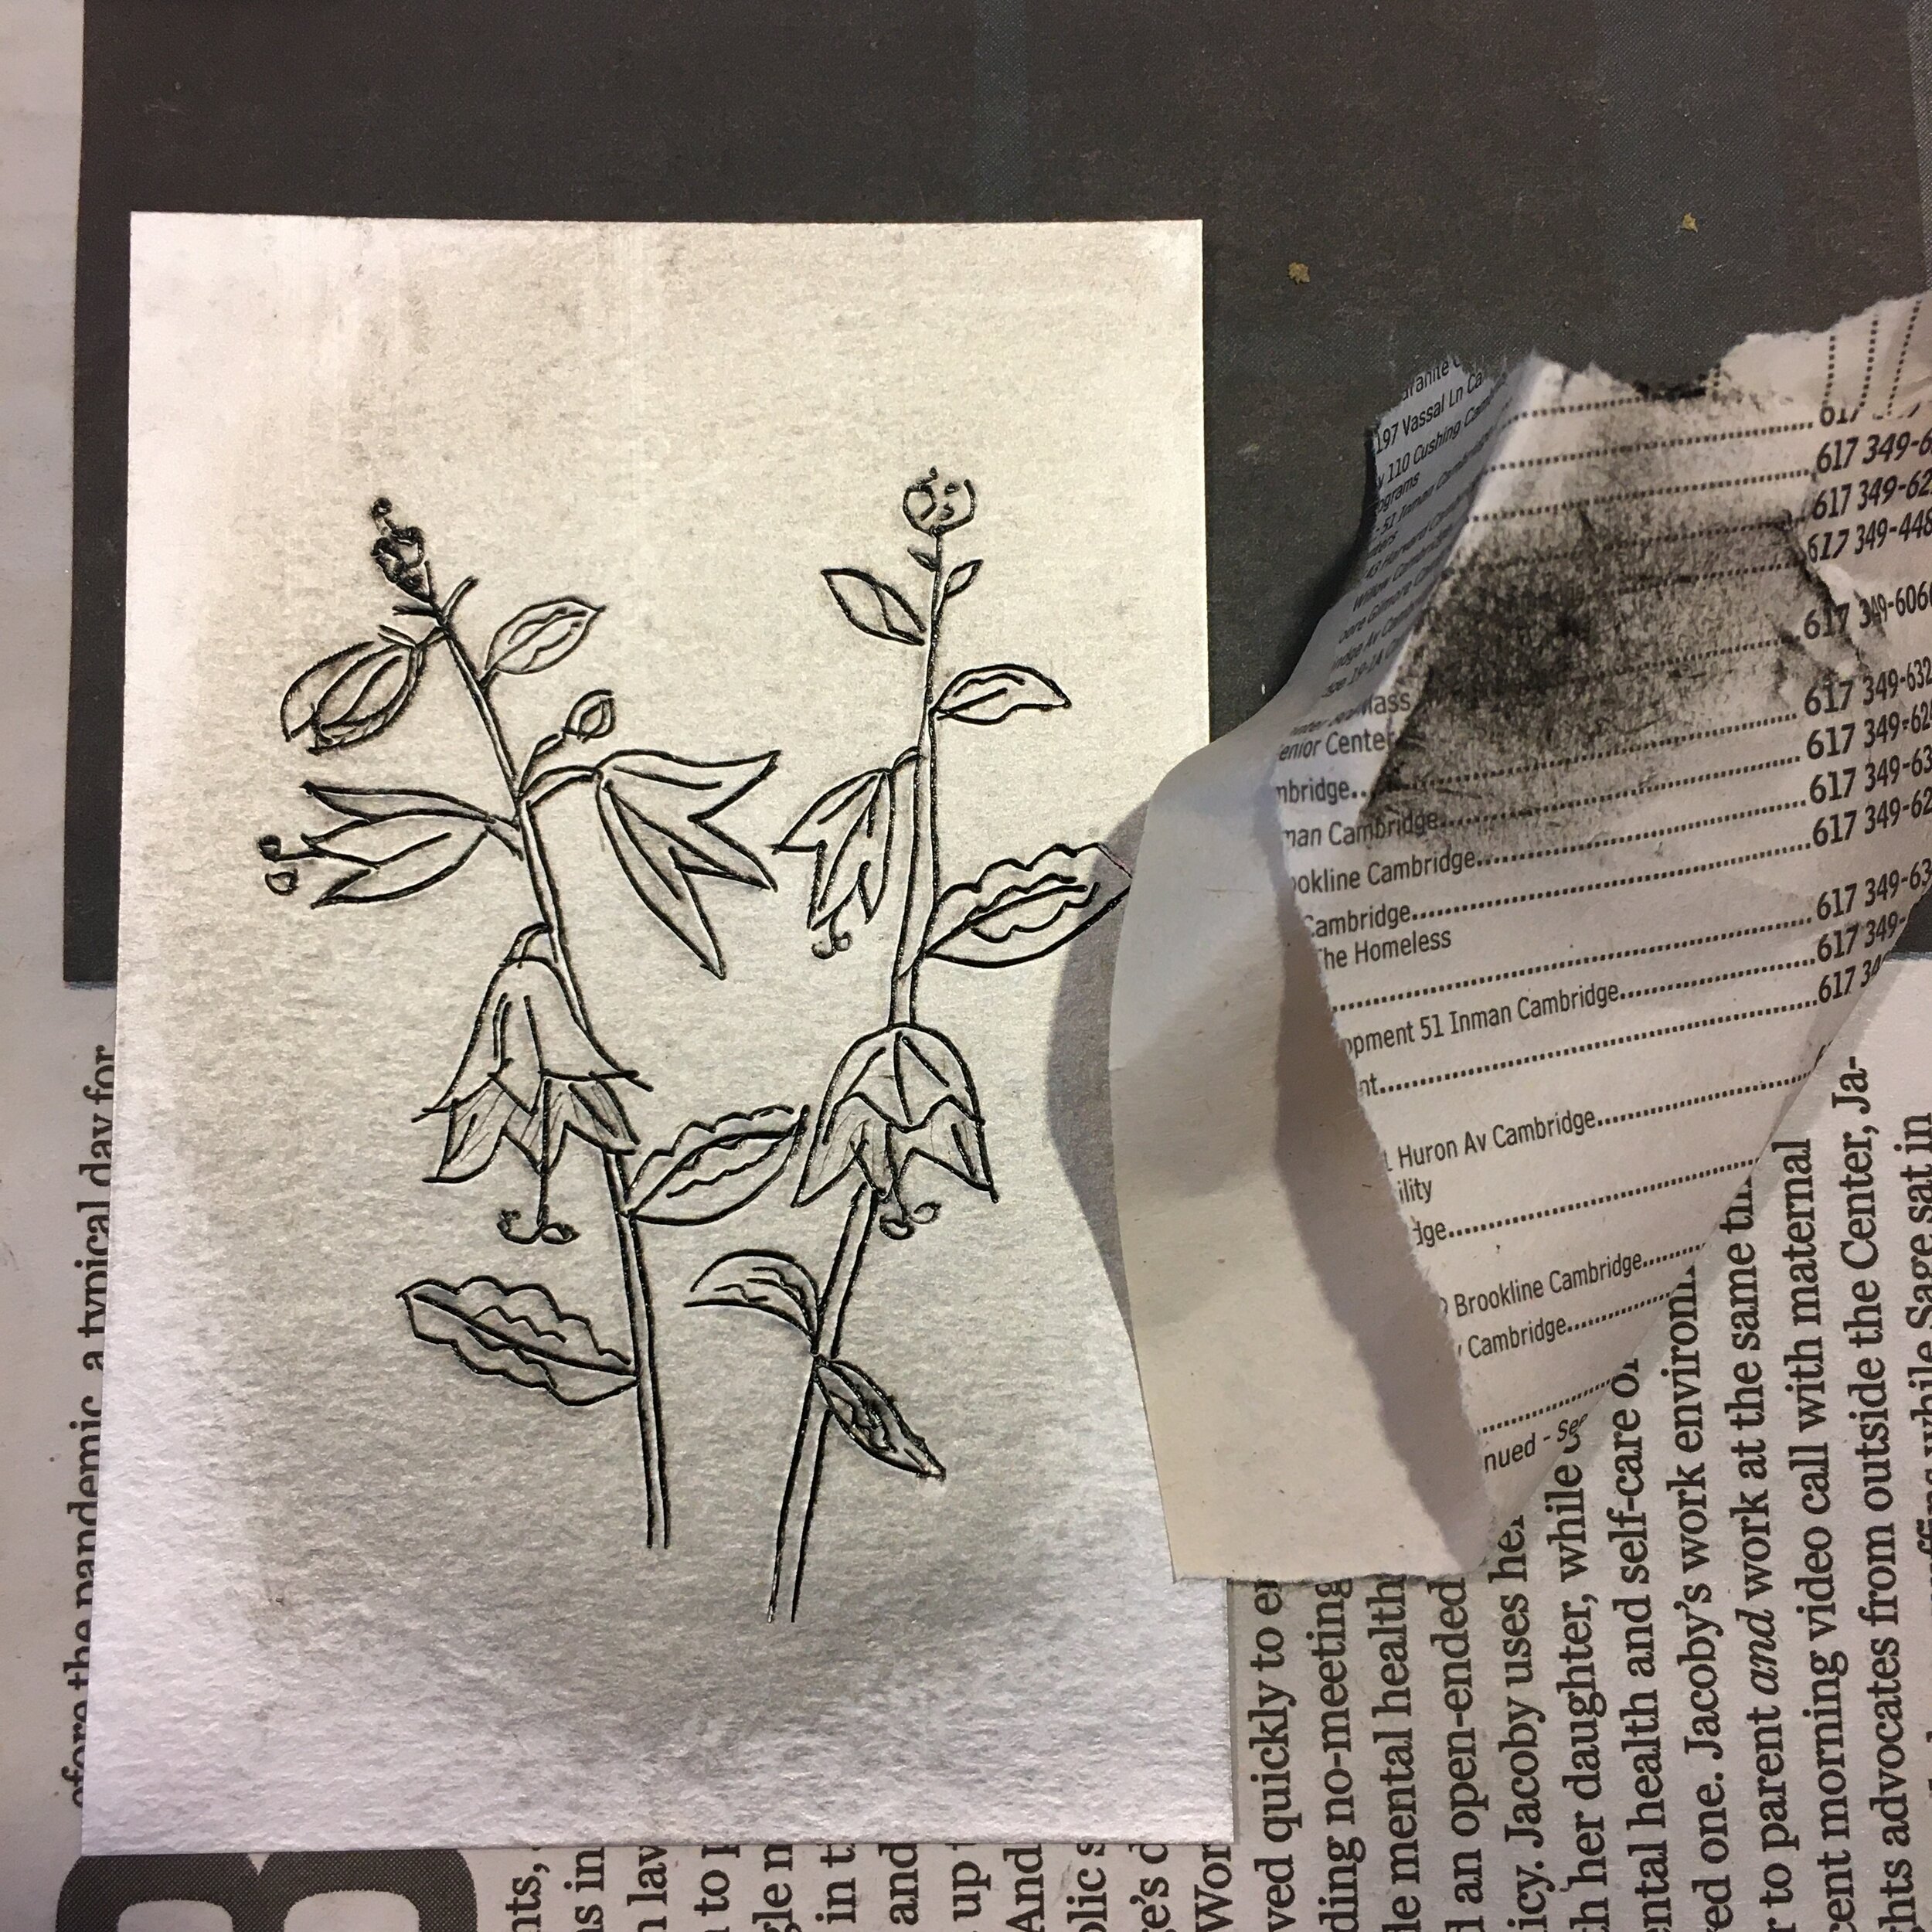
Top Row Left: A new piece from a TetraPak®, with an etched design in the piece below it.
Top Row Right: A close-up of the etching.
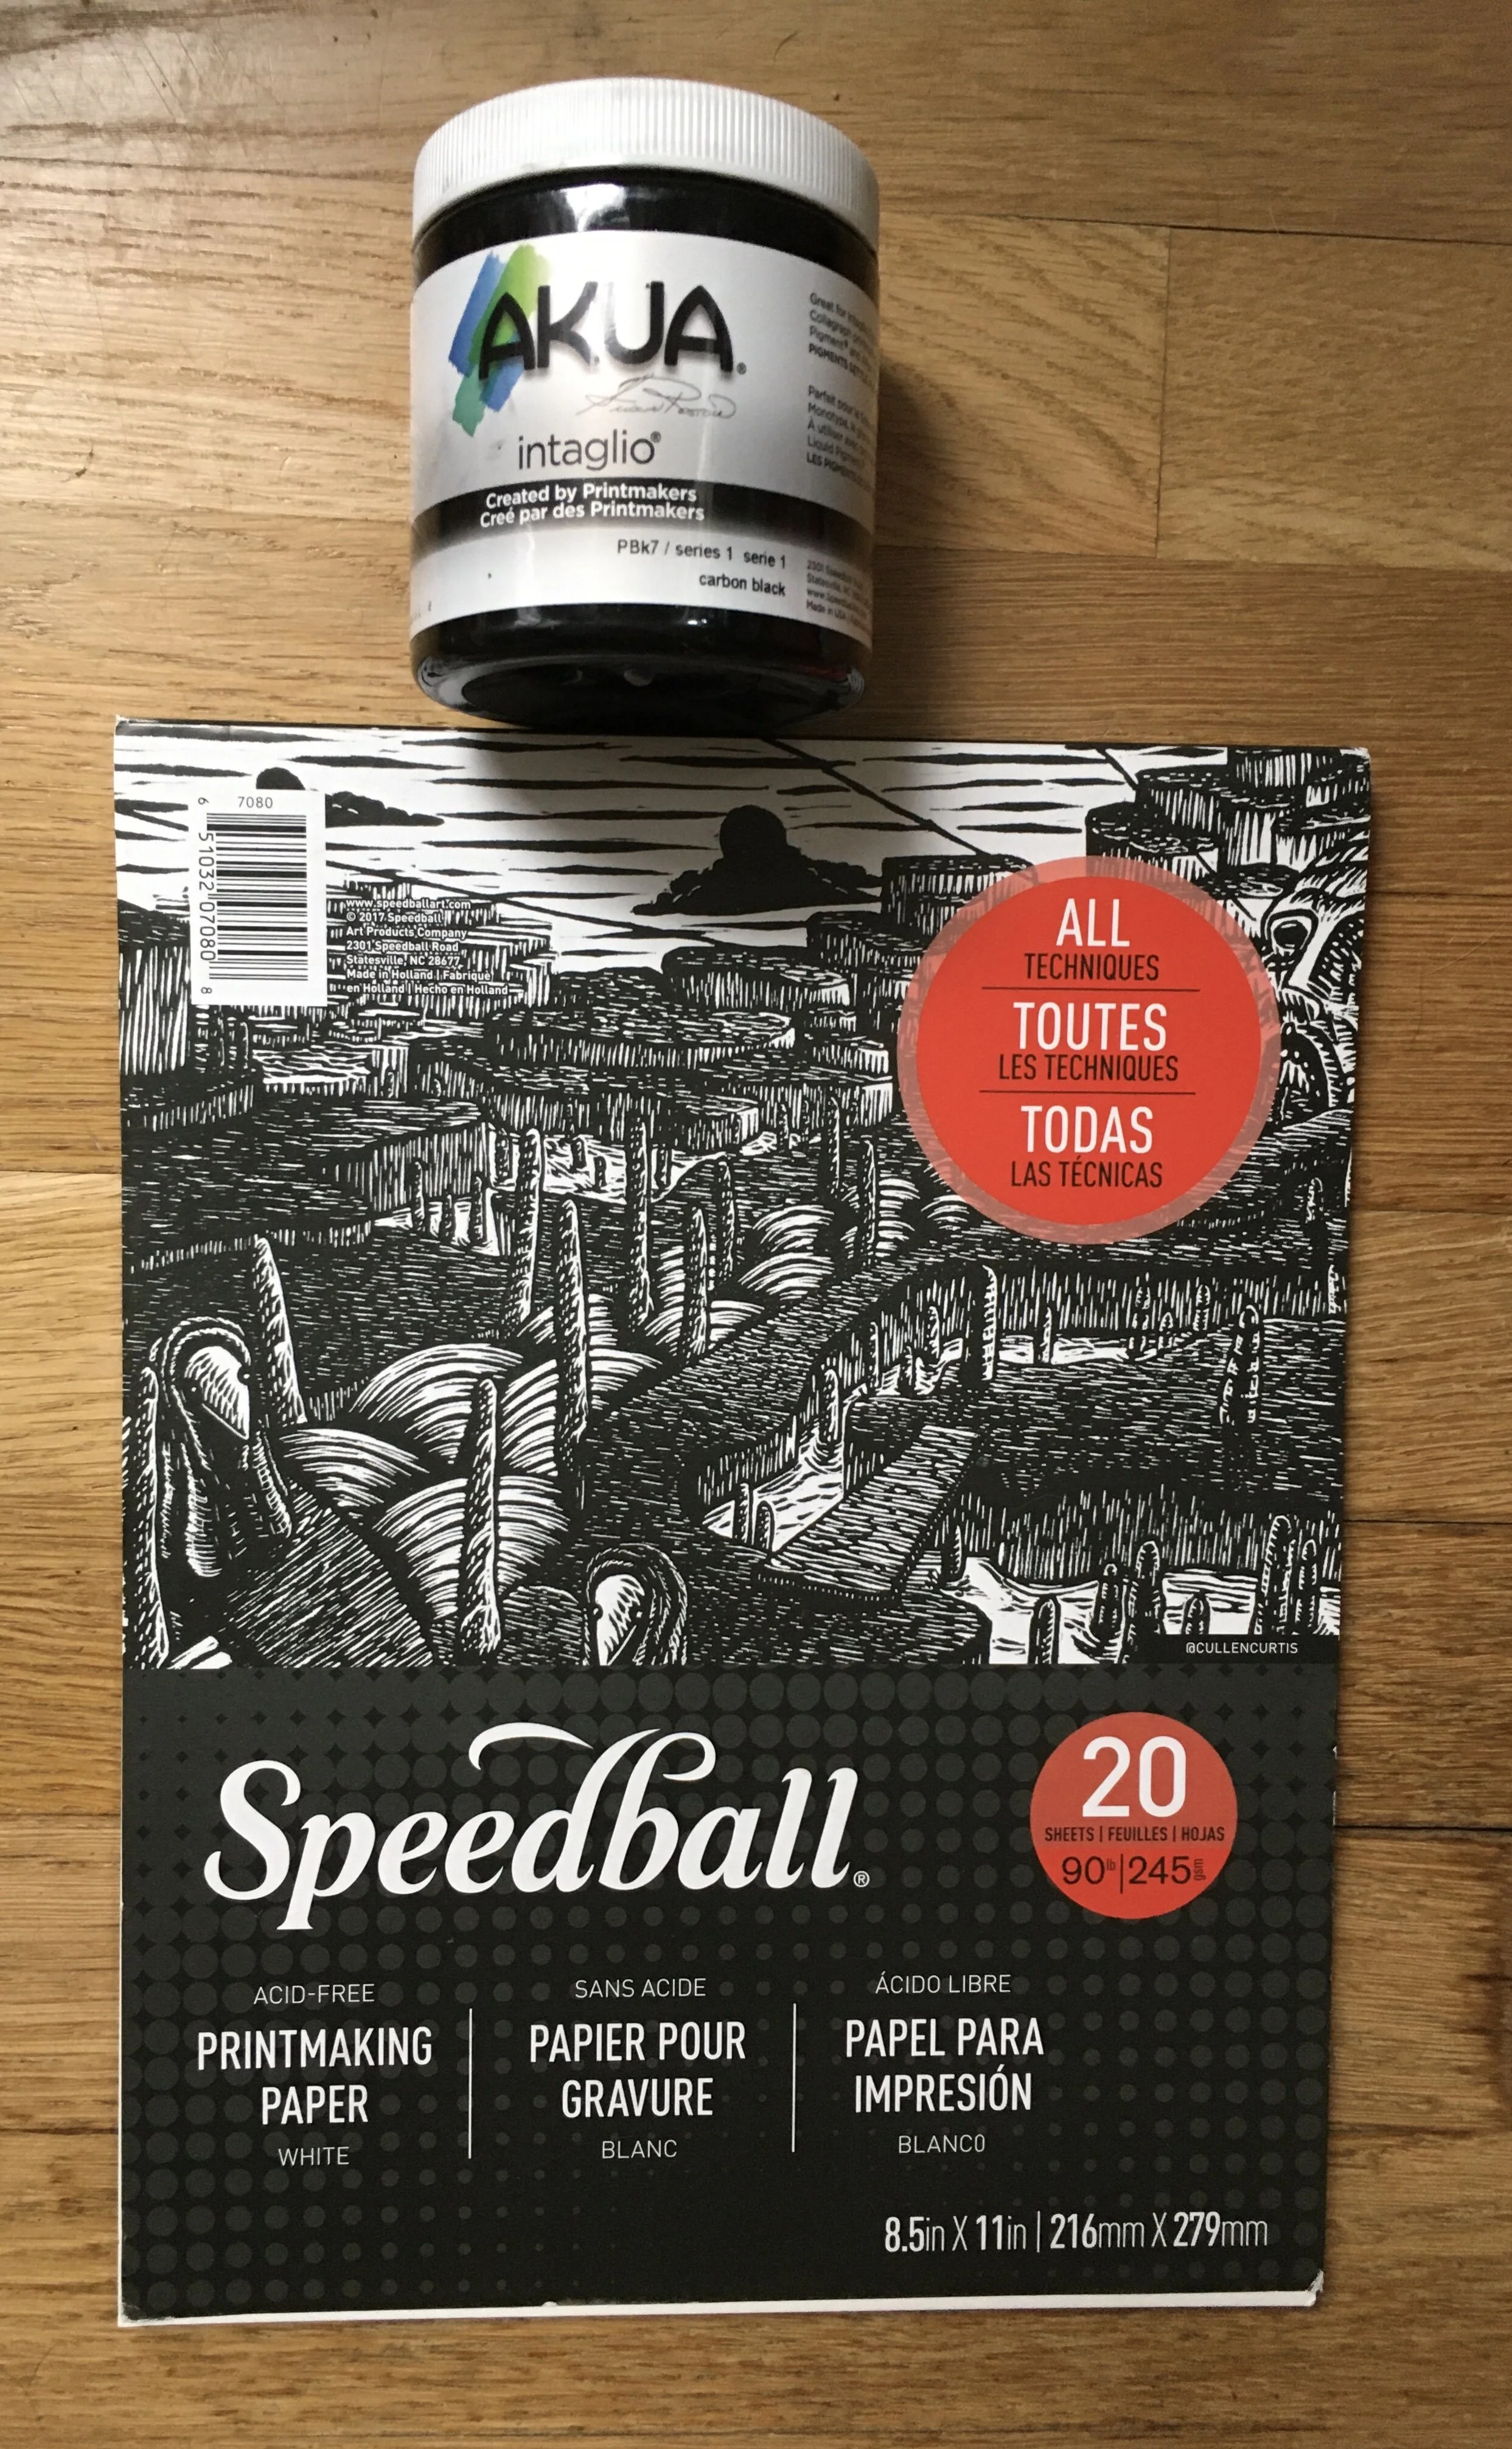
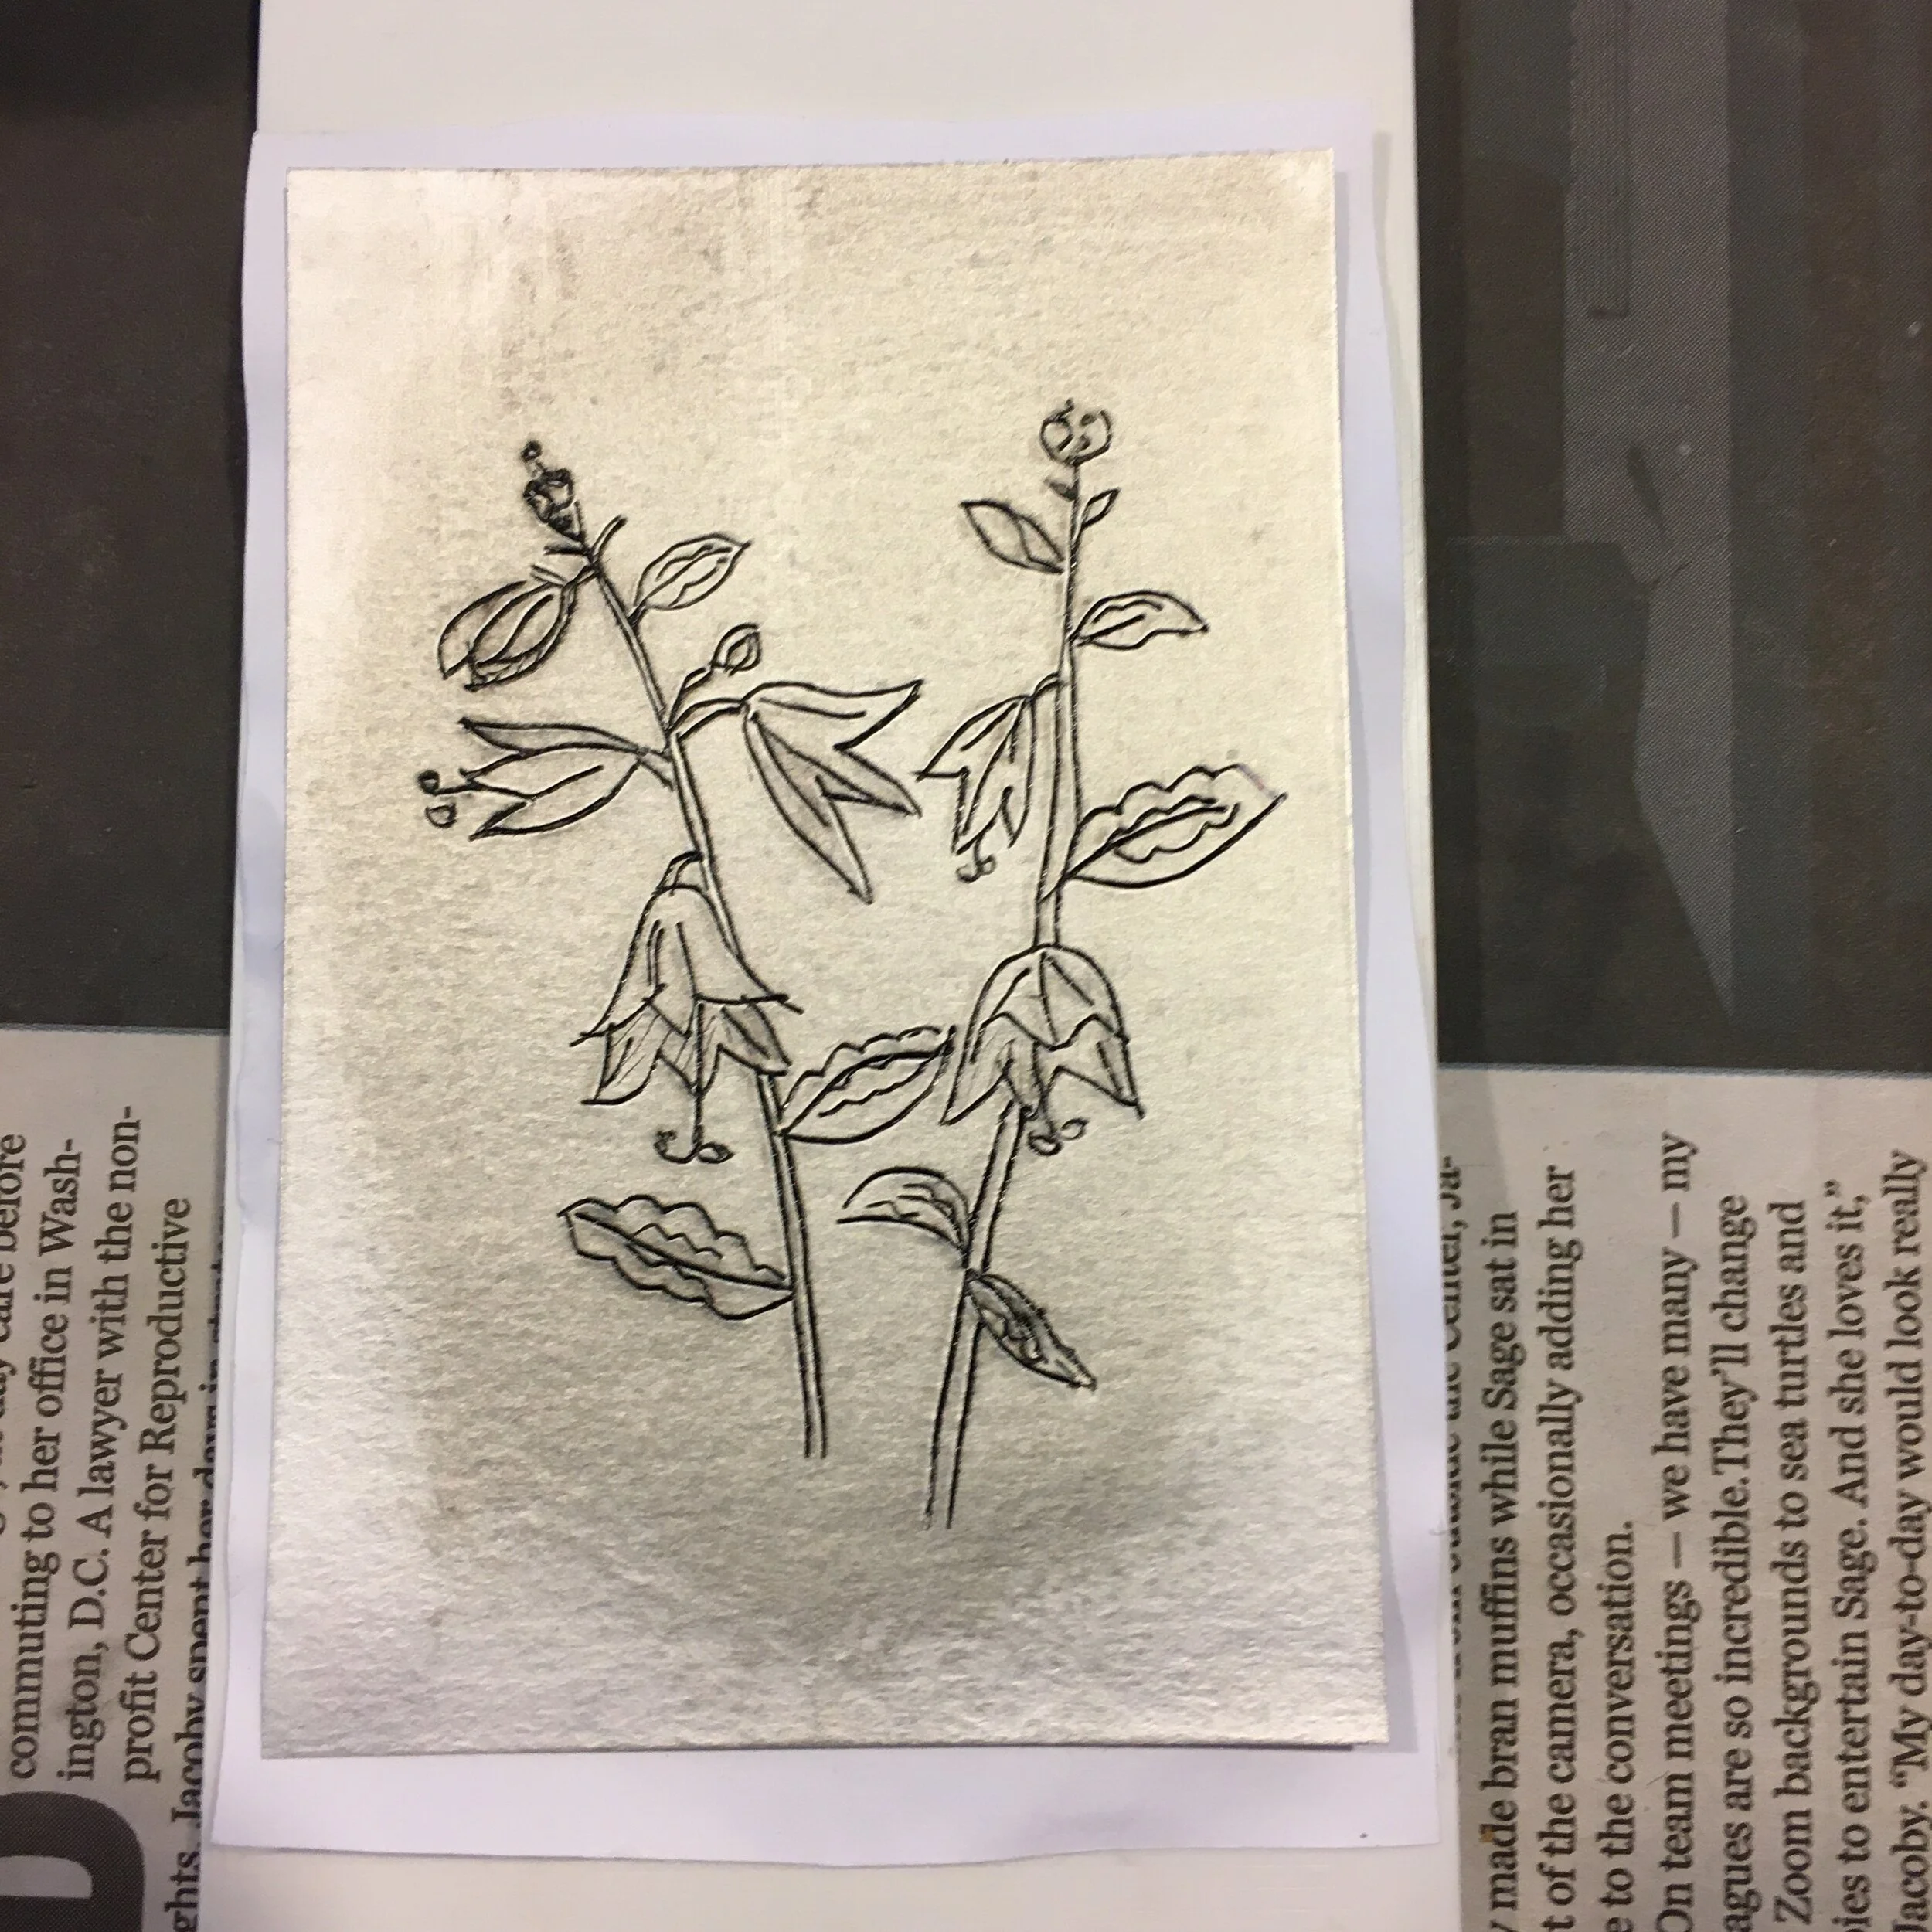
Second Row Left: I like using the Speedball printmaking paper. It’s readily available online in the US, not very expensive, and a great weight for making note cards. I have used mulberry paper but while it does make nice prints, it’s more expensive, definitely trickier to use, and much thinner weight. I’ve had good results using Akua® Intaglio® printing inks. (I’ve used both carbon black and a Prussian blue.
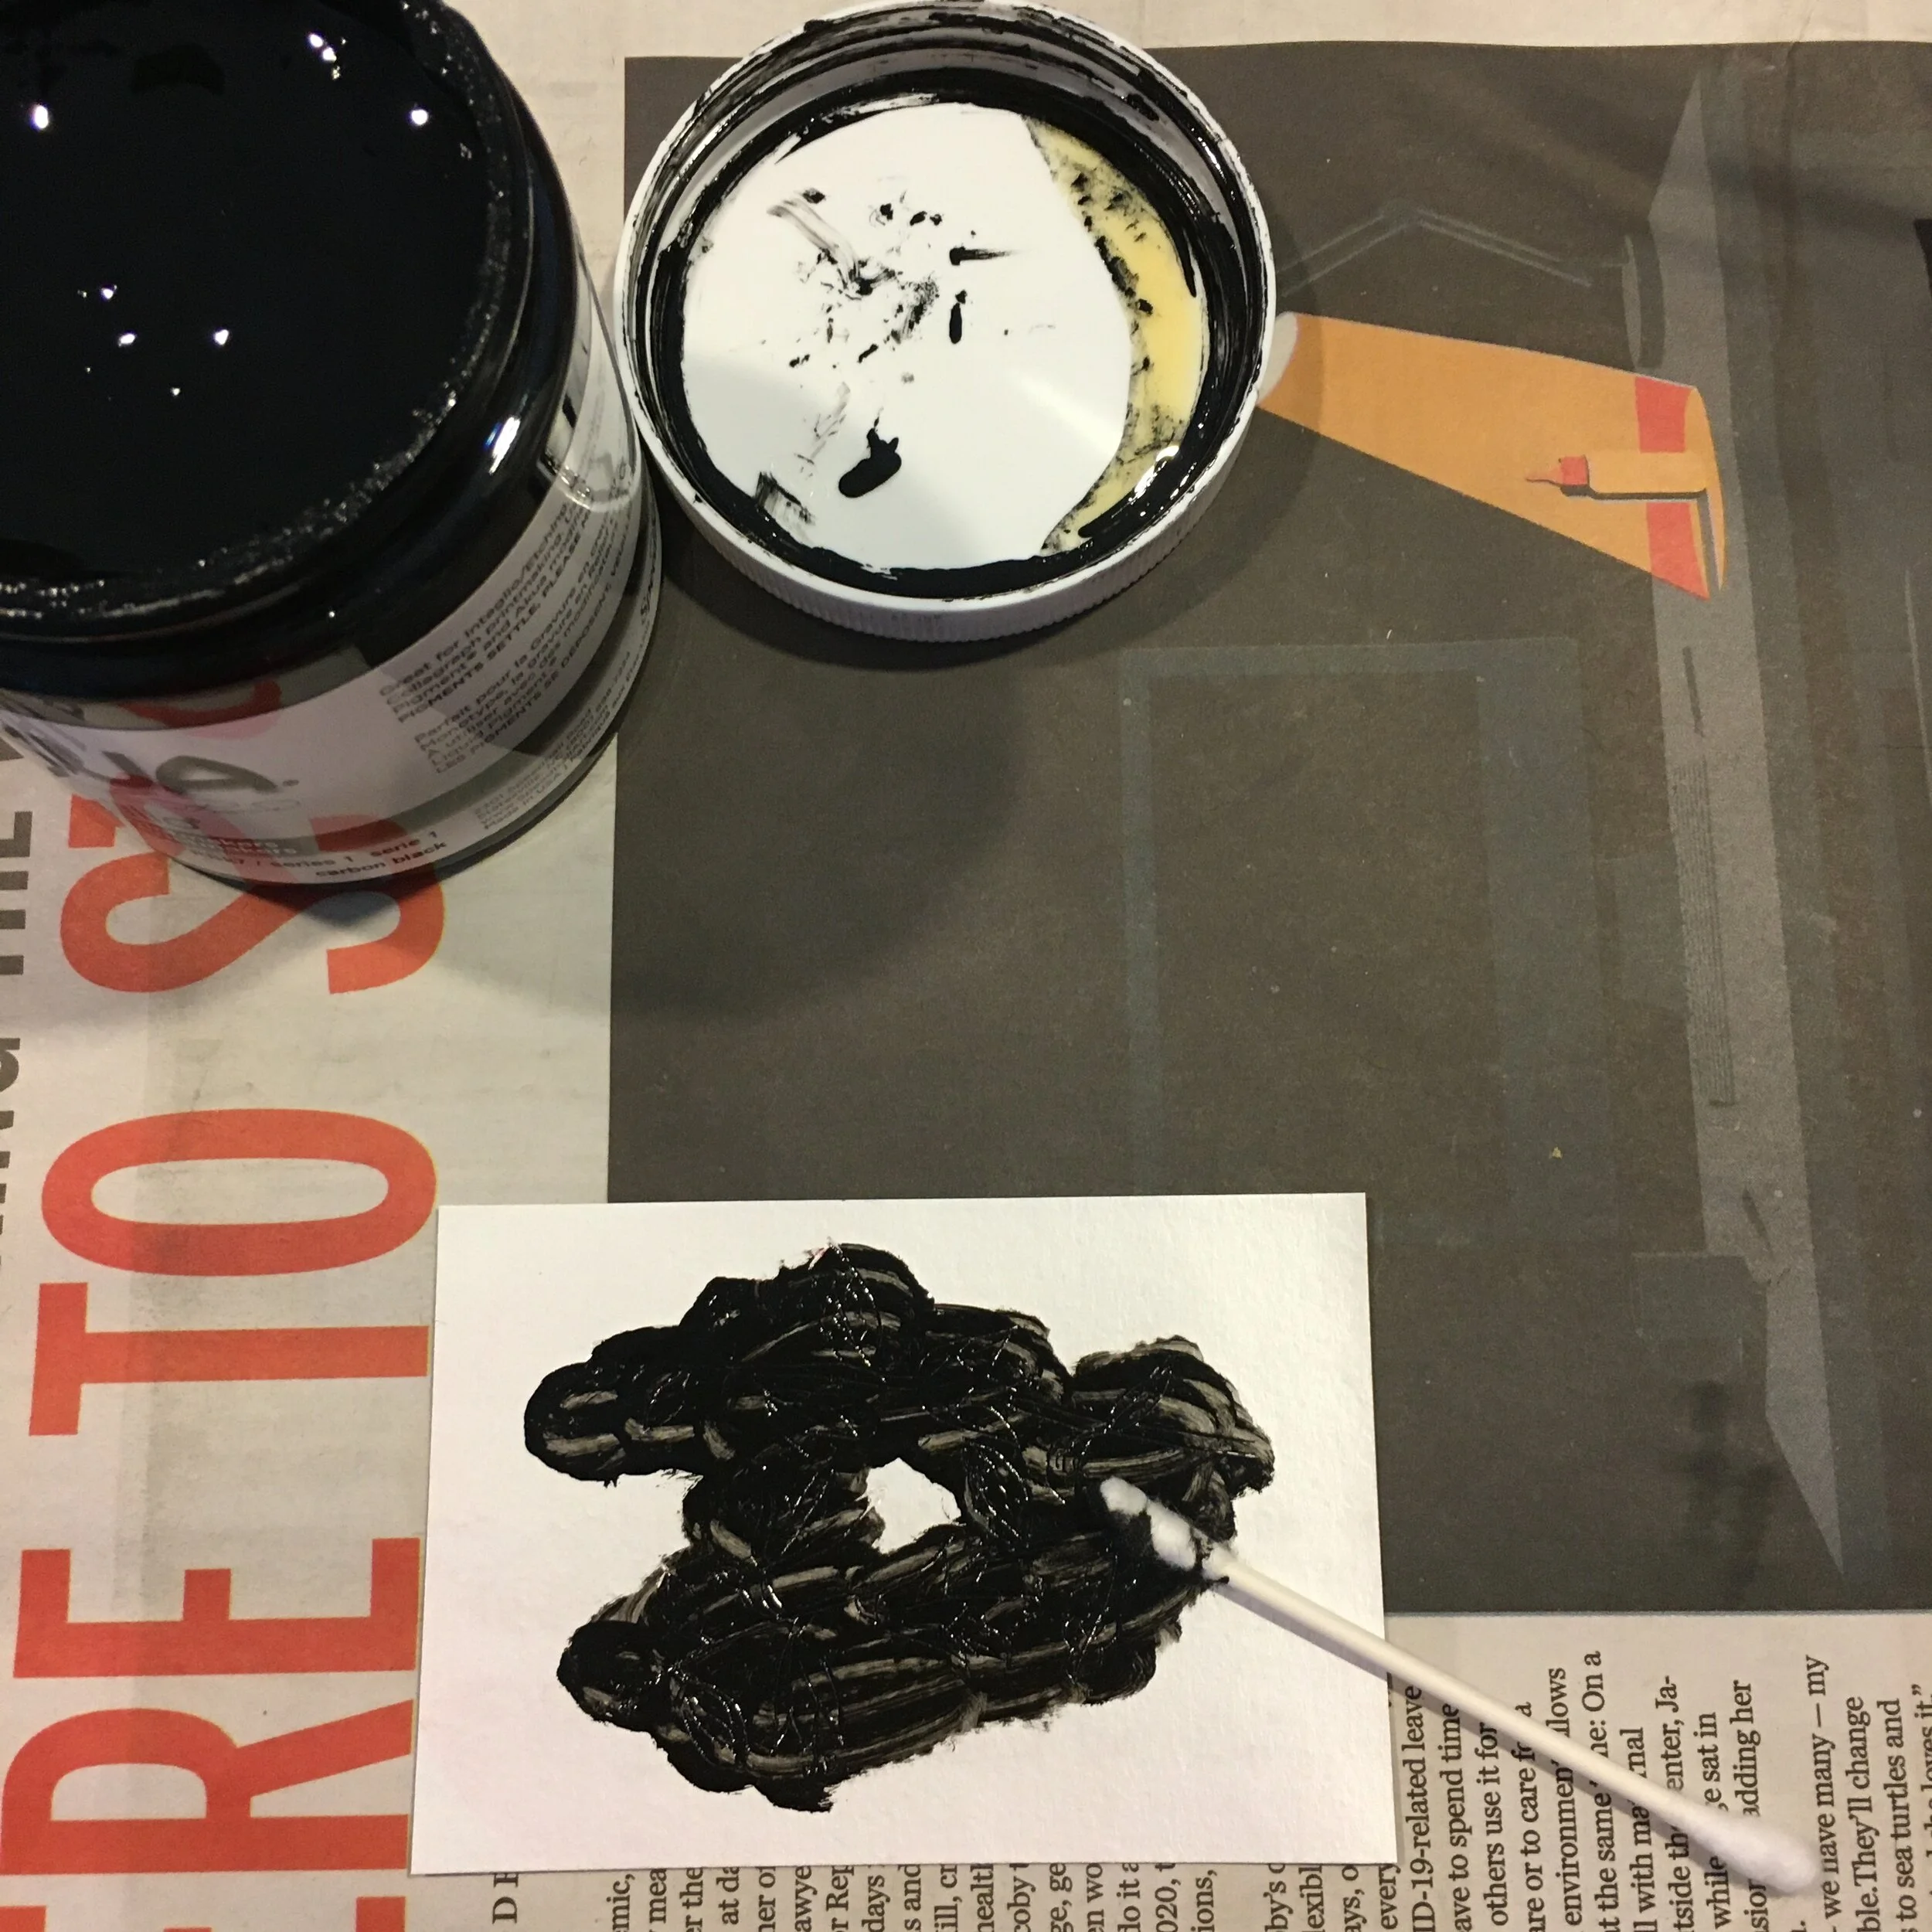
Second Row Right: After trying a variety of ways to apply the ink, I’ve settled on using a cotton swab. My etchings are very simple drawings and the cotton swab makes it possible to just apply a small amount of ink over the etched areas.
Third Row Left: My favorite item for wiping excess ink off the etching is pages of old telephone books! I’m sure newspaper would work too since printed phone books are no longer an common commodity!
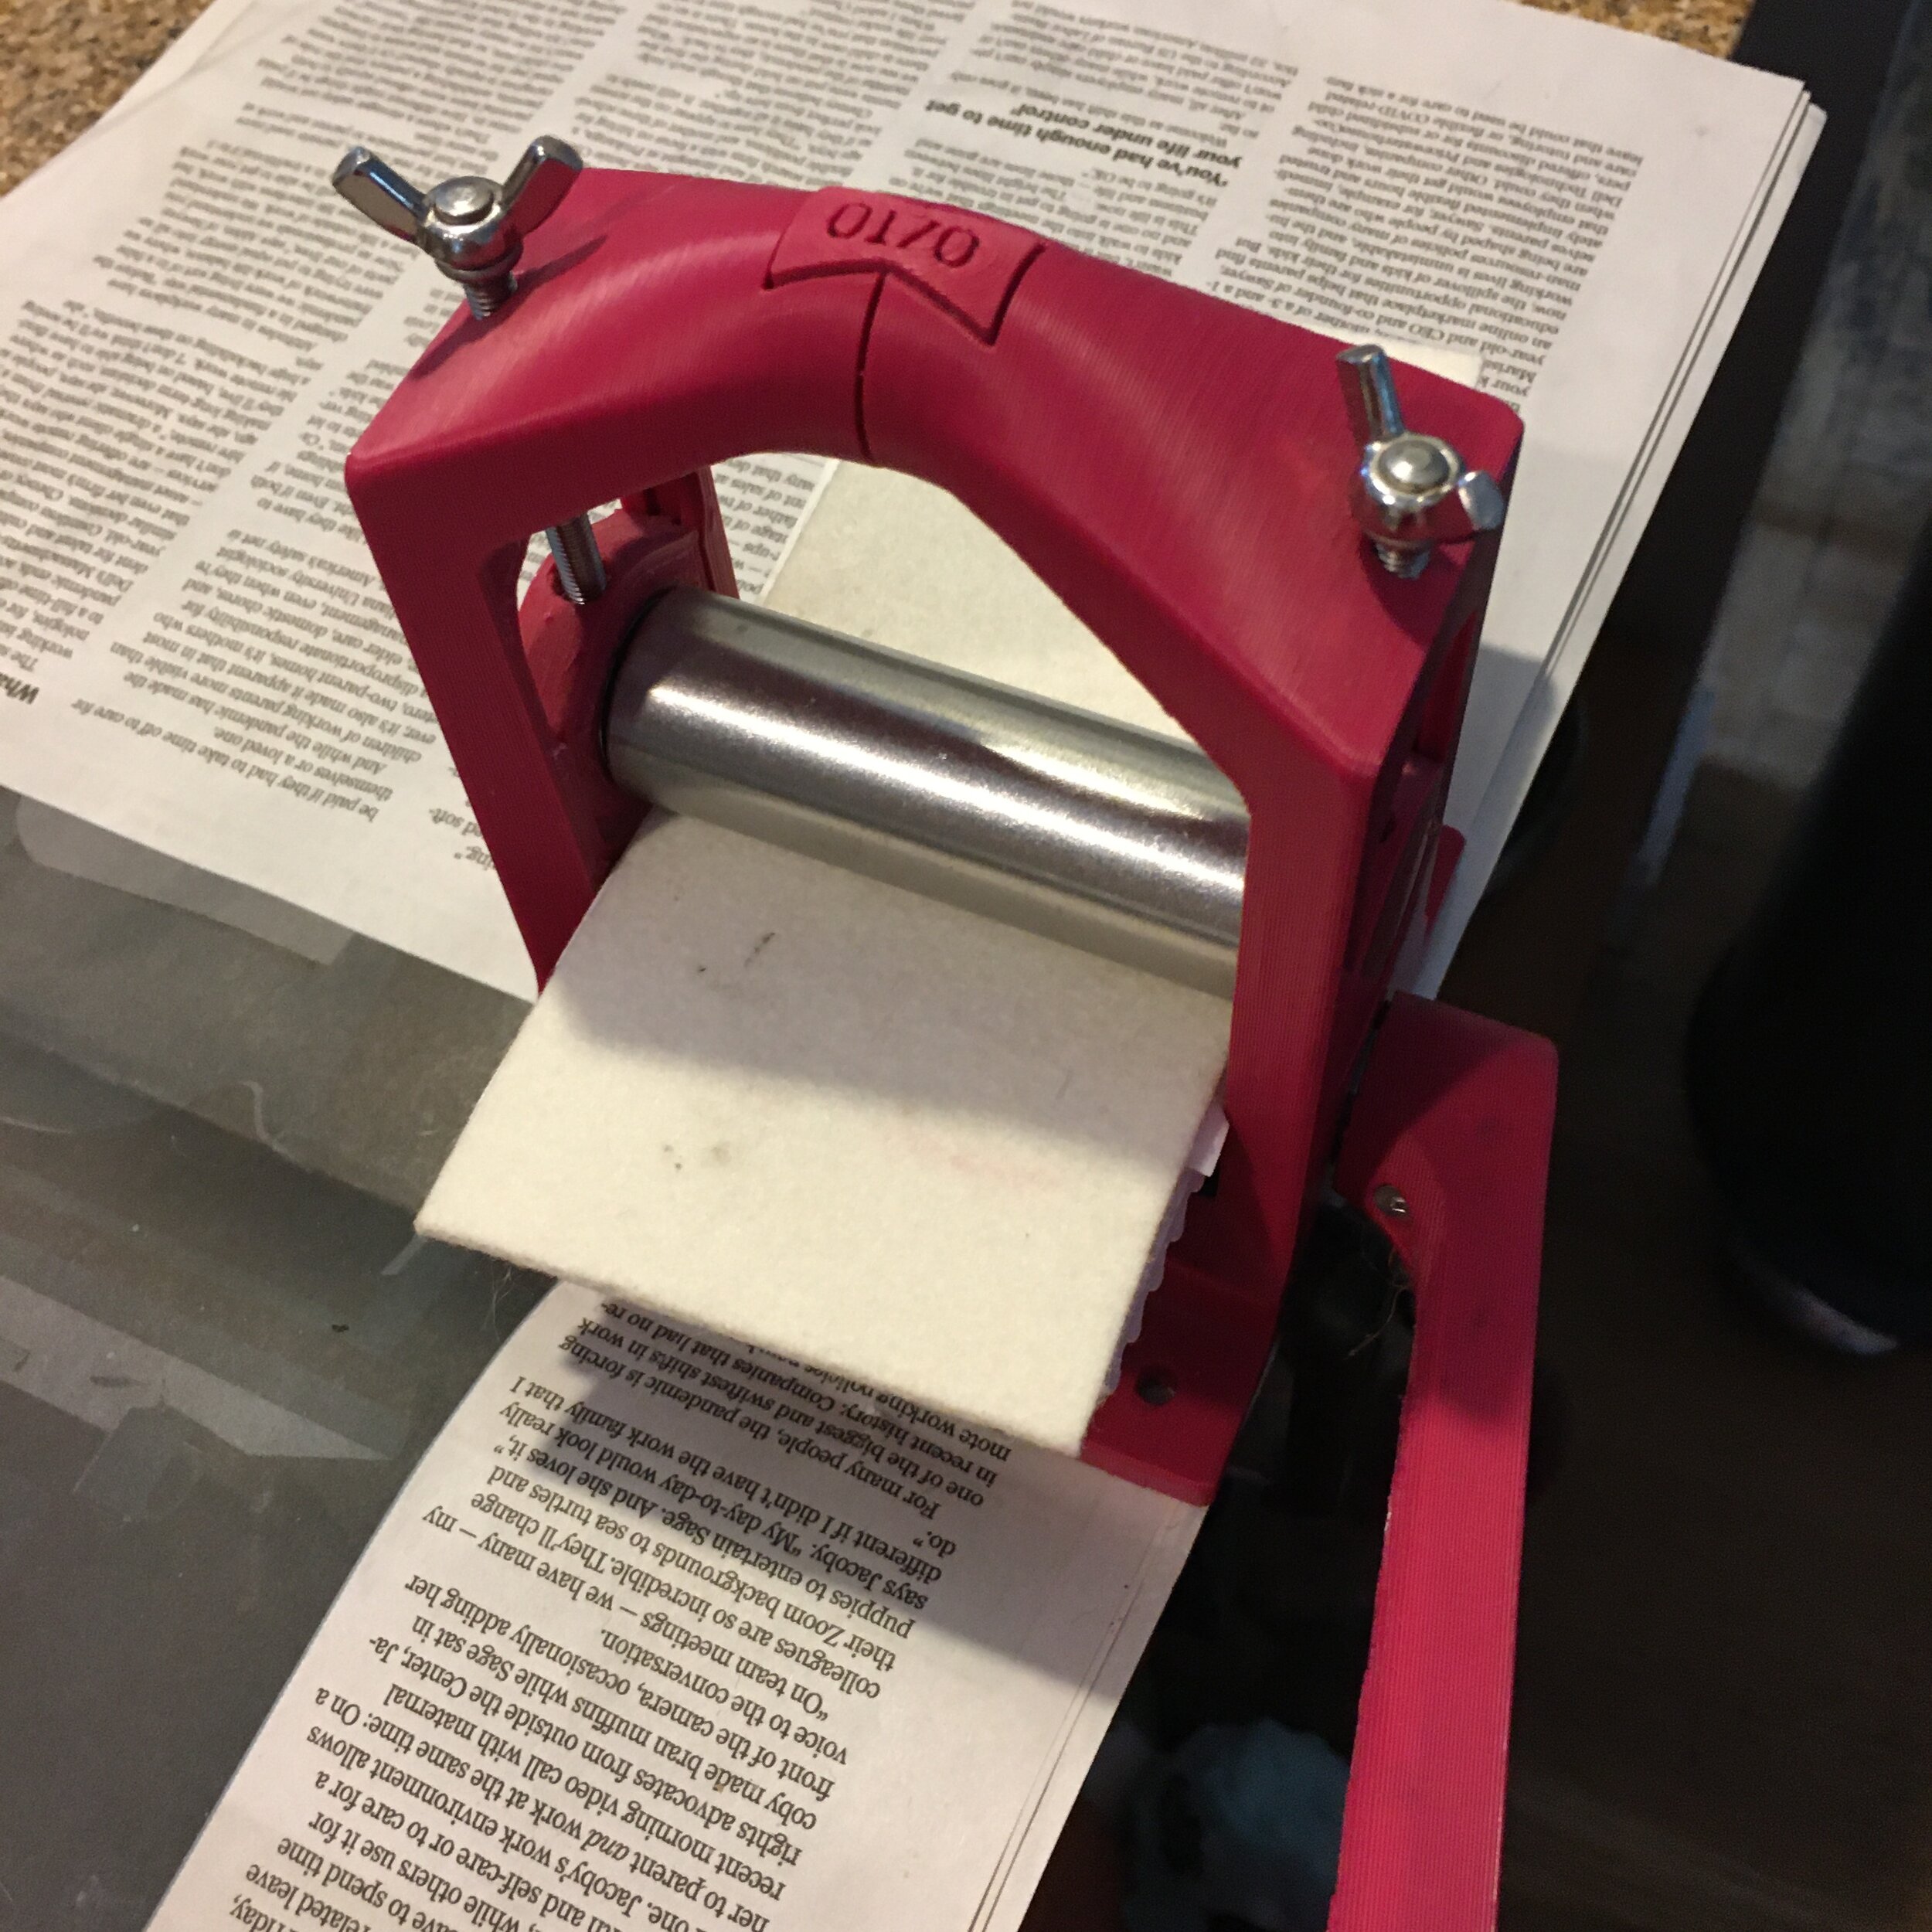
Third Row Right: I put a piece of trimmed-to-size copy paper on the printer’s platen. Then the etching. On top of the etching a place piece of printing paper which I have soaked for a few minutes in a tray of clear water. On top of the printing paper, I put another piece of copy paper, and finally the sheet of felt which came with the press. Now, all ready to print!
Bottom Row Left: The sandwiched print and paper is cranked through the printing press.
Bottom Row Right: And here, on the far side of the press, the etching on the left and the print on the right.
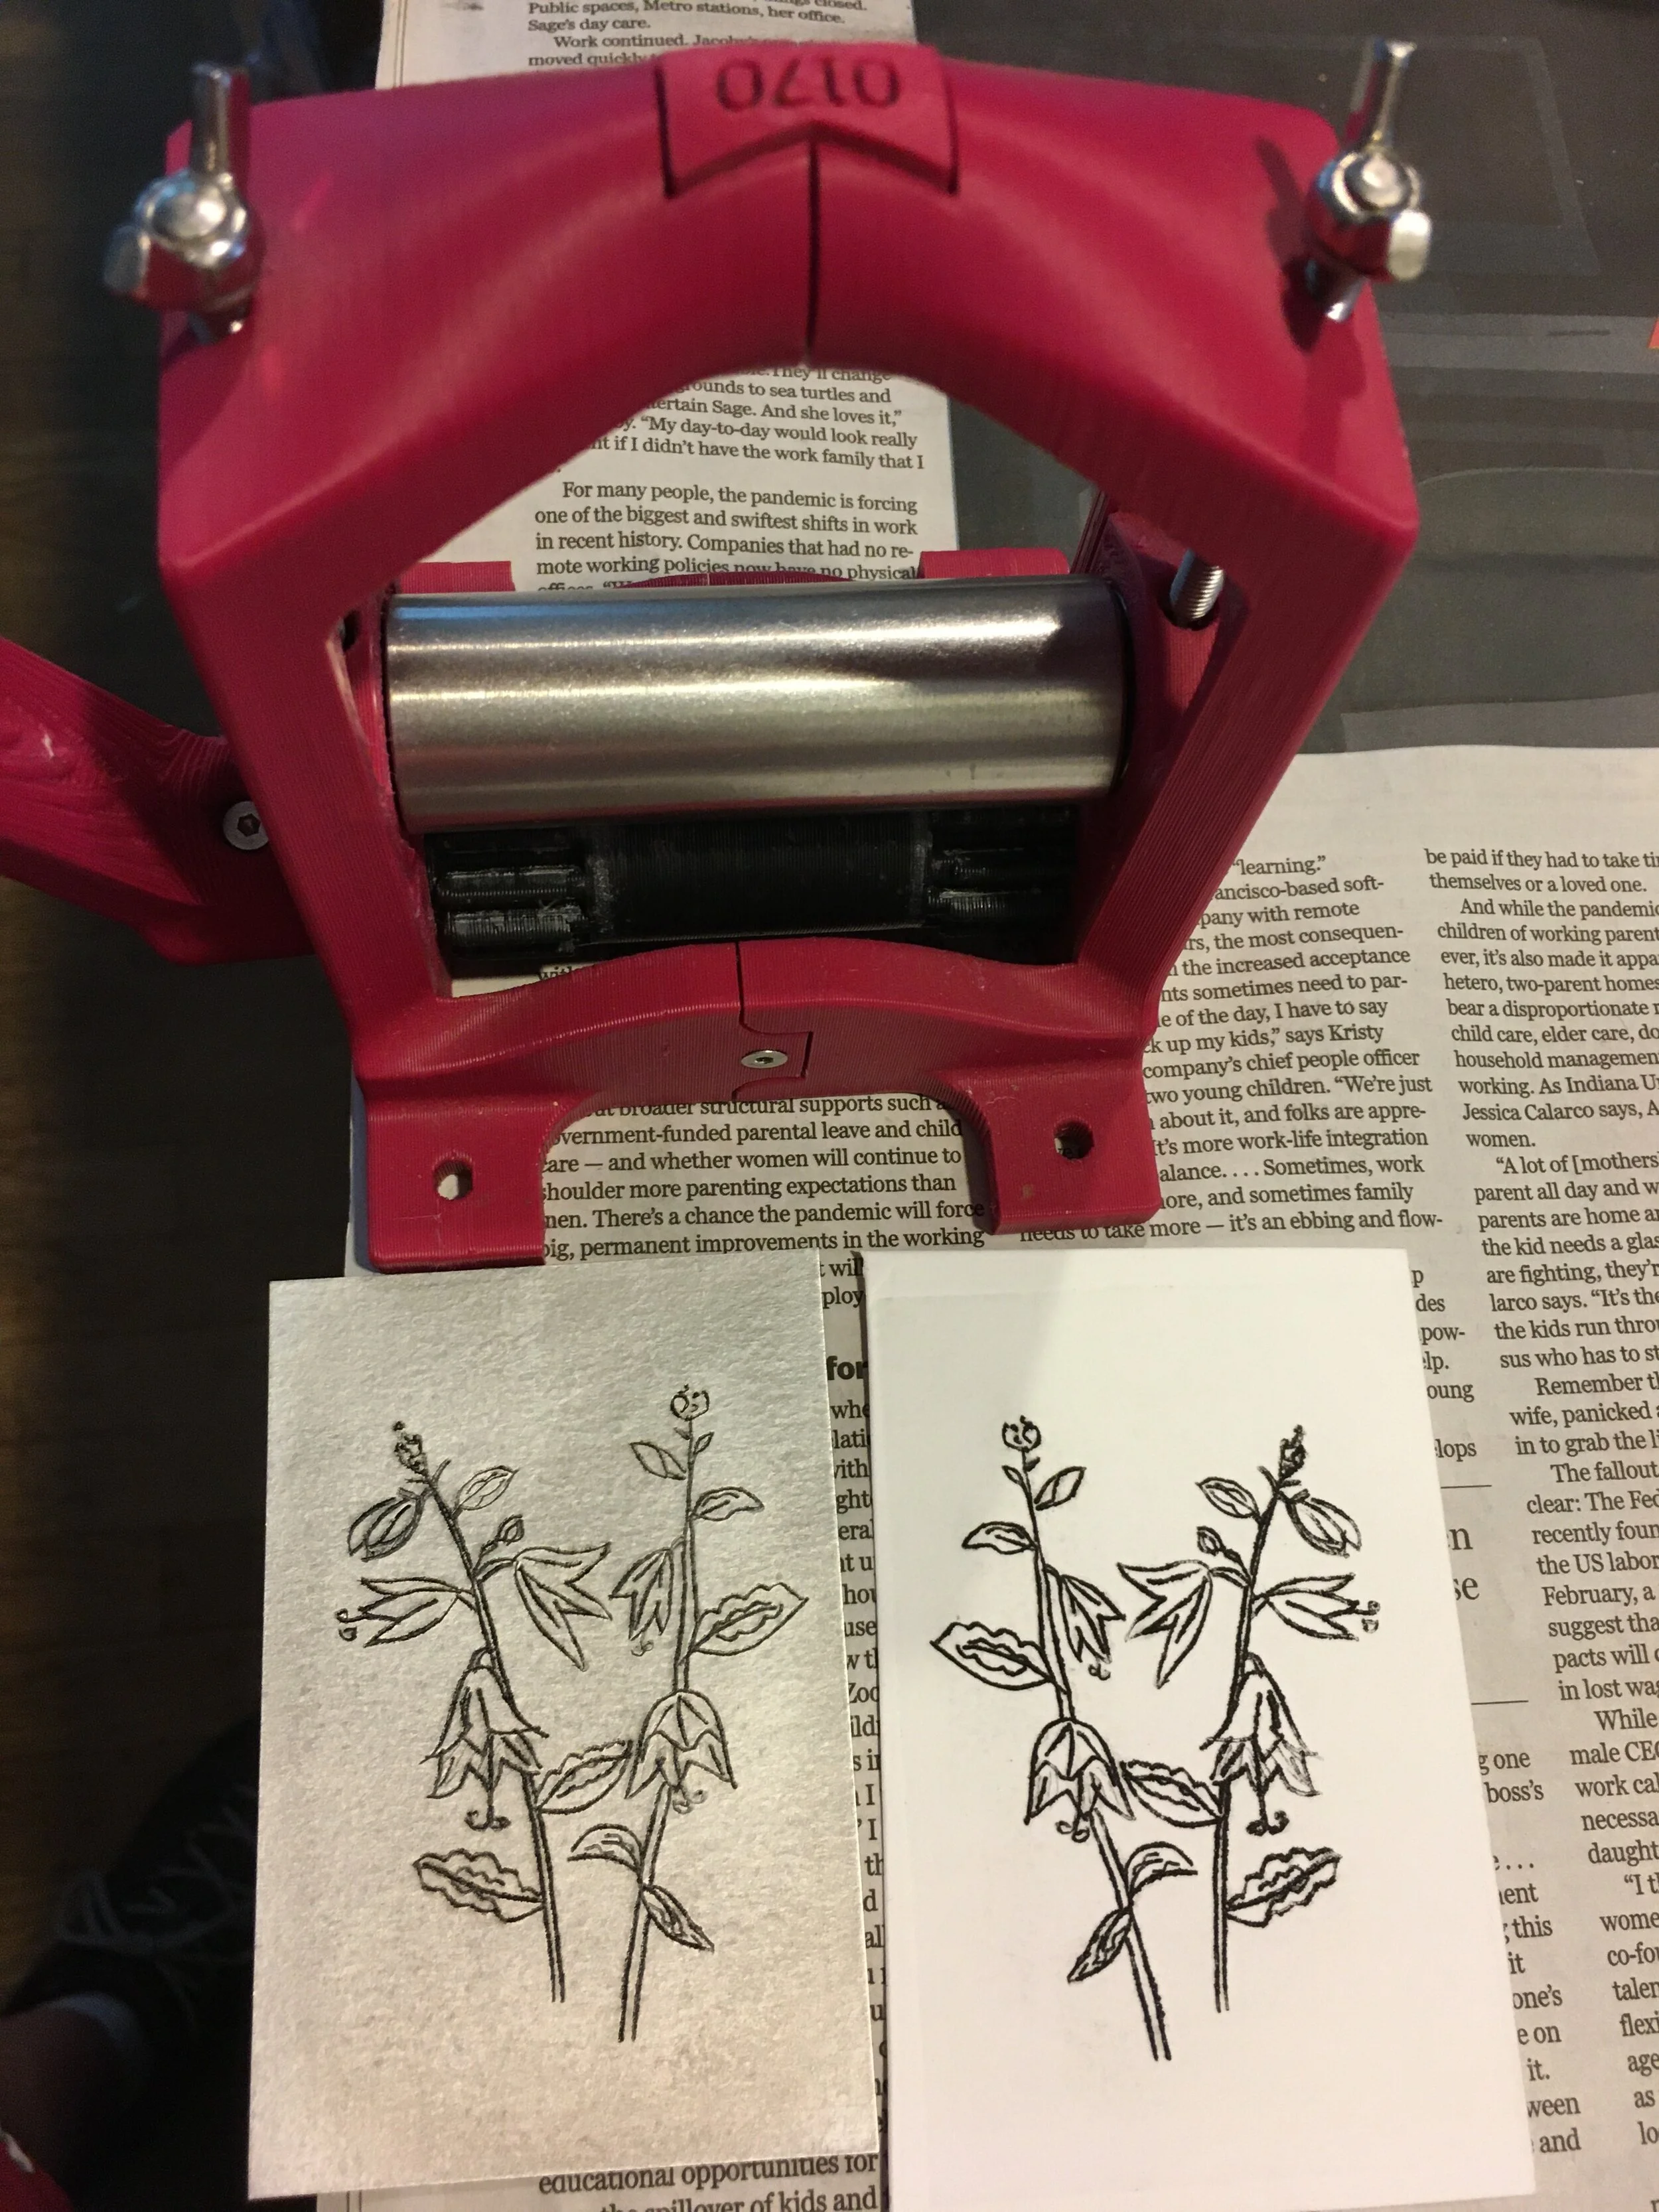
This is a tiny press. 2 3/4 inches is about as wide as your printing paper can be. But that’s also one of the joys of this press. I can sit down and do a TetraPak® etching in an afternoon, and a couple hours later have a stack of prints that are drying. The prints do need to be put under a stack of books or other weights overnight so that they don’t curl as they dry completely. But I love how fast I can make prints with this press! I’m so glad found out about this KickStarter project and signed up!
Check out what other folks have printed on Instagram #openpressproject.
The Kickstarter Campaign is over, but if you’d like your own little 3D printed printing press, you can purchase one from the OpenPressProject. I highly recommend them!
Notice: This blog is not monetized: I do not use affiliate links. When there are links in a post, they are to give credit to another creative person, because I like or have used a product, or to help the reader easily find supplies for a project.