

"Flying Economy" the pattern I designed to use fabrics from a Yankee Swap
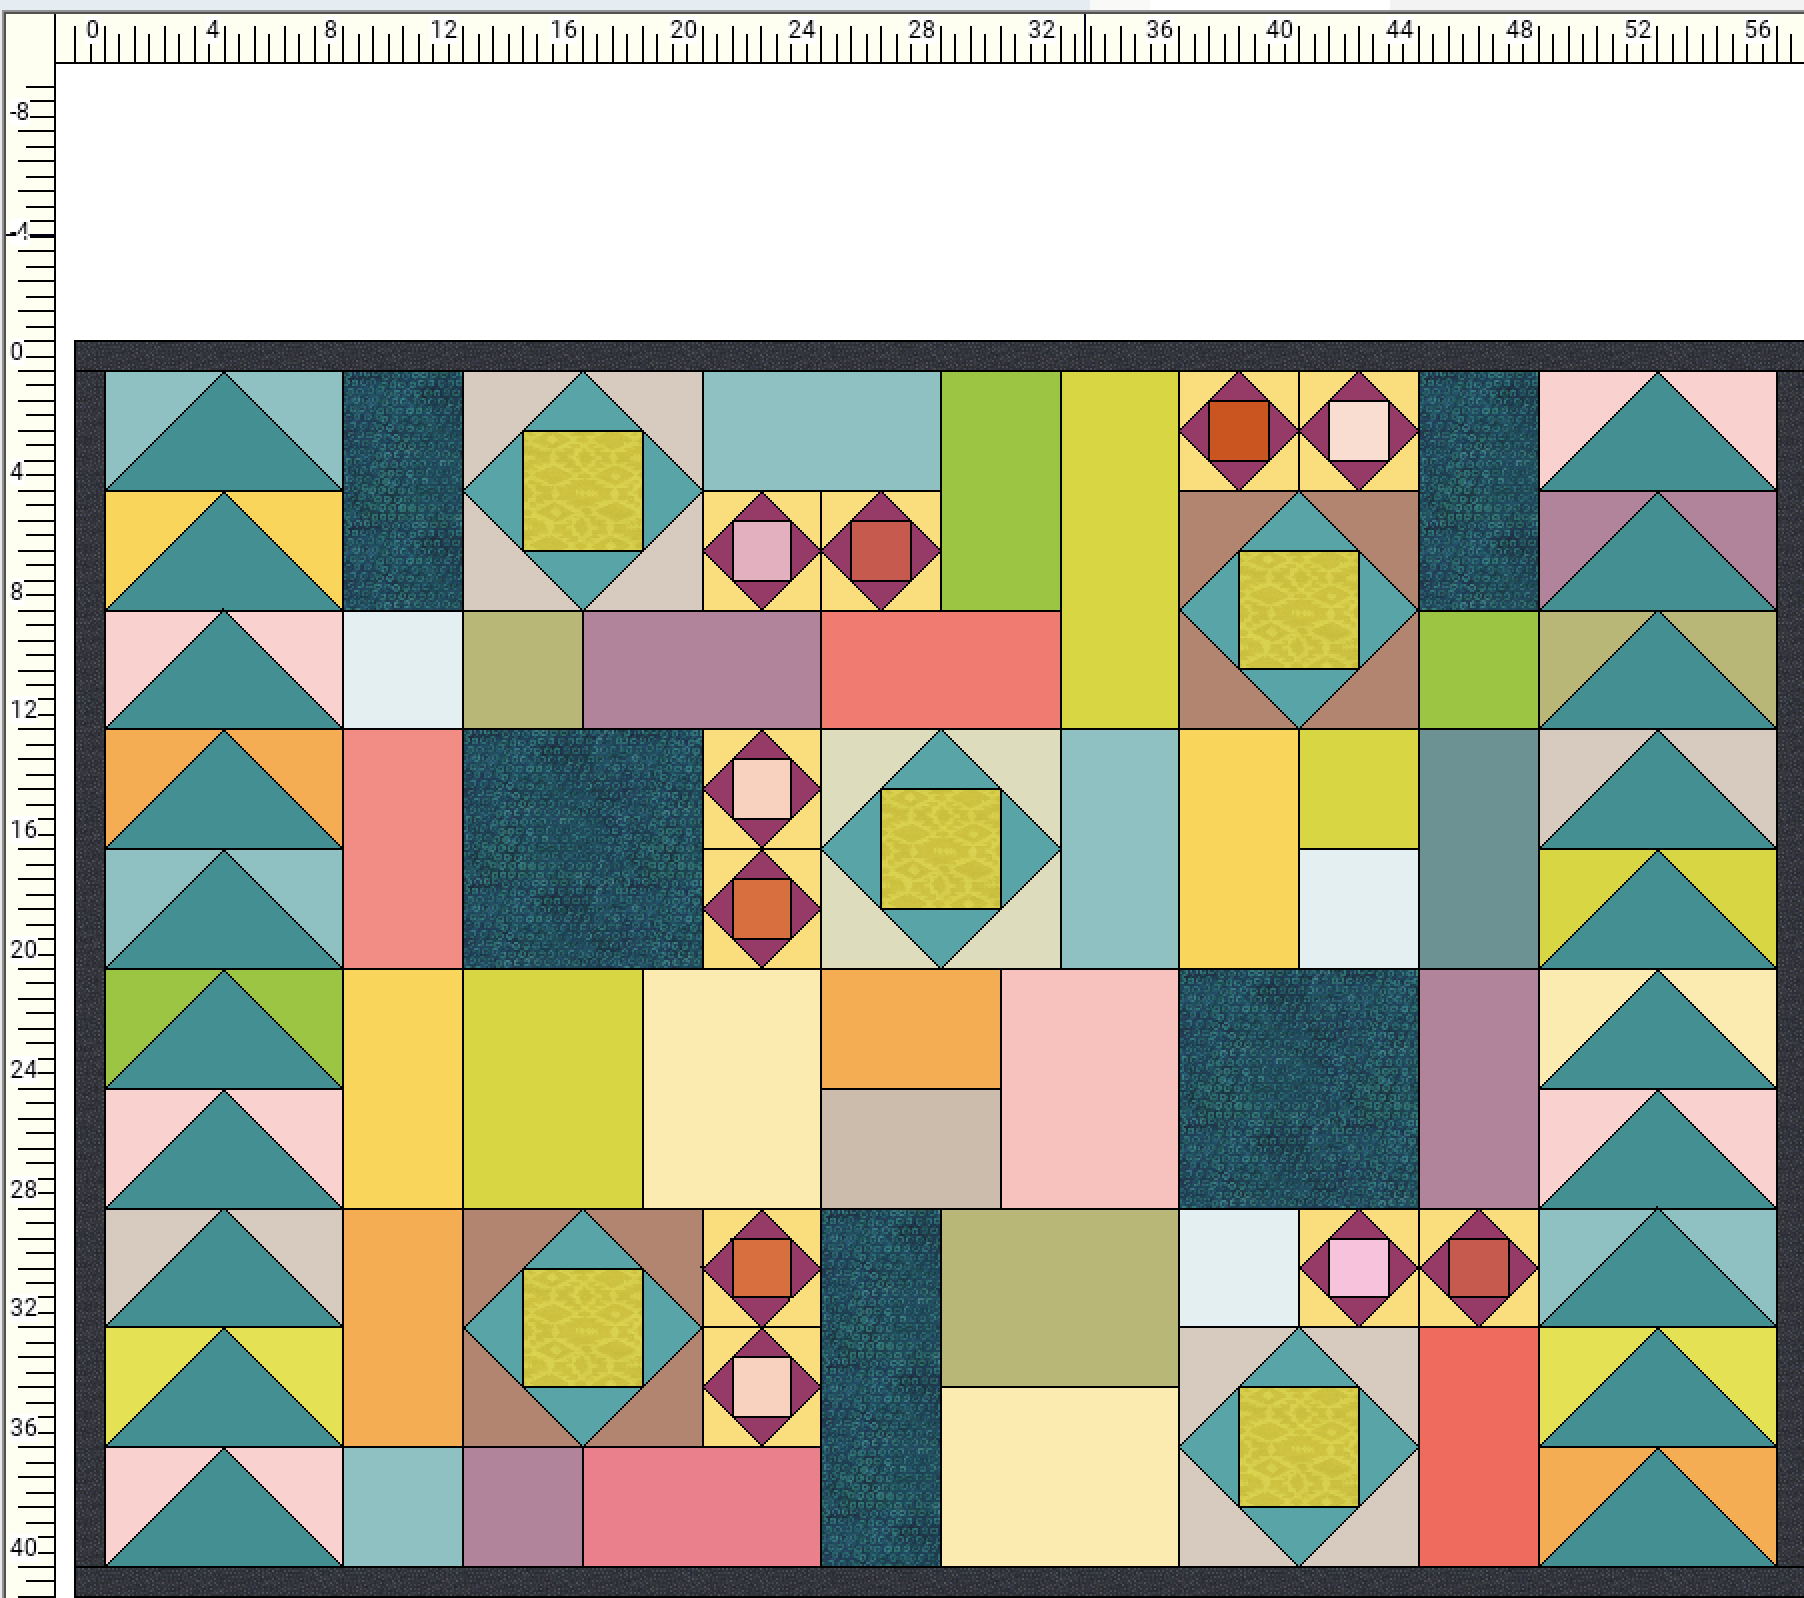
And here it is: The quilt I designed for my Yankee Swap Fabrics (see May 31, 2018 post) using the Custom Set Blocks option in the Electric Quilt (EQ8) program.
The design is a combination of flying geese, economy blocks in 2 sizes and an assortment of rectangles and squares. The blocks sizes can all be divided by 4. That common denominator makes the blocks in the quilt all compatible and allows for piecing without odd seams.
It is important to check the design to make it actually can be pieced!! It is possible to design a quilt that is essentially impossible, or would be a nightmare, to piece!
The central panel of this quilt can be pieced in 4 strips--two wide ones and two narrow ones. Can you see how looking at the pattern? * The flying geese borders will be pieced and added after the central panel has been pieced.
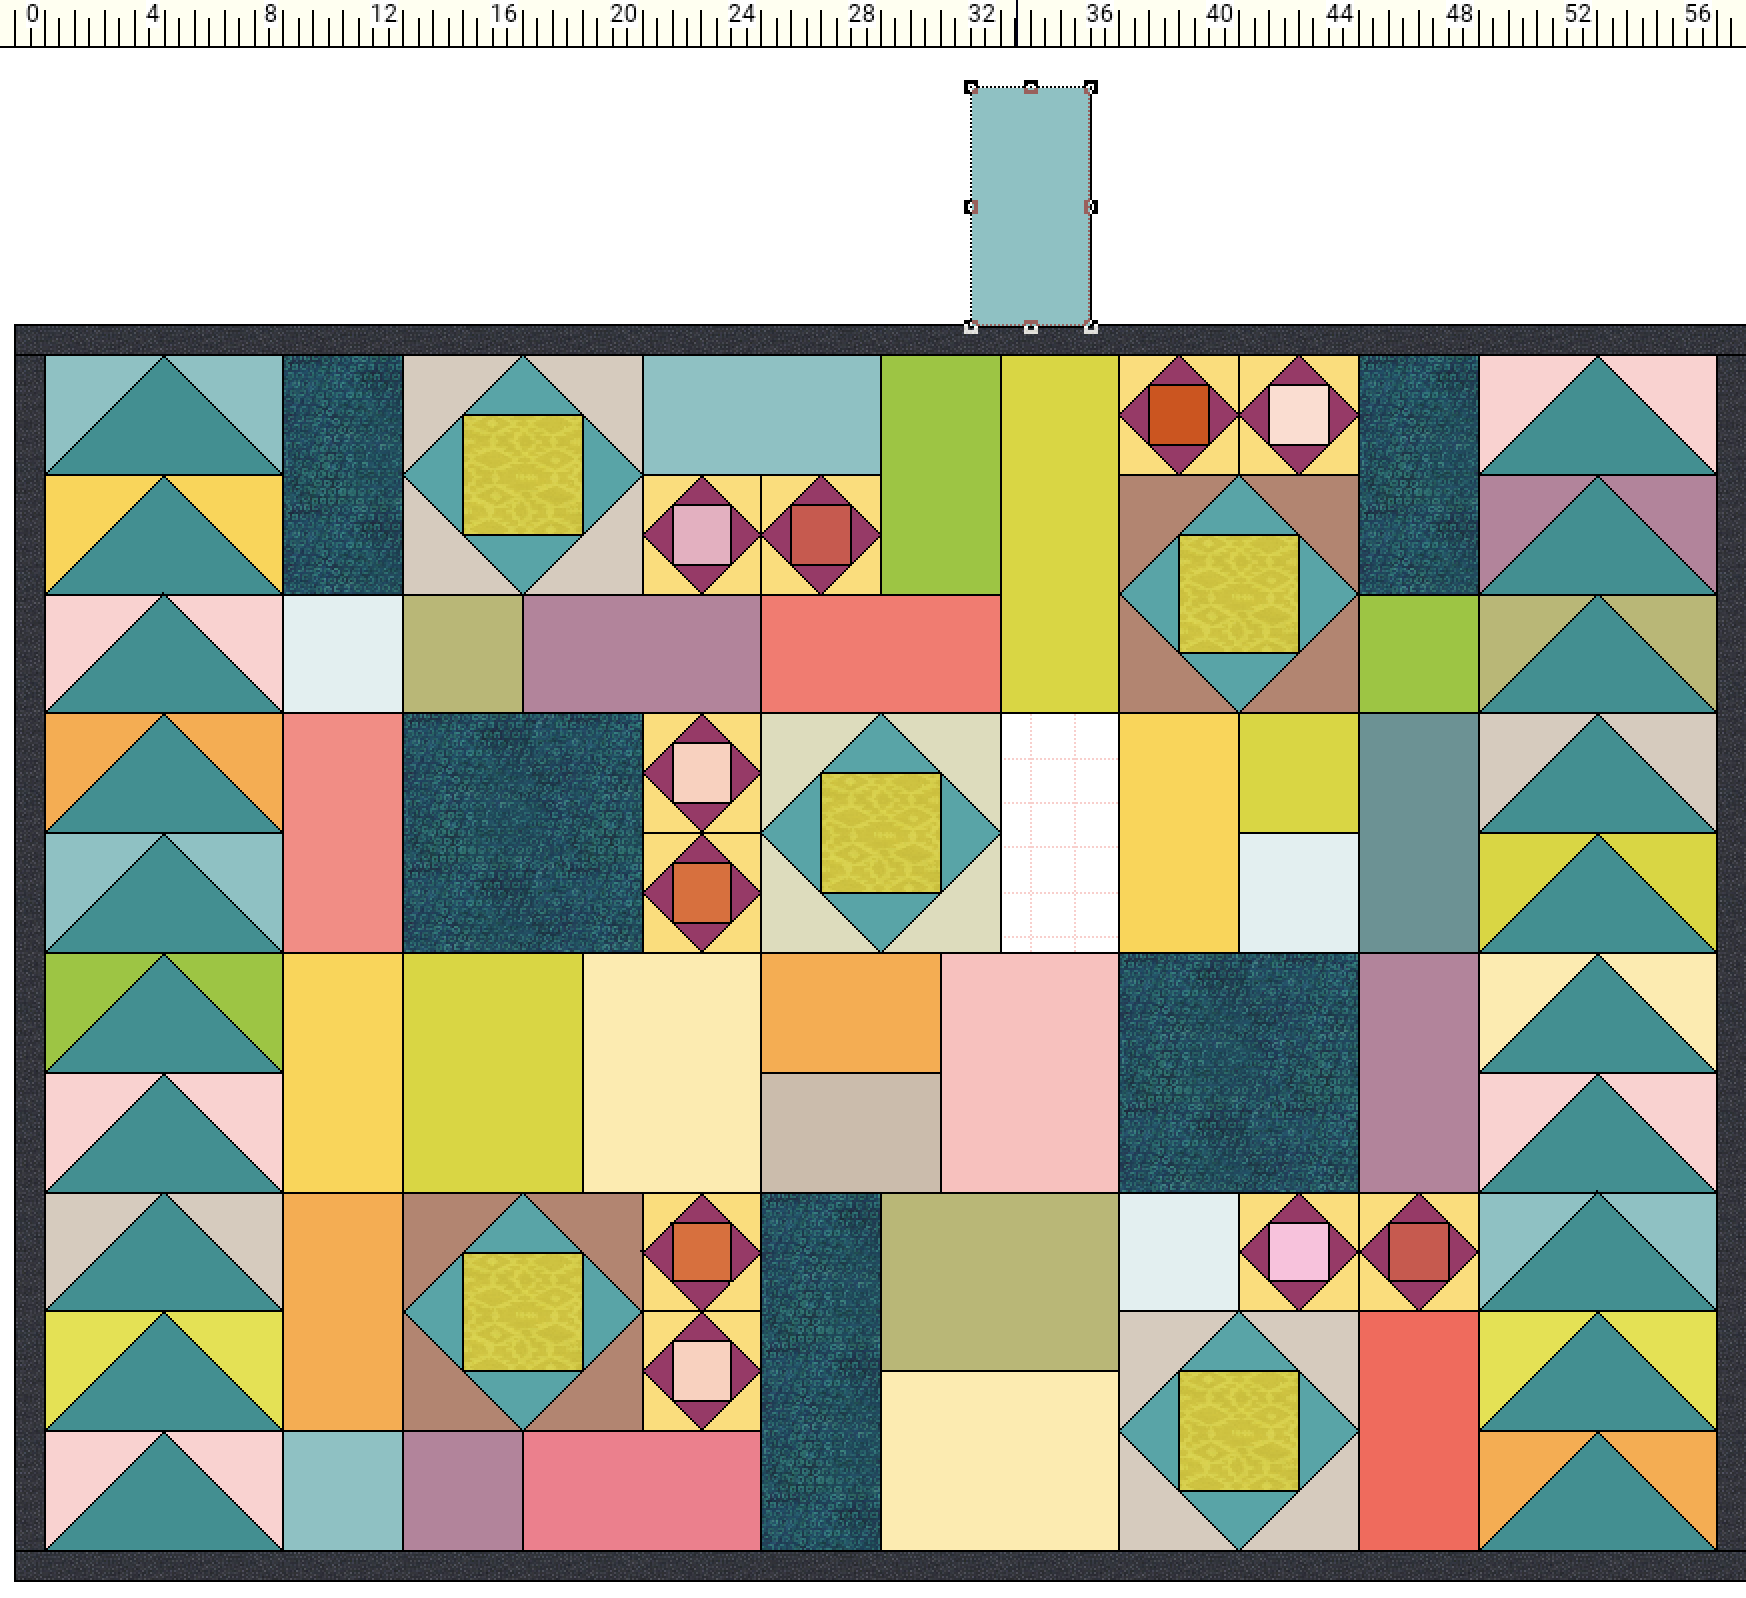
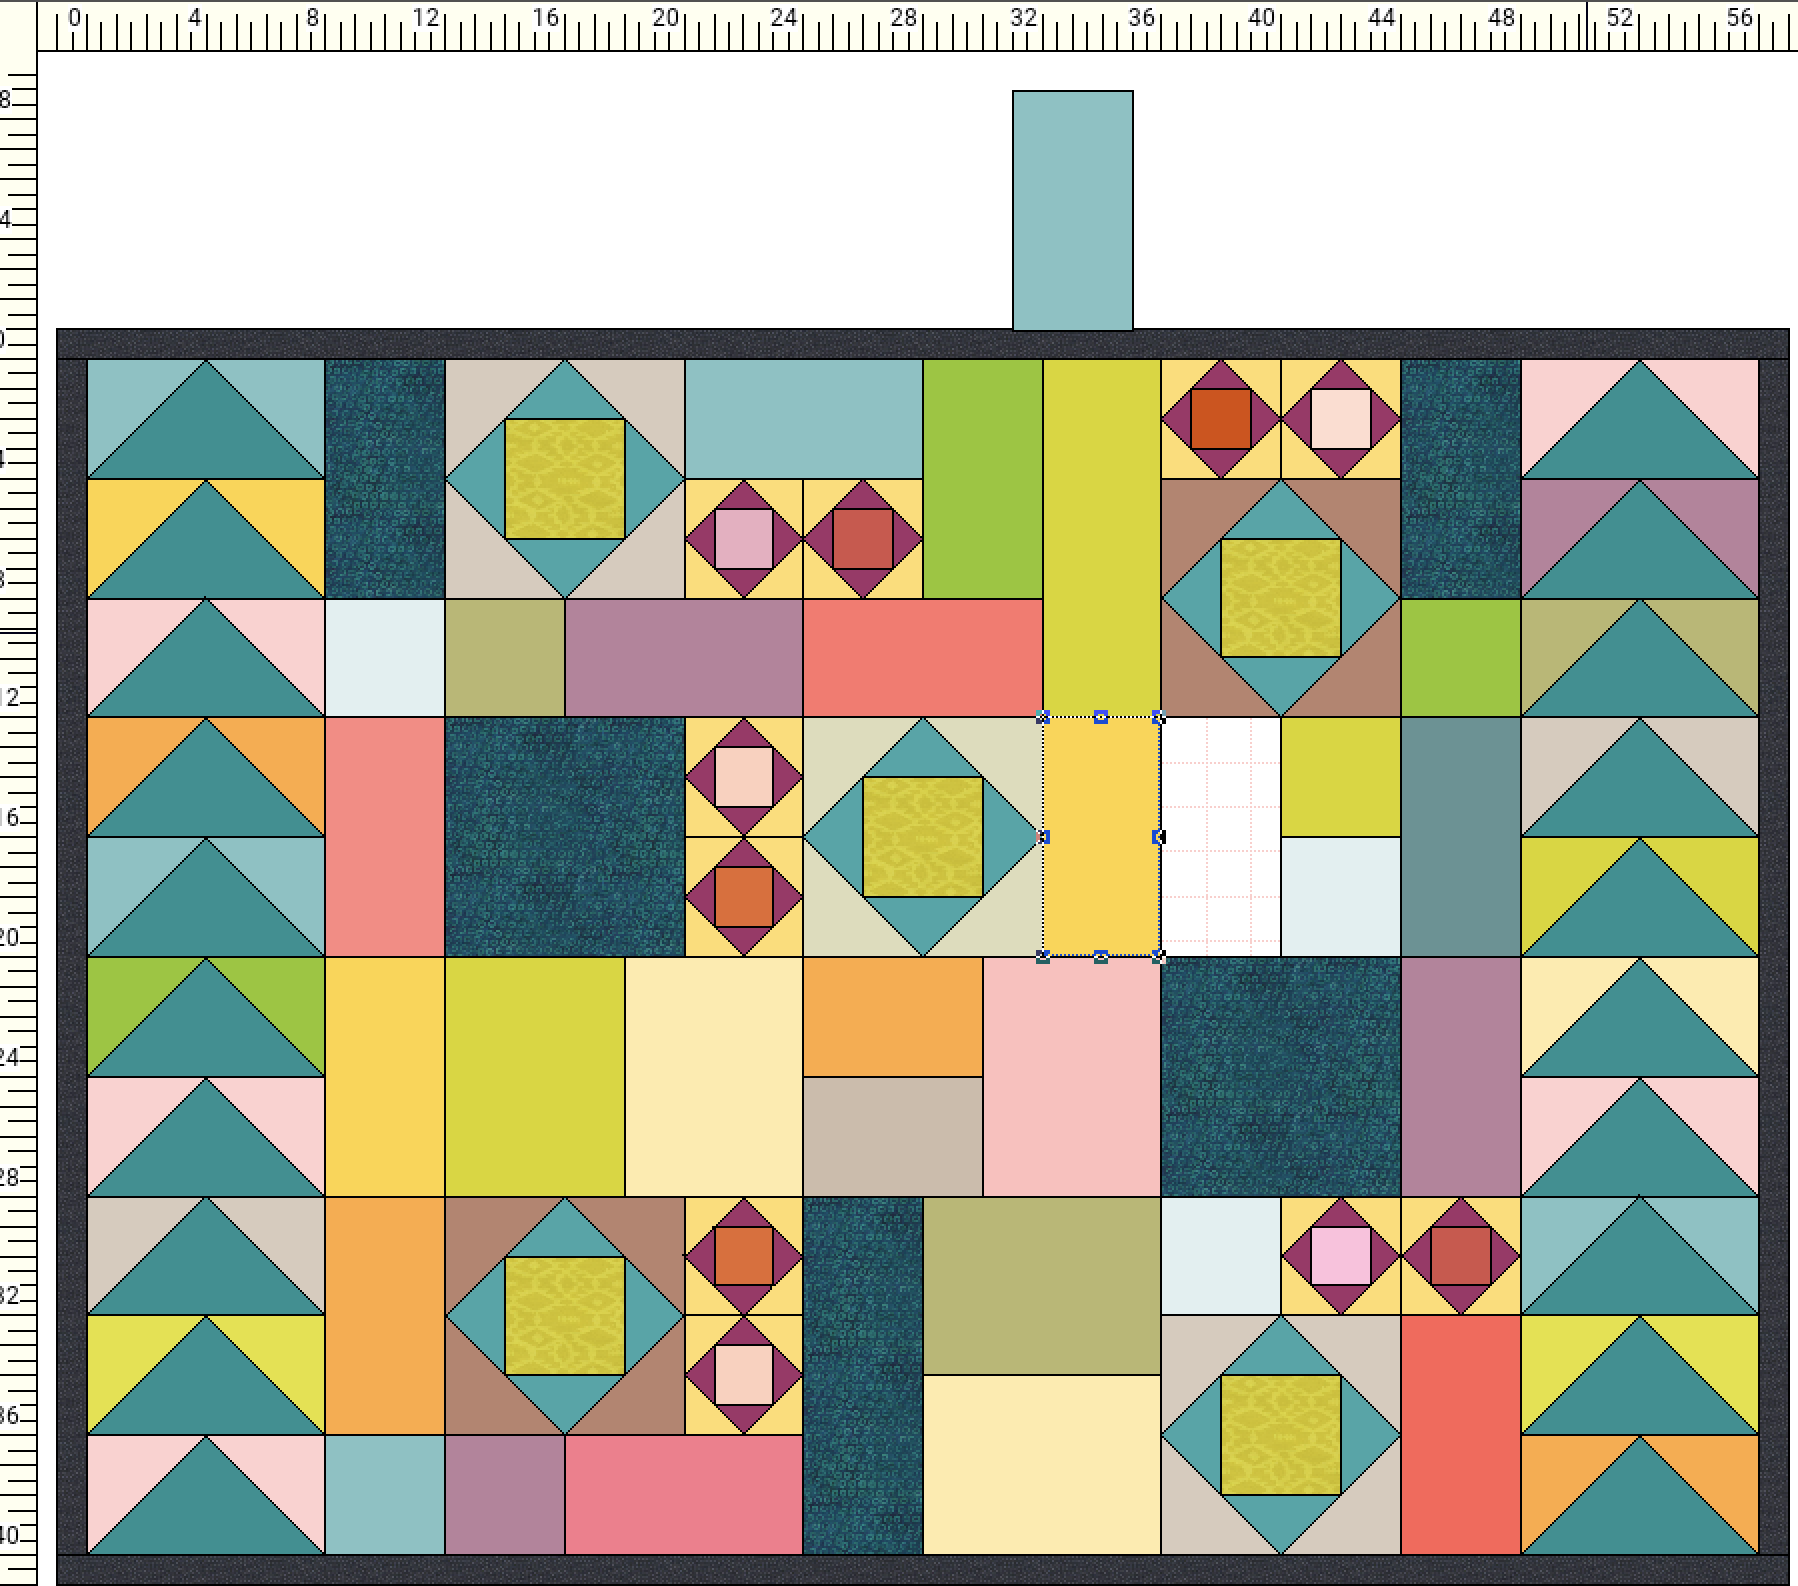
I moved a number of blocks around as I was designing the quilt. I found I could move one block off the work area, shift another block into that space and then move the first block back into the newly open space. It reminded me of those little plastic puzzles I had as a child where you move pieces around in a plastic square to put them into some sort of order to to spell words!
In the example below, I want to swap the location of the teal and gold rectangular blocks in the right side of the middle row. I lifted the teal block out of the quilt, moved over the gold block to the left and put the teal block in the place where the gold block had been originally. How cool is that? (I could also have just recolored them, but I wanted to show that you really can move blocks around very easily in this program).
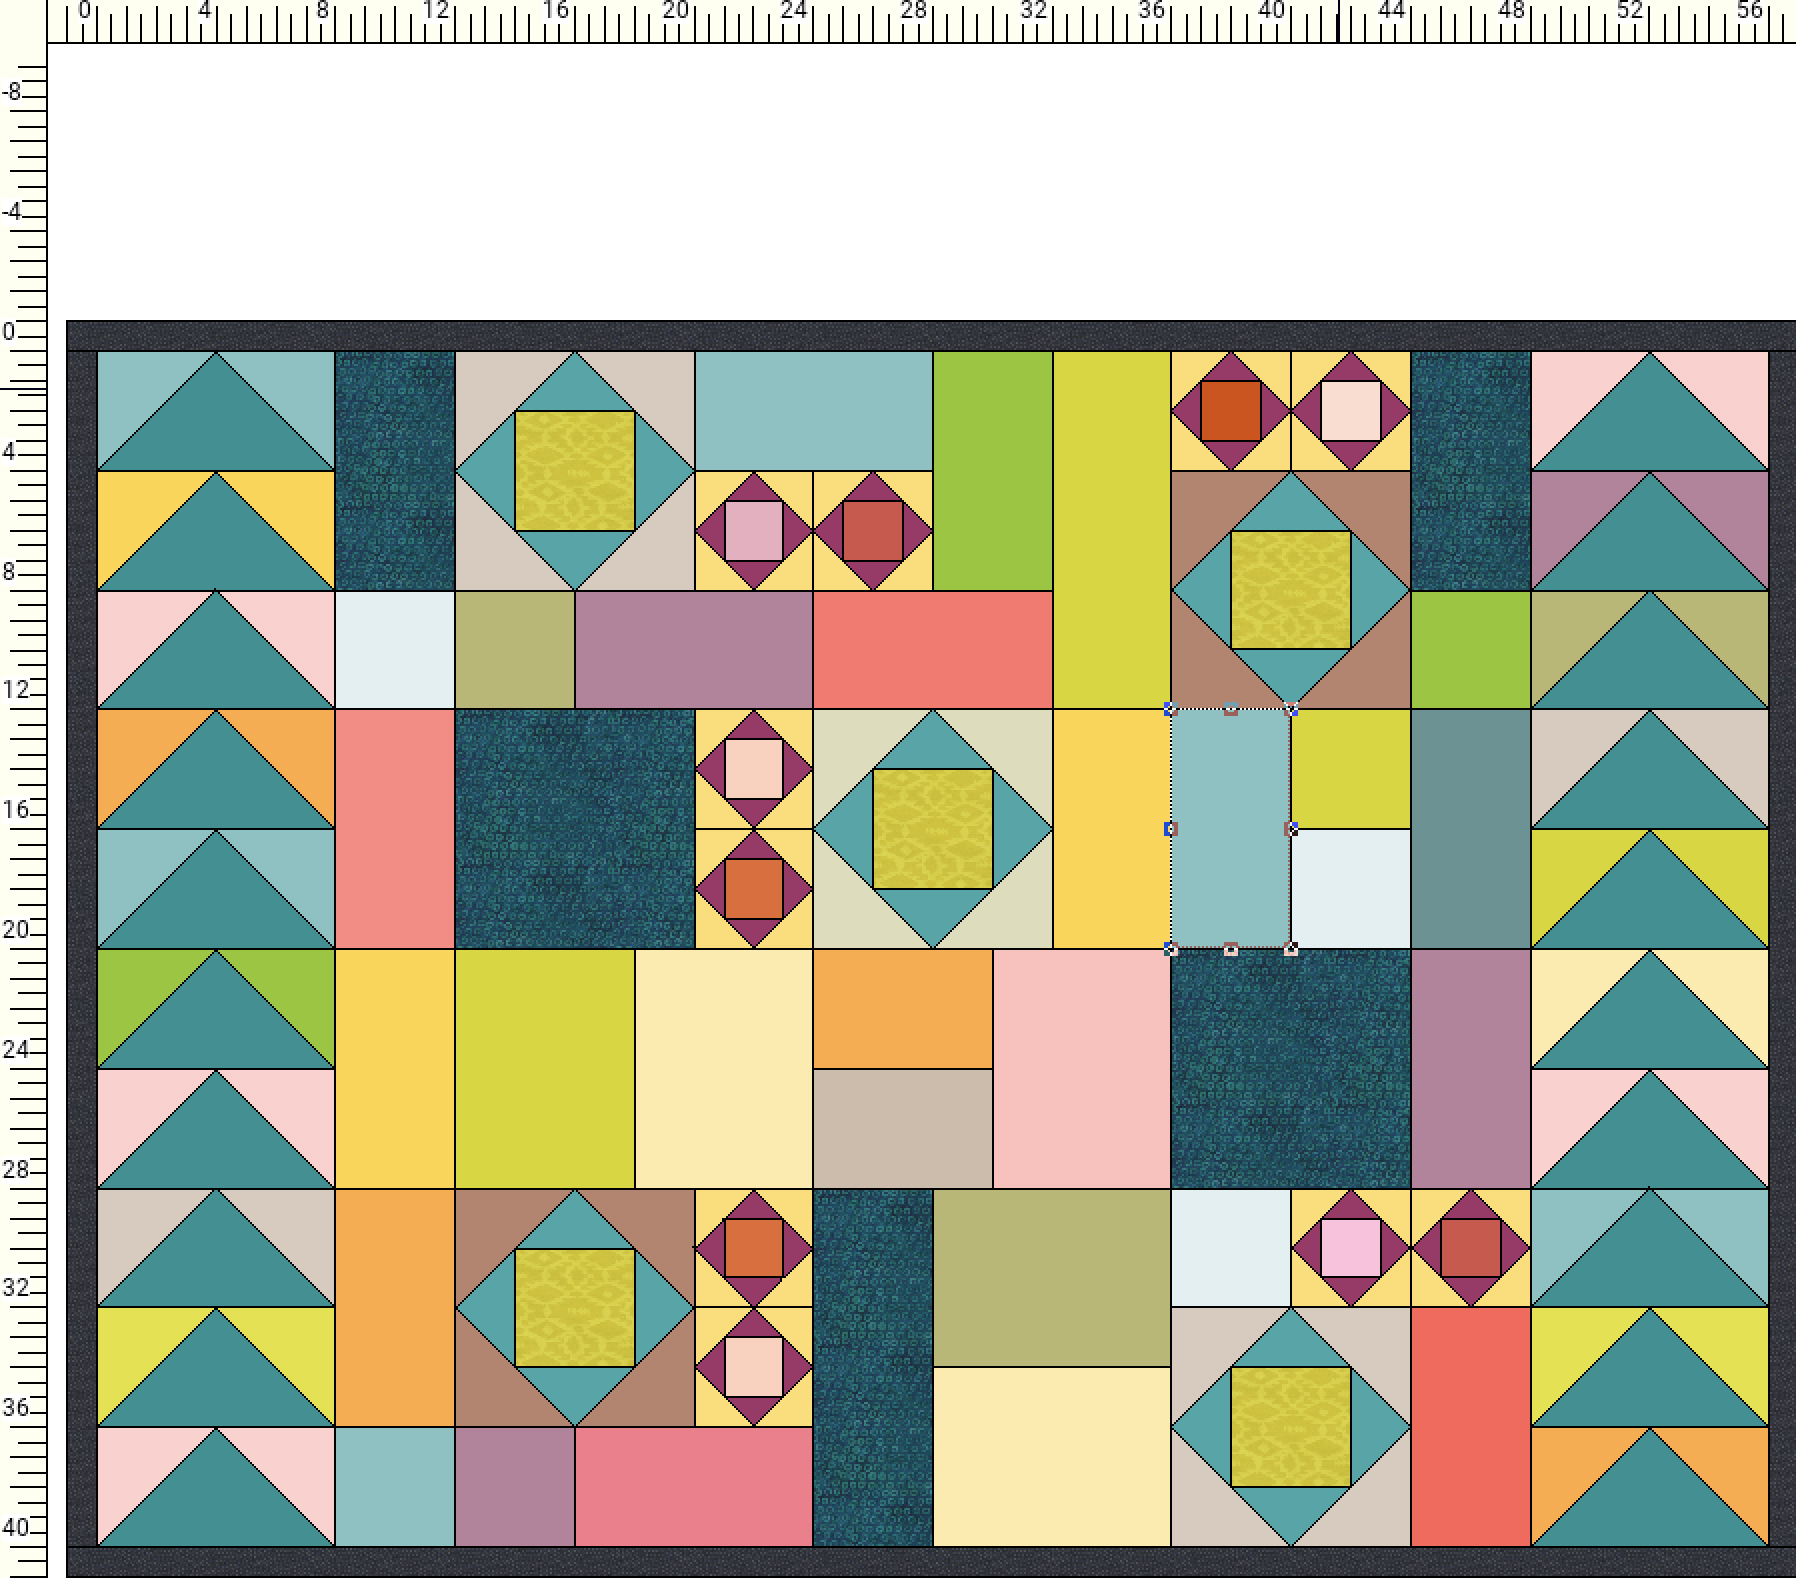
The colors of the actual quilt won't be exactly the same as the colors in this pattern. But they are close enough so that I know I'll like the design and color distribution.
Time to cut and start sewing!
* (The top and bottom strips are the wide ones).
Addendum: I just realized today, June 22, 2018, that this quilt design was obviously inspired by a quilt designed by Sam Hunter. For details, see the addendum at the end of my next post, "Flying Economy" Finished Quilt.