
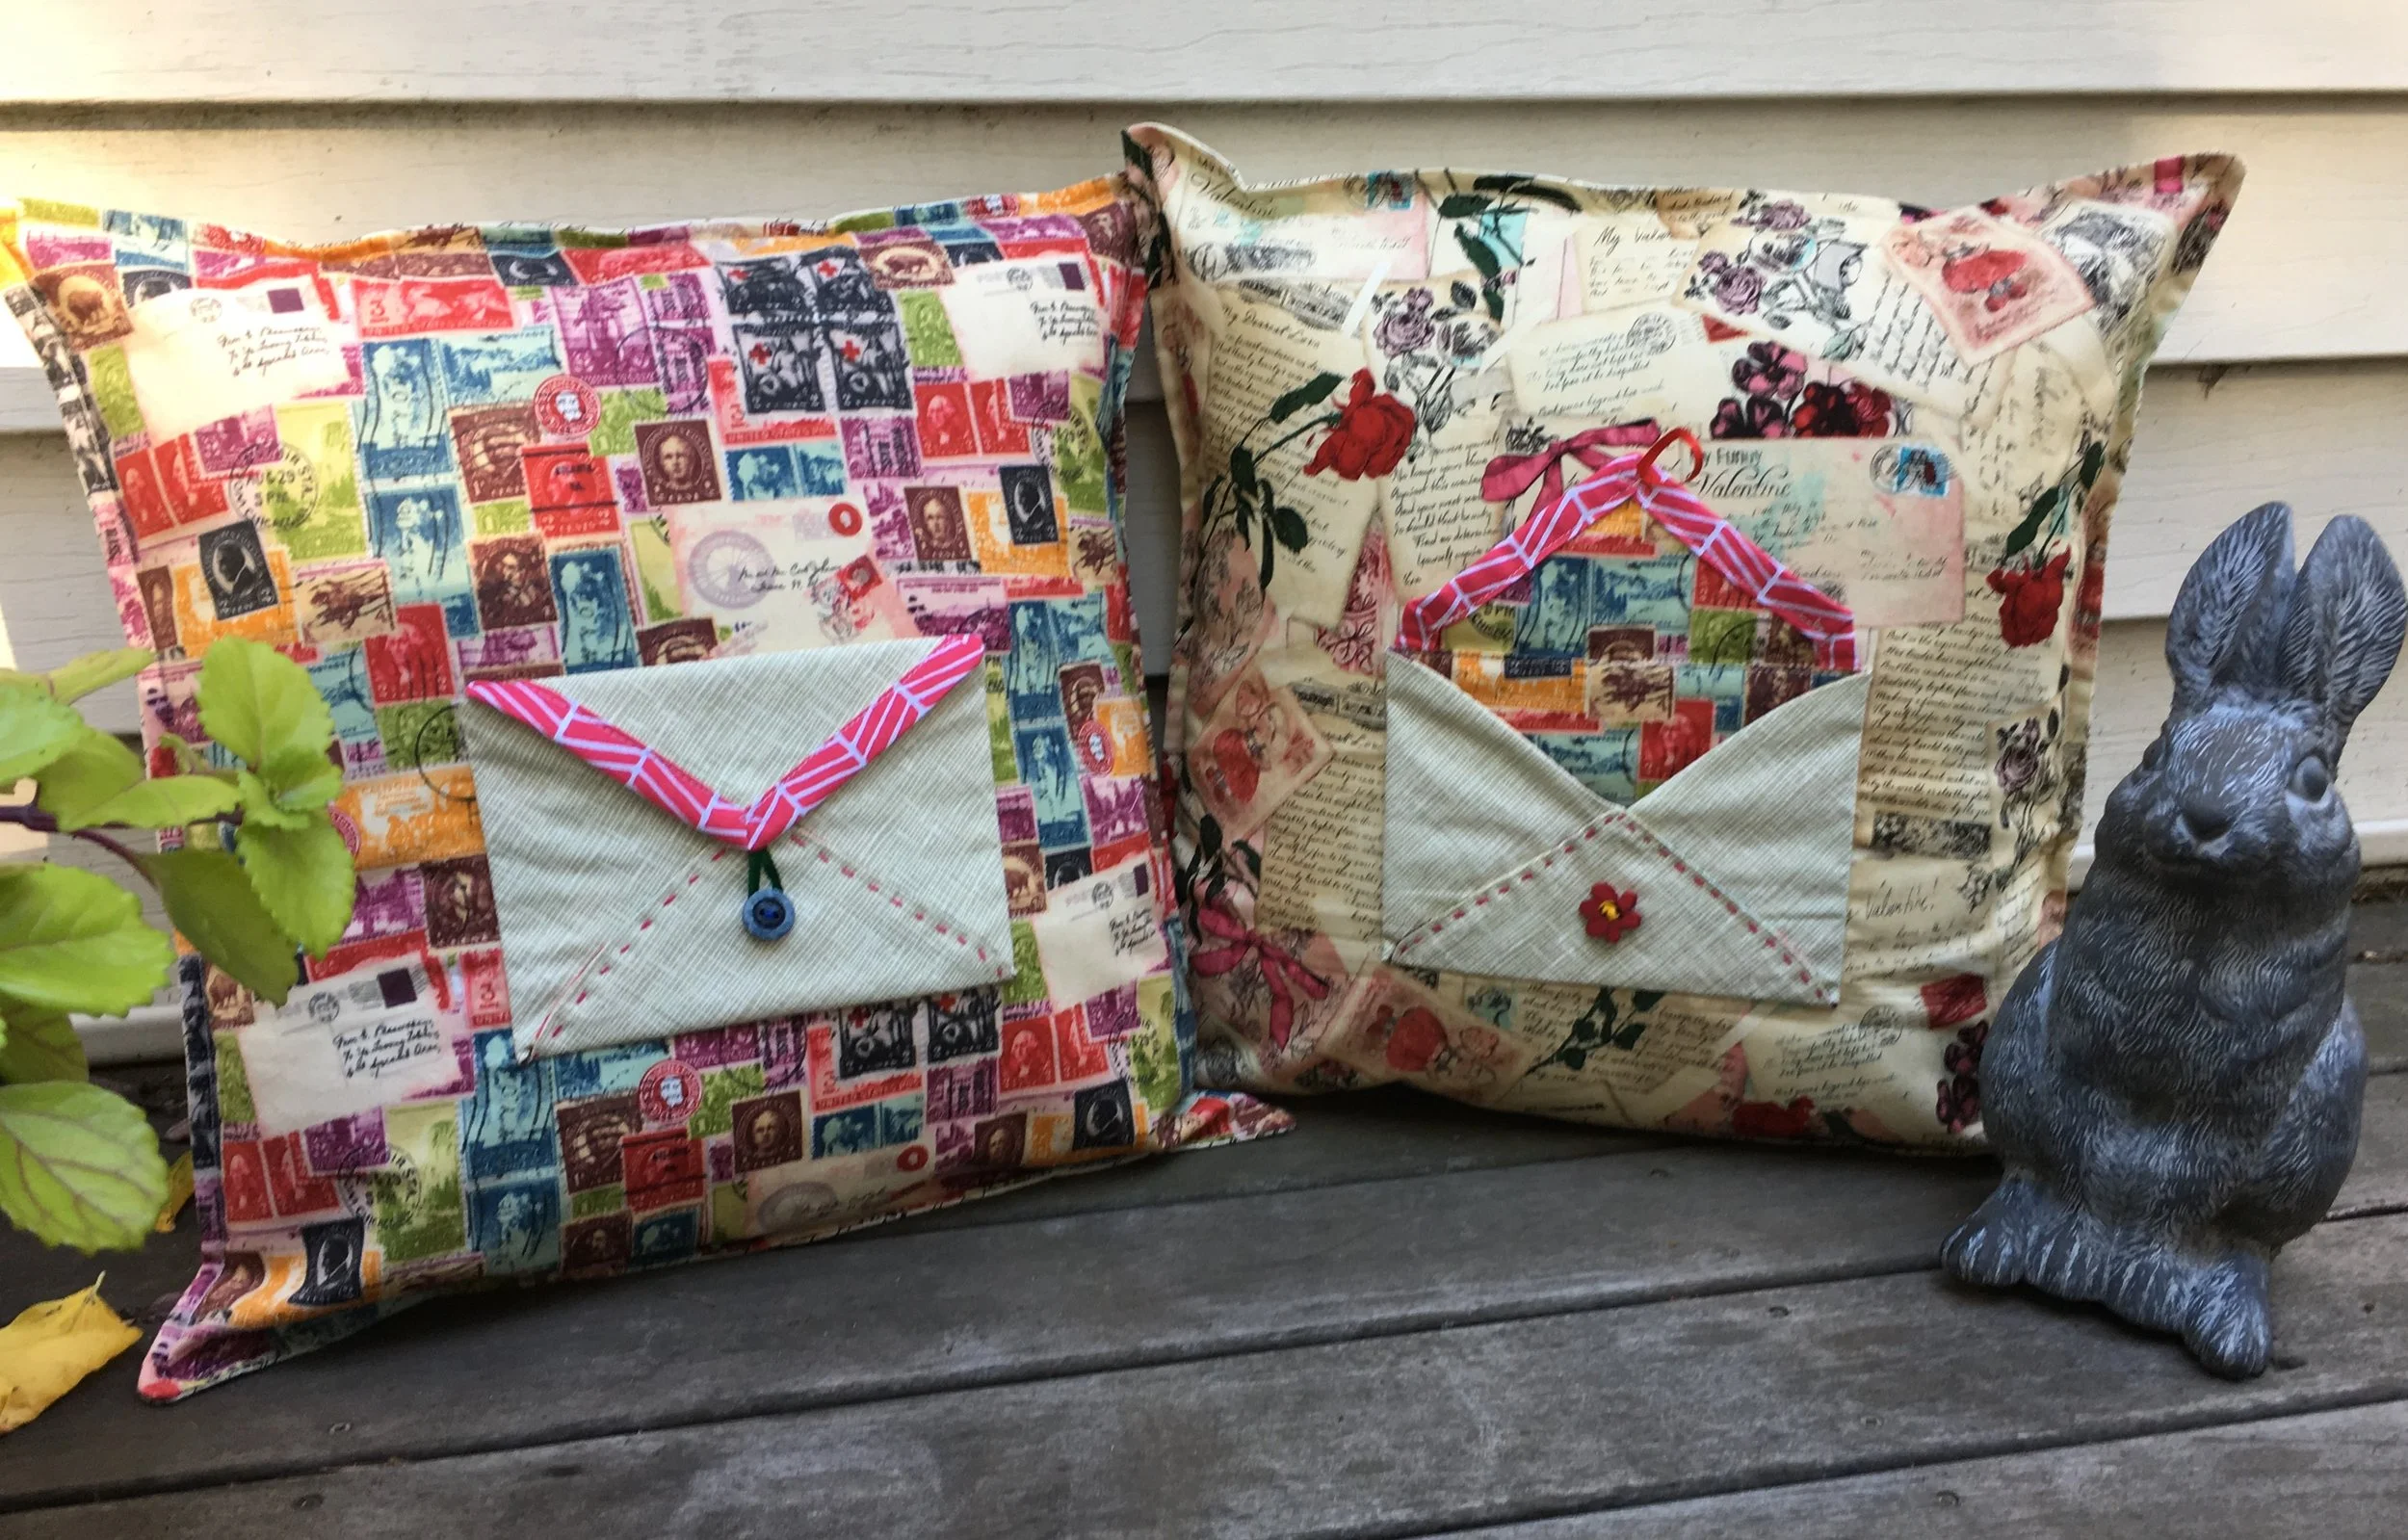
"Leave me a Message" Envelope Pillows
I've been collecting travel/stamp fabric thinking I would use them for a quilt. But when I saw a video on Creativebug.com showing how to make envelopes from magazine pages I realized I could make fabric envelopes! And what could be more fun than sewing an envelope on a pillow? I'm thinking the pillow could be left on someone's bed or chair with a message tucked in the envelope for a special day--sort of a variation of putting a message in a lunch box!
So here's a TUTORIAL so you can make your own "Leave me a Message" envelope Pillow.
Materials:
- 14 inch square purchased pillow form. (You could also make your own).
- Paper envelope to use a template--at least 4 x 6 inches or use larger a greeting card envelope.
- Plain paper to make a pattern for your fabric envelope
- 1 Fat quarter of a fabric for the pillow front
- 1 Fat quarter for the inside of the envelope
- 1 Fat quarter for the exterior of the envelope
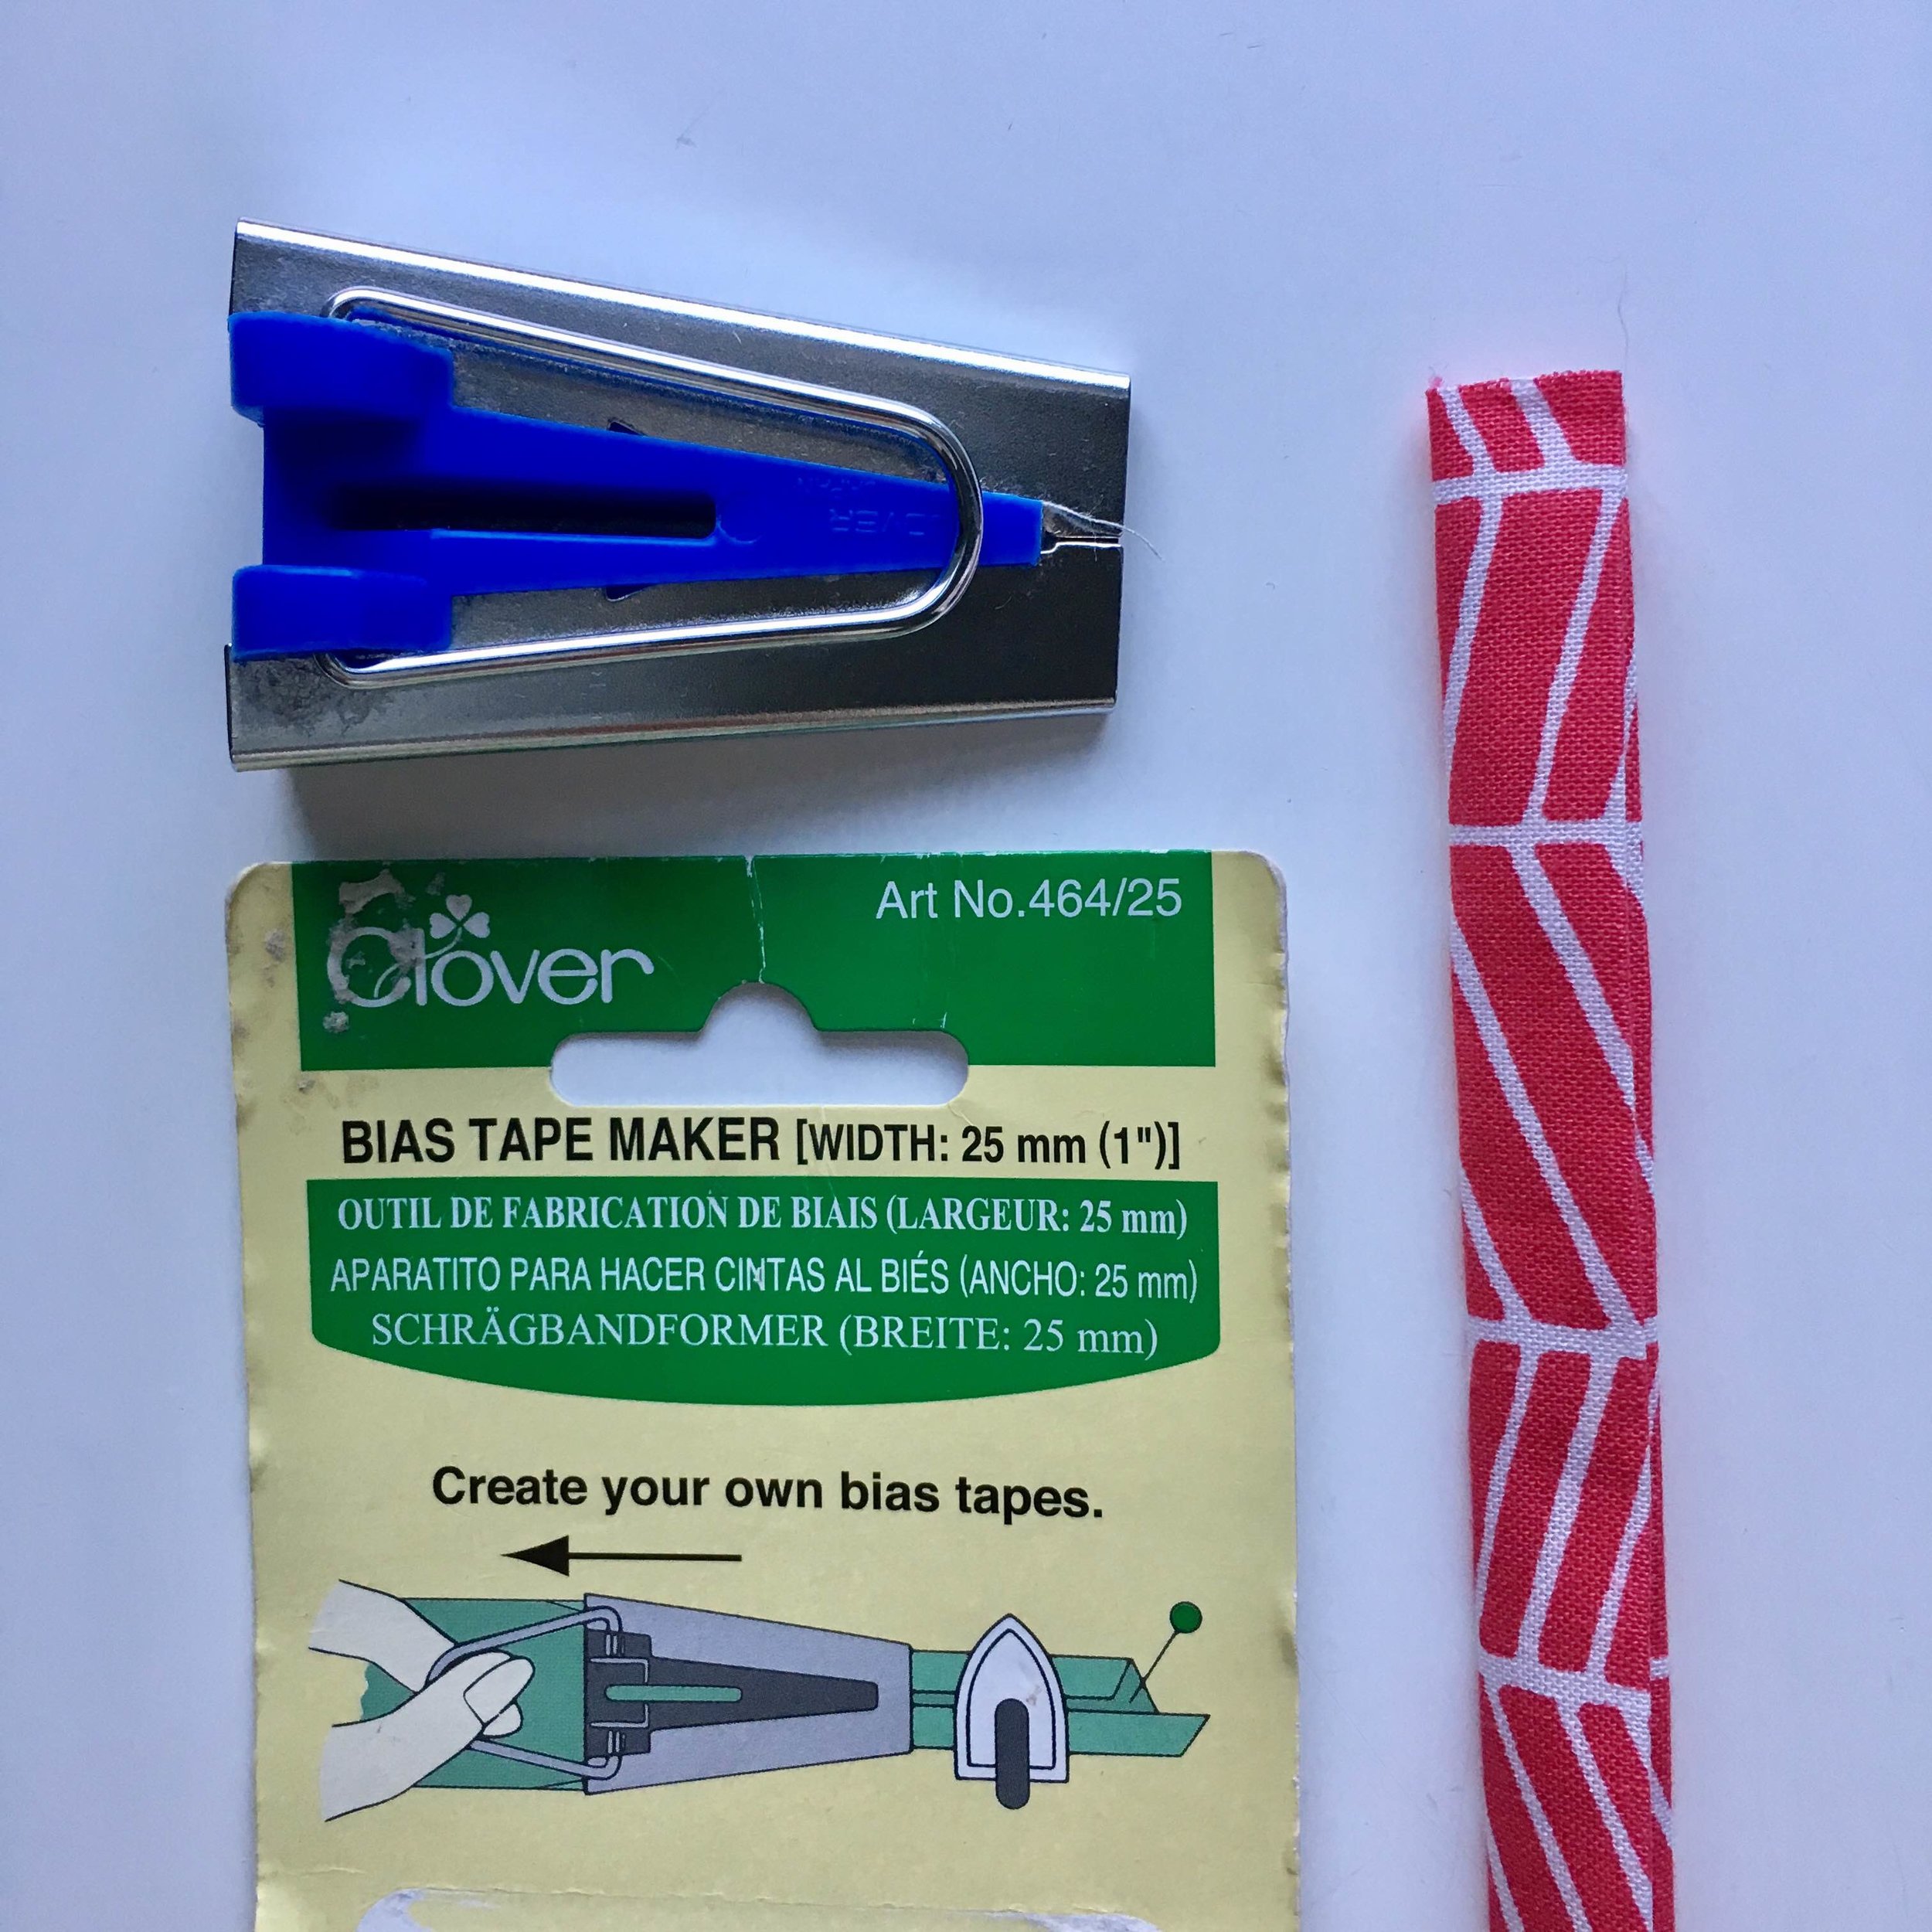
- 1/4 inch pre-made bias double fold bias tape or 2 1/2 inch wide strip of fabric, at least 12 inches long. (Does not need to cut on the bias). You can make a regular quilt binding or use a Clover Tape Maker: Width 25mm, 1" to make a double fold tape
- 1/2 yard of fabric for the back of the pillow
- Matching sewing thread
- Pearle cotton #8 contrasting color for hand stitching on envelope
- Chenille needle, or needle with eye wide enough for the Pearle cotton
- 1 decorative button
- 1/8 inch ribbon to make loop to close the envelope
- Tailor's chalk or other non-permanent marking pencil or pen
- 16 1/2 inch square quilting ruler--helpful but not necessary
- Sewing machine with open toe foot. A walking foot also very helpful but not mandatory.
Instructions:
- Cut one 15 1/2 inch square for the front of the pillow
- Cut two 10 1/2 inch x 15 1/2 inch rectangles for the back of the pillow
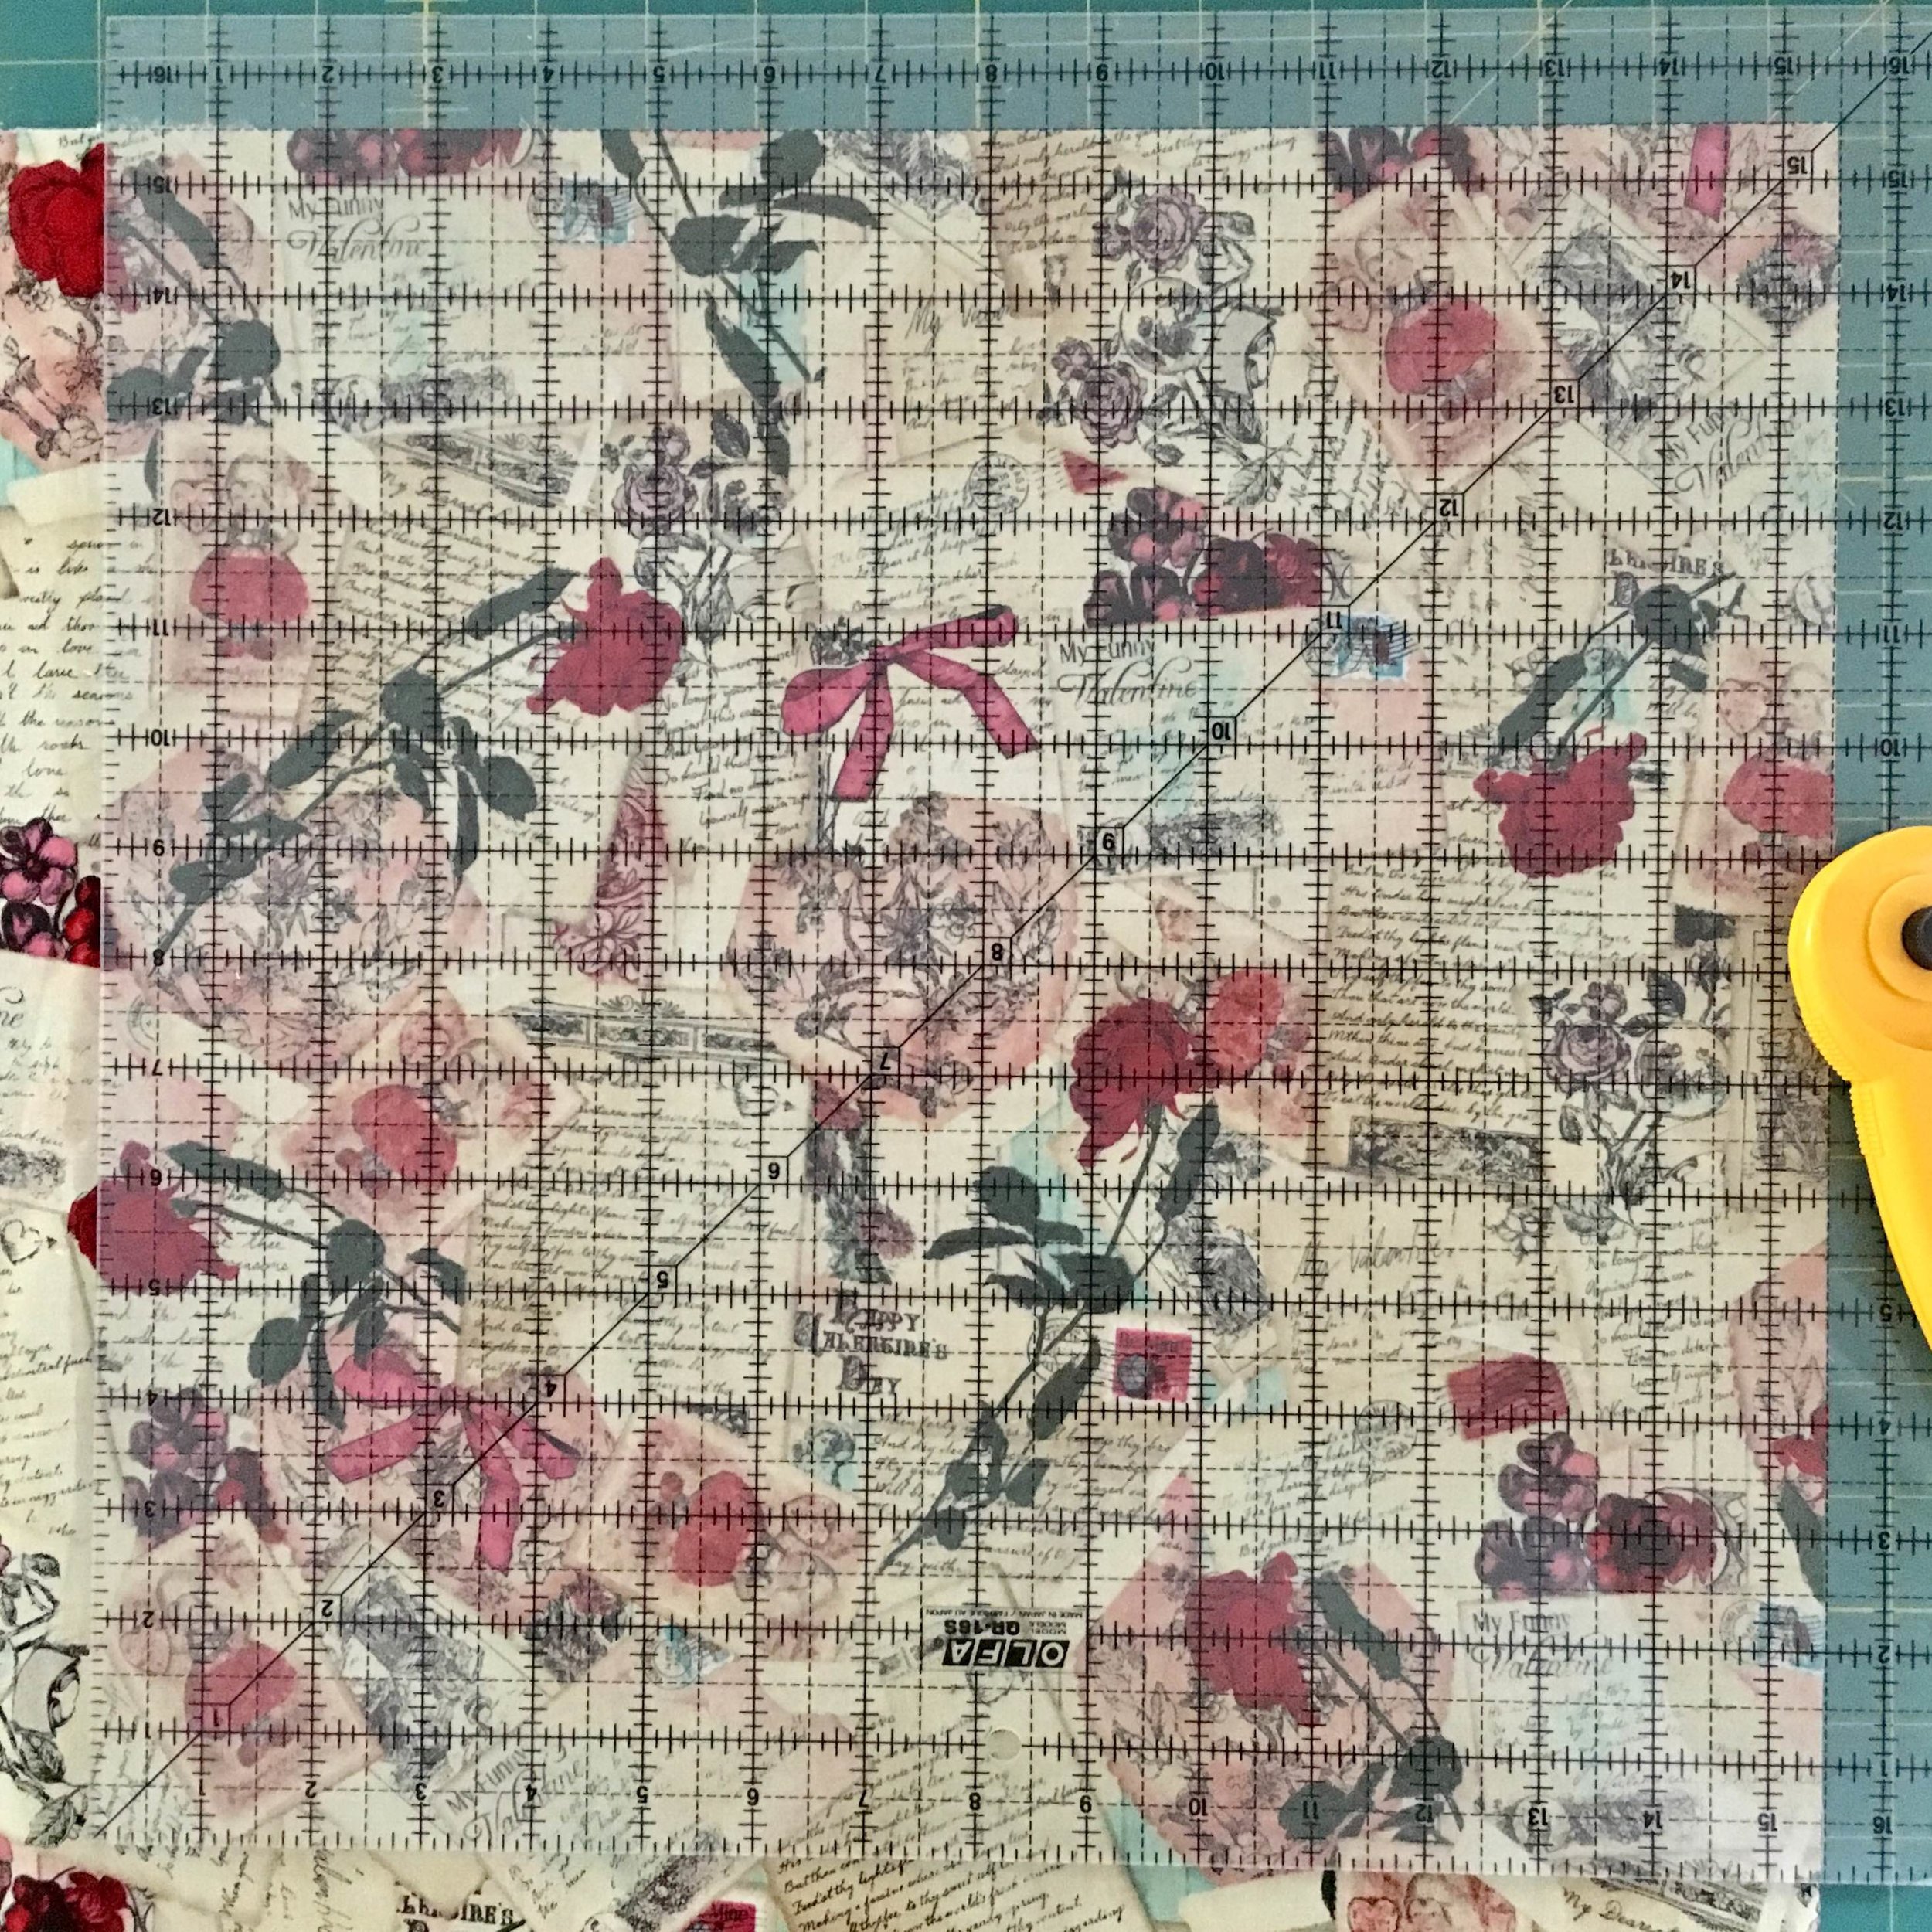
Using a quilting ruler to cut the cover
- Carefully take a paper envelope apart and smooth it flat
- Cut off the envelope flap along the fold line
- Lay the two envelope pieces on a plain piece of paper. You may need to tape two pieces of paper together to make a piece large enough for the body of the the envelope.
- Trace around the body of the envelope and around the flap.
- Now draw a 1/4 inch seam allowance around all sides of both the envelope body but ONLY the lower edge of the flap on your pattern.
- Mark the fold lines from the template envelope on your pattern
- SAVE the paper envelope used as the template. It helps to refer back to it when you fold your fabric envelope.
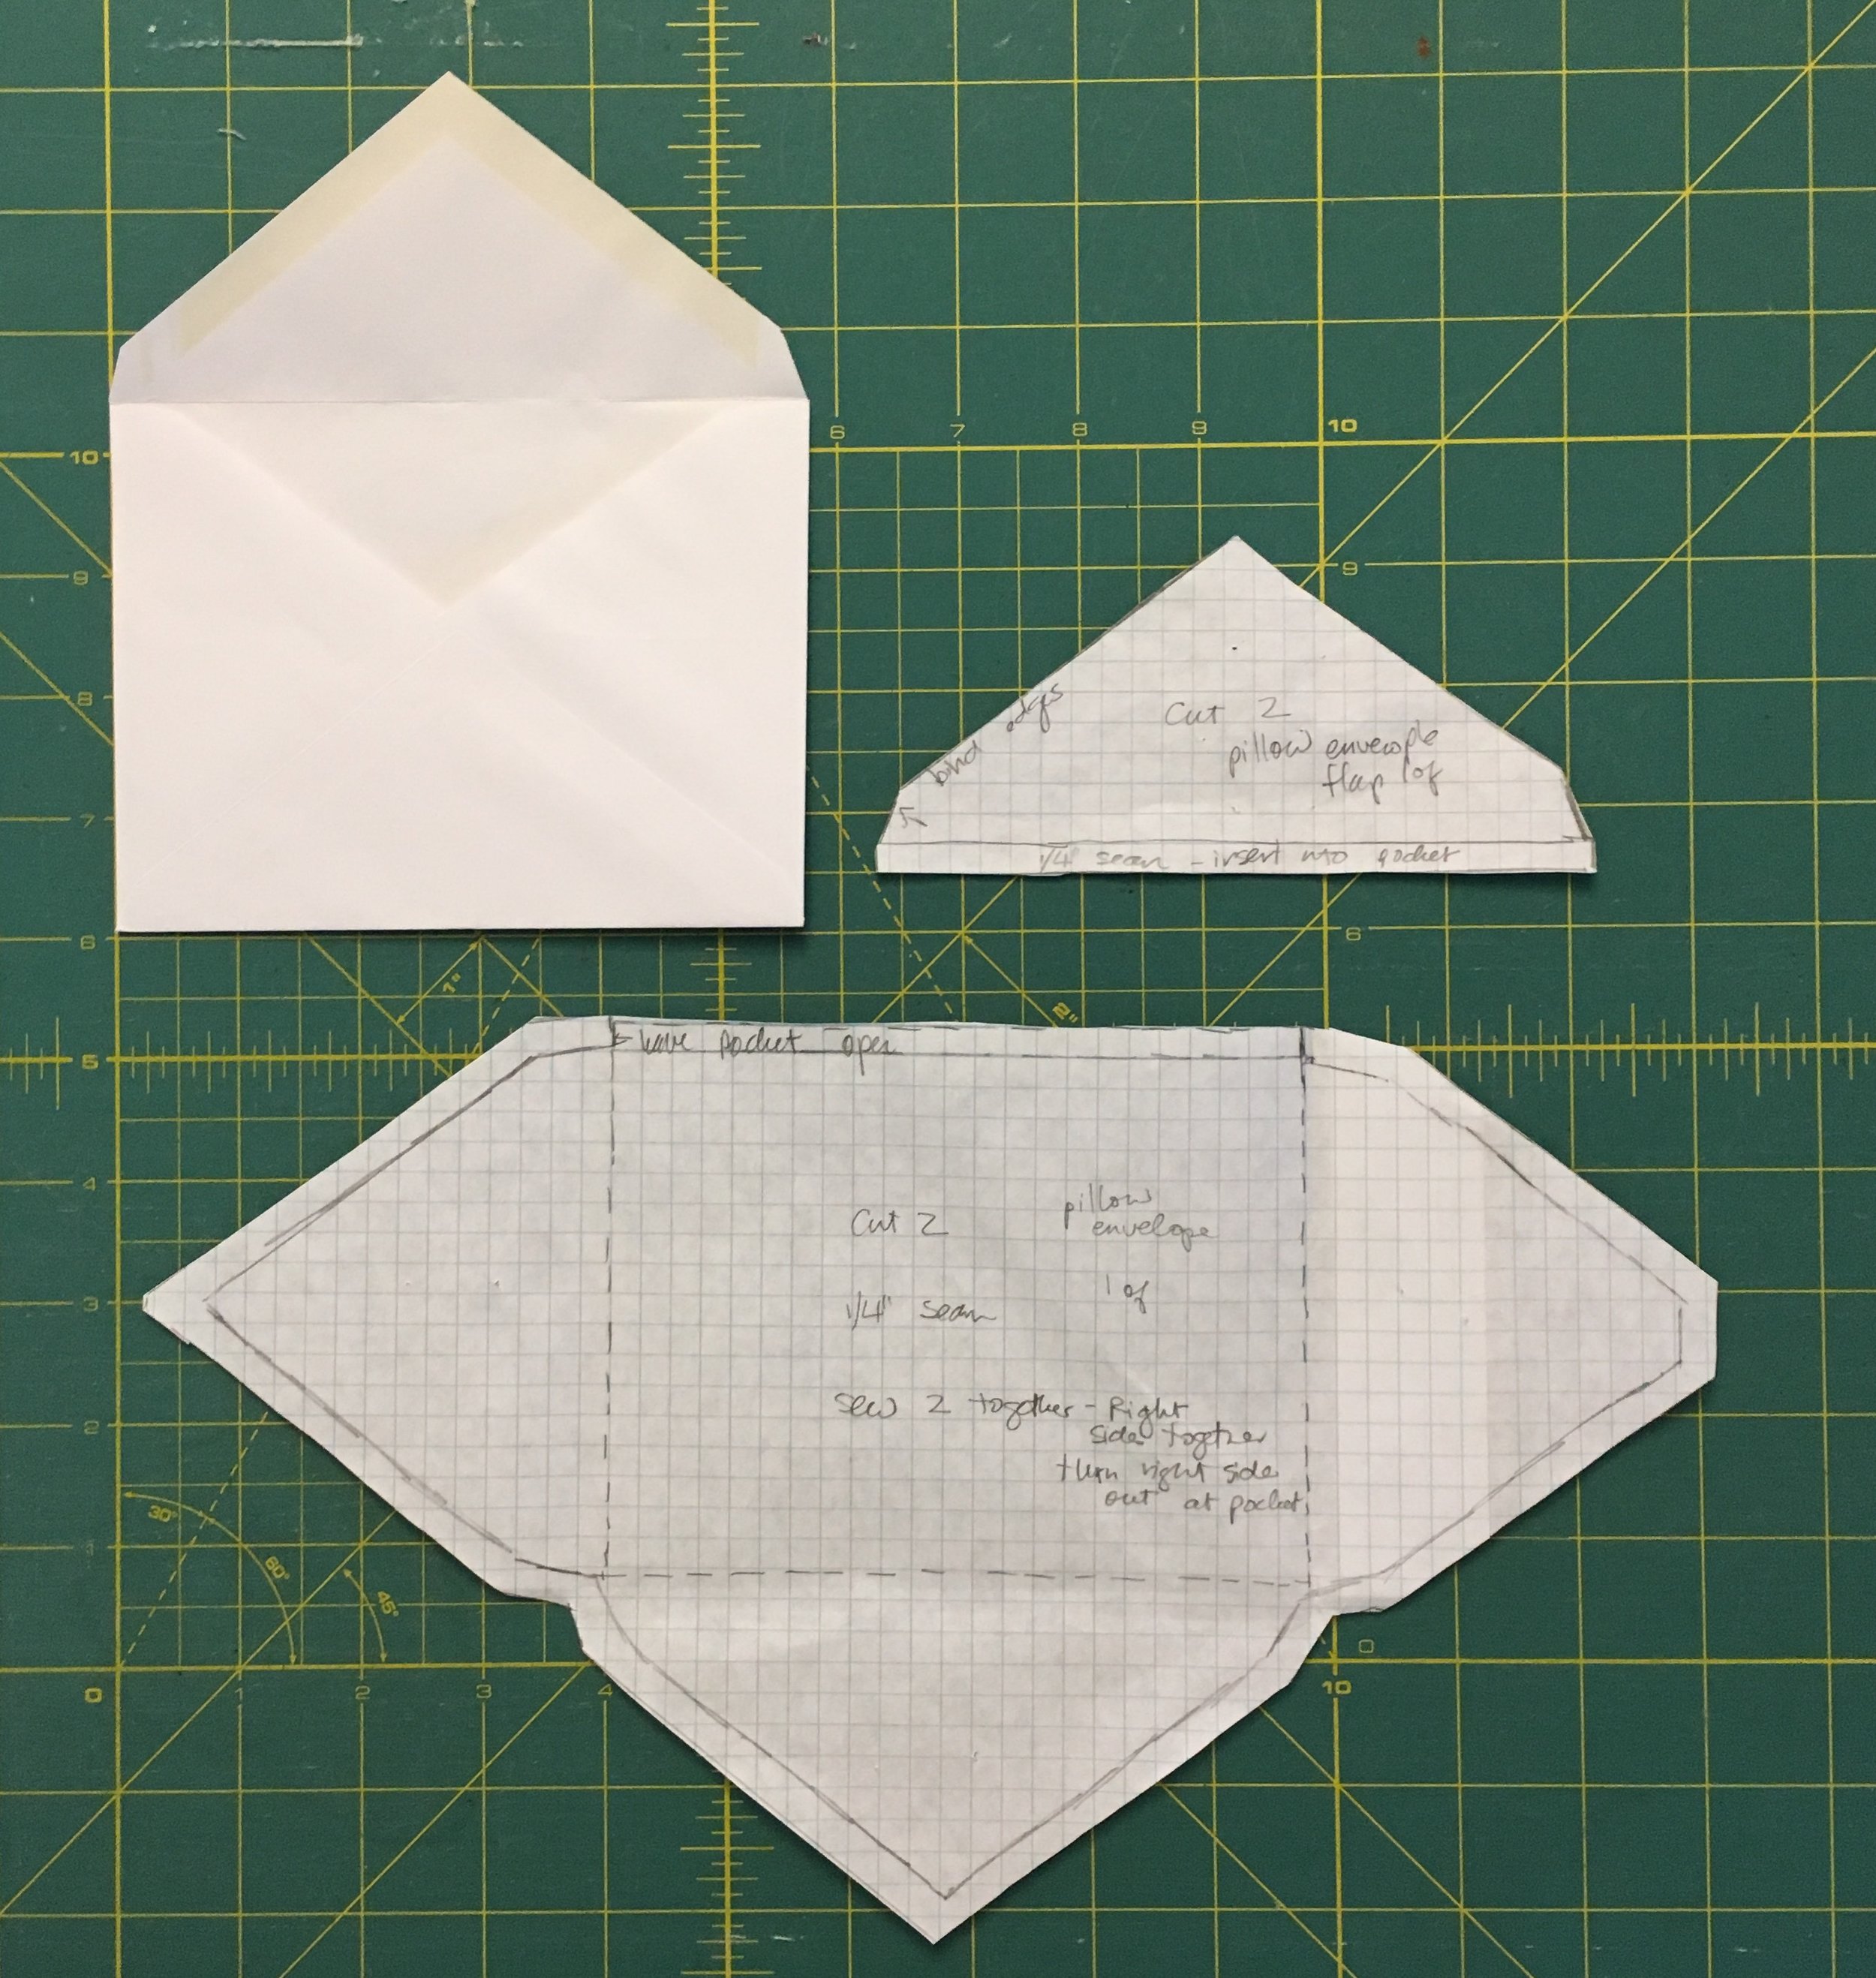
Envelope pattern pieces and intact template envelope
- Place fabric for inside of envelope and outside of envelope RIGHT SIDES together. Pin on the 2 pattern pieces. Cut out the envelope pieces.
- Mark where the two fold lines will be at the top edge of the envelope body
- Using a 1/4 inch seam, sew the two parts of the envelope BODY together, leaving the top edge between the 2 fold lines OPEN. (The envelope flap will be sewn tucked into this opening later).
- Trim the points on the envelope body and clip notches. Be careful NOT to cut your stitches!
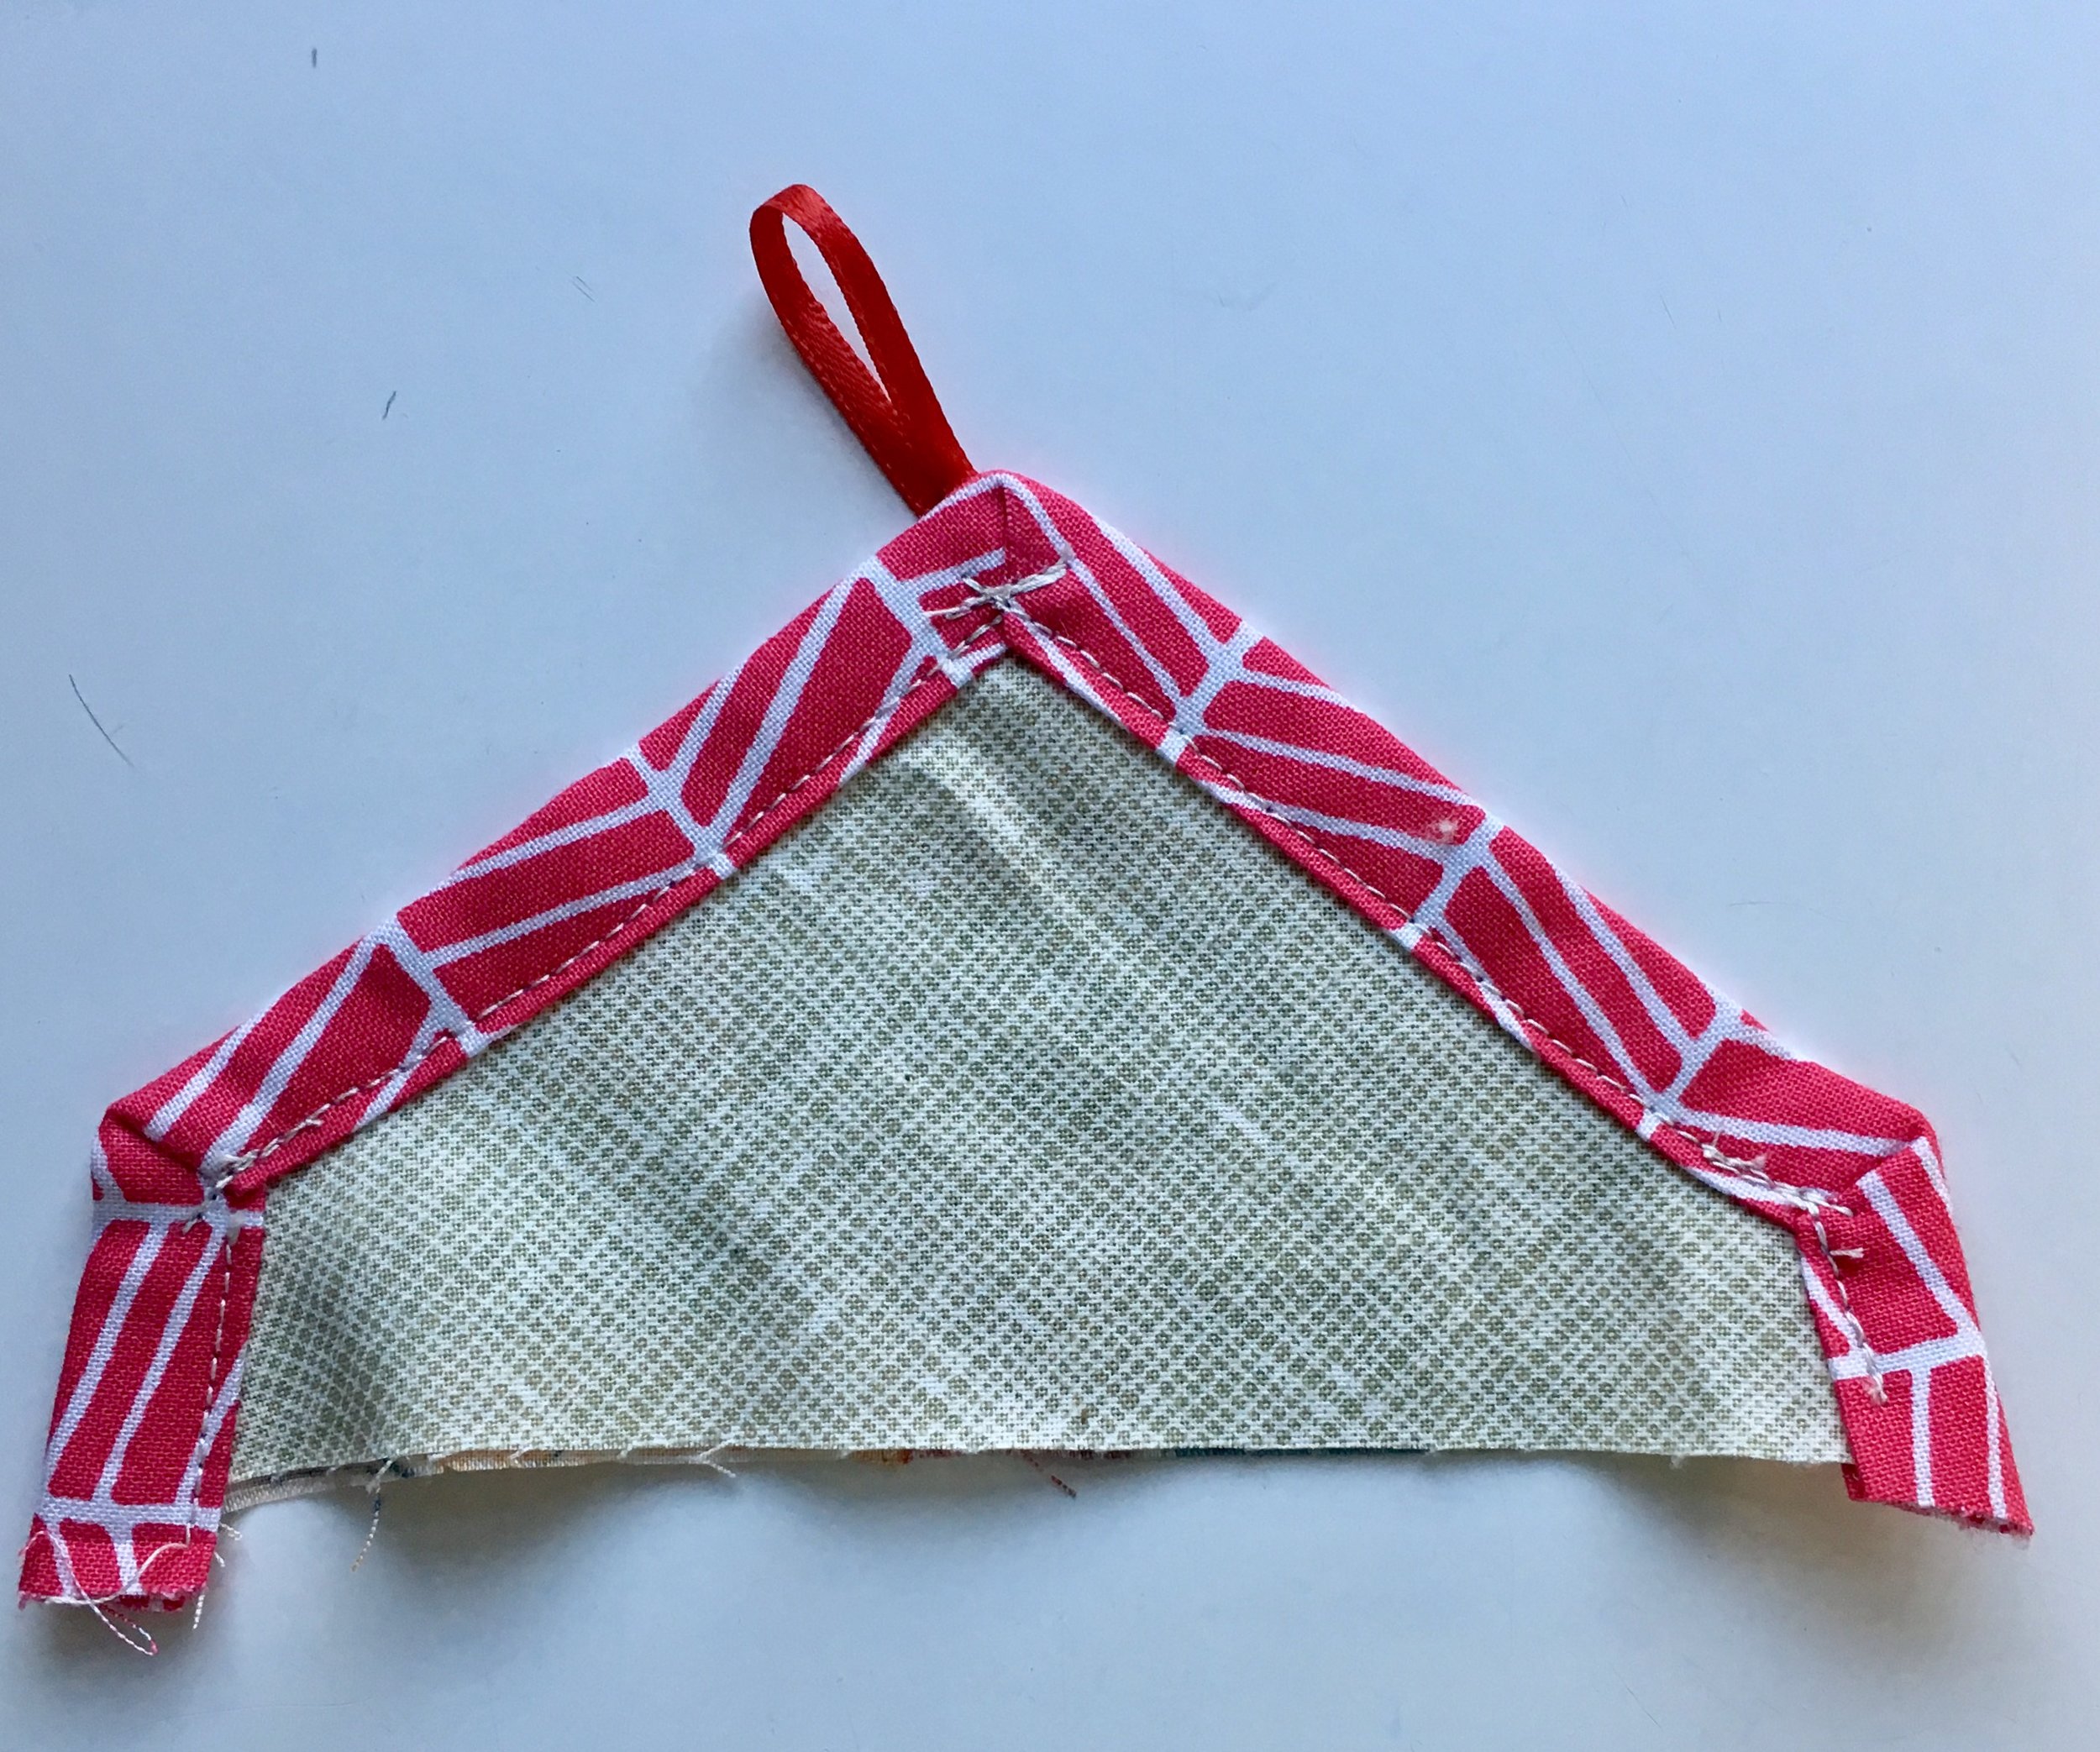
- Turn the envelope body right sides out. Press, turning the raw edges under 1/4 inch at the top.
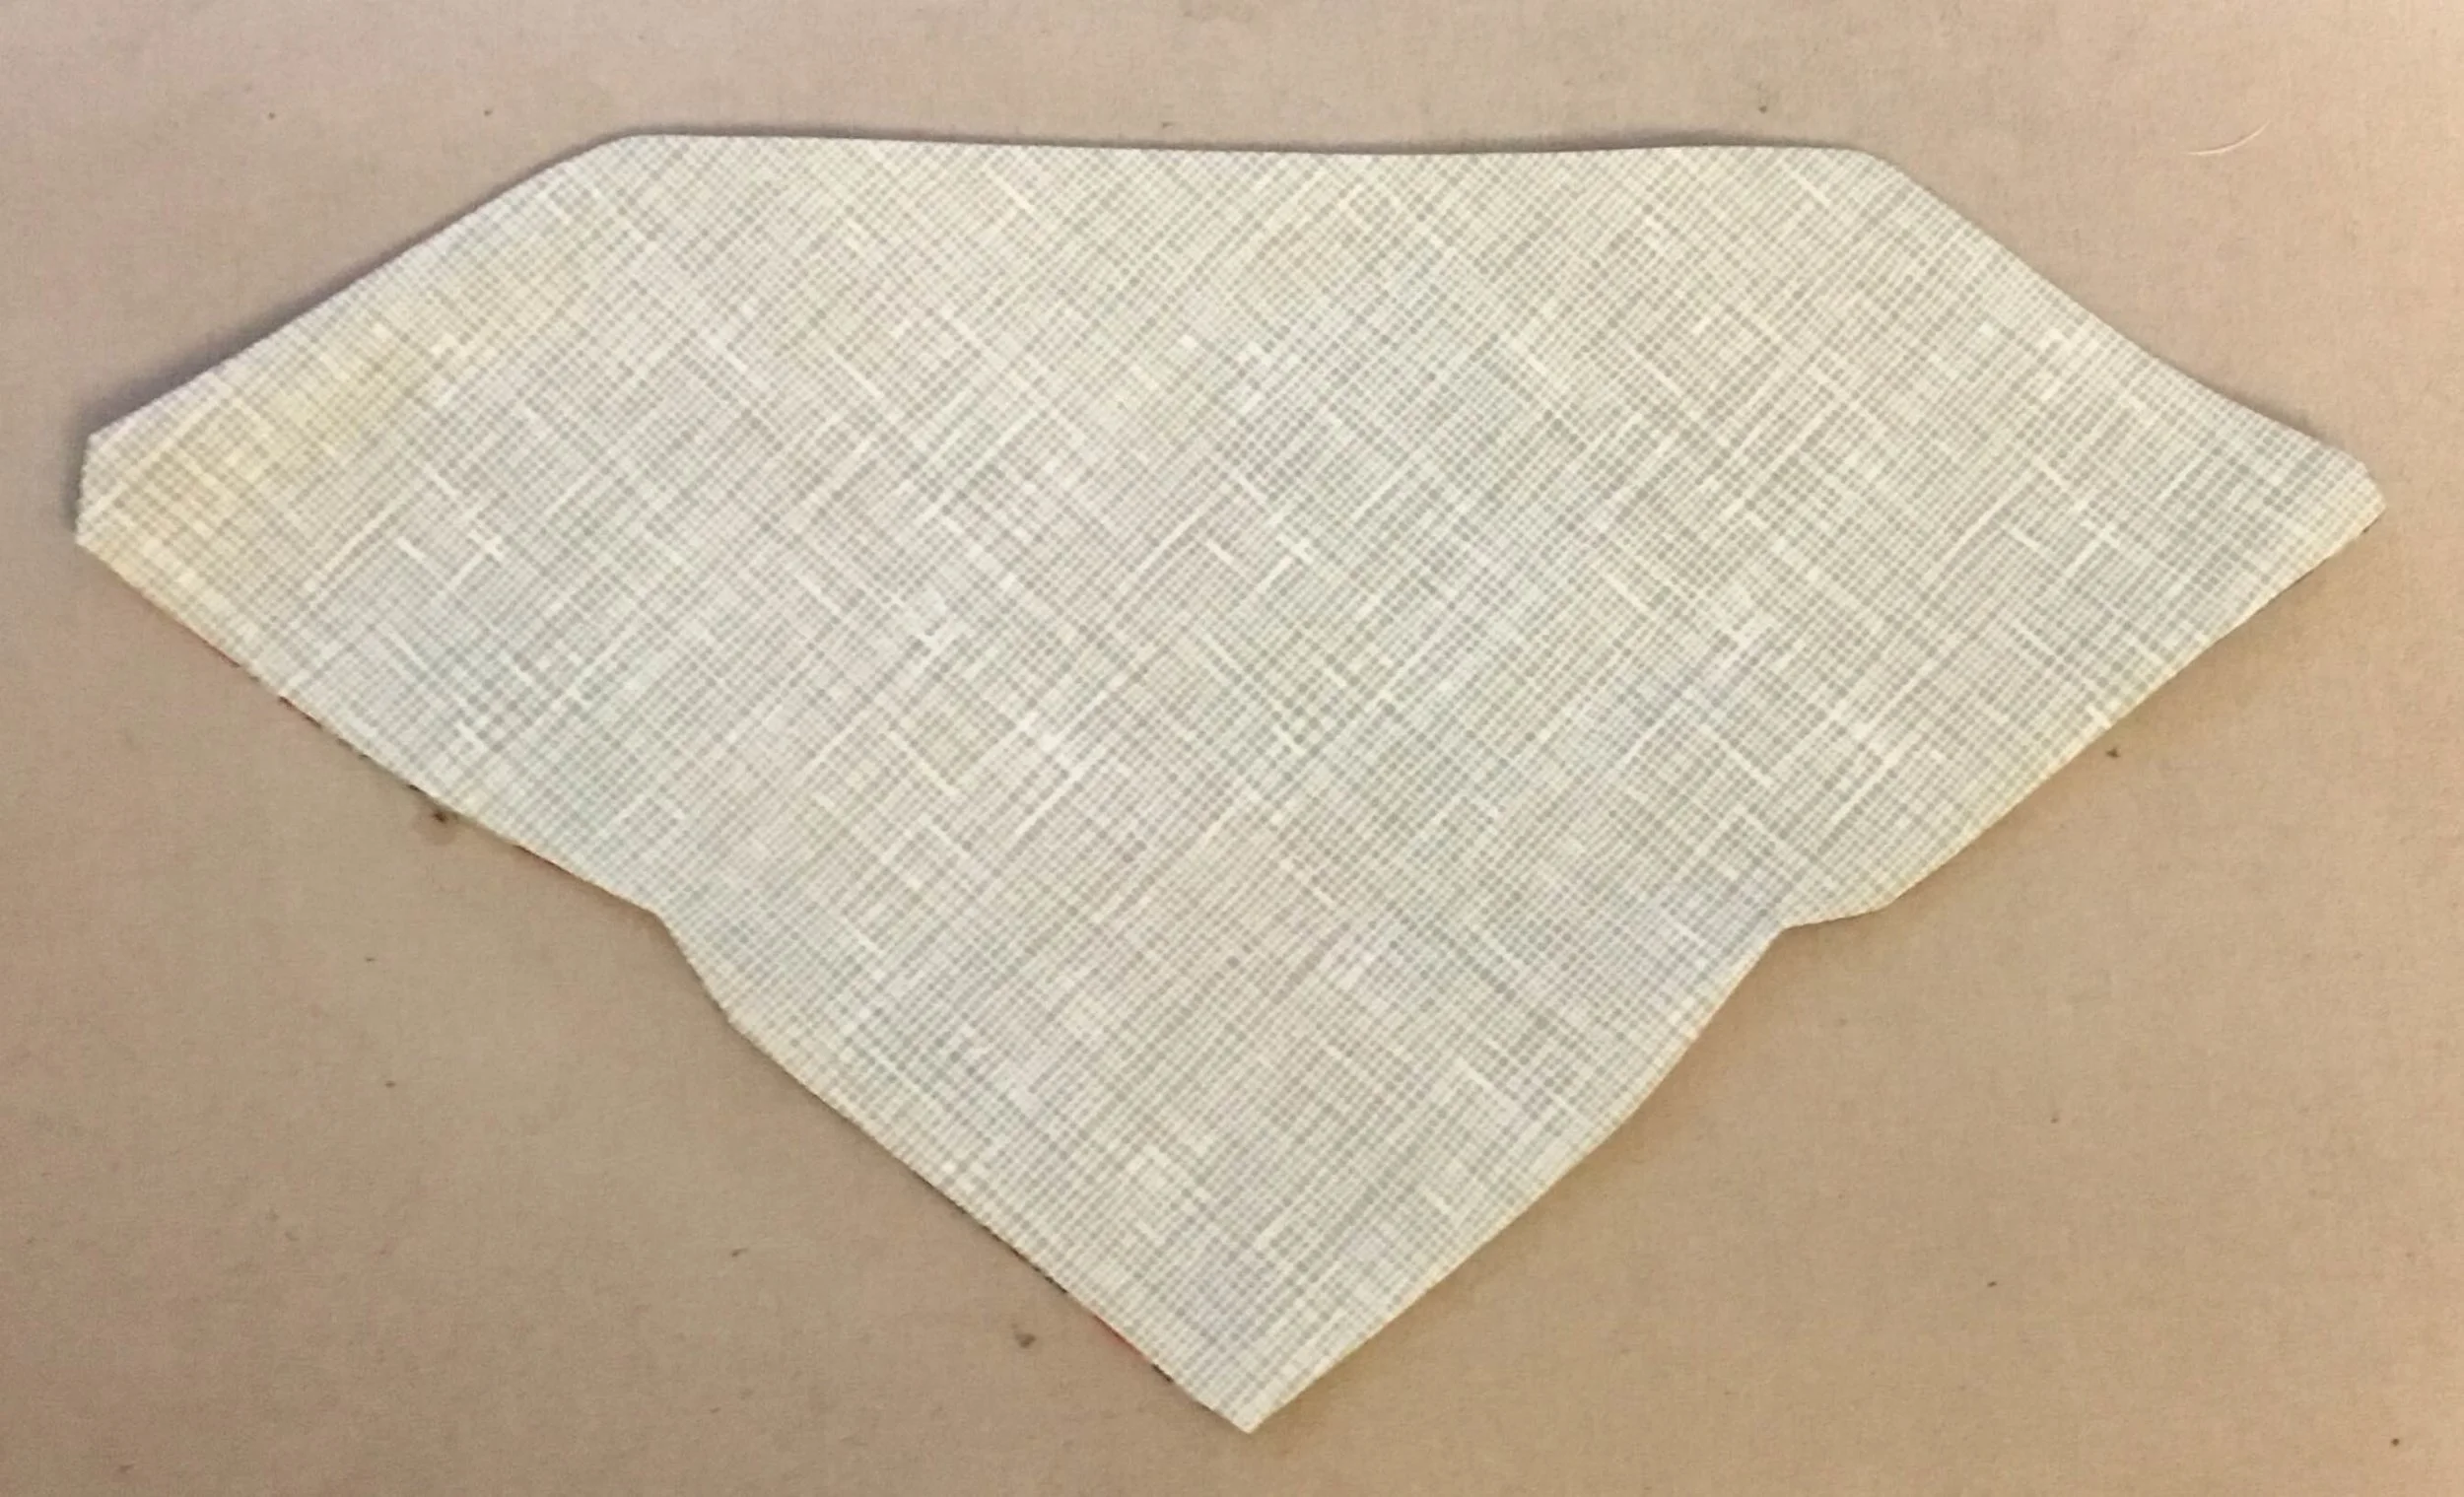
Envelope body turned right sides out and pressed, with raw edges at top turned in 1/4 inch and pressed flat
- Make a double fold tape using the Clover Bias Tape Maker OR make quilt binding OR cut a commercial 1/2 inch bias fold tape the length needed to cover the two upper sides of the envelope flap. 12" is probably long enough.
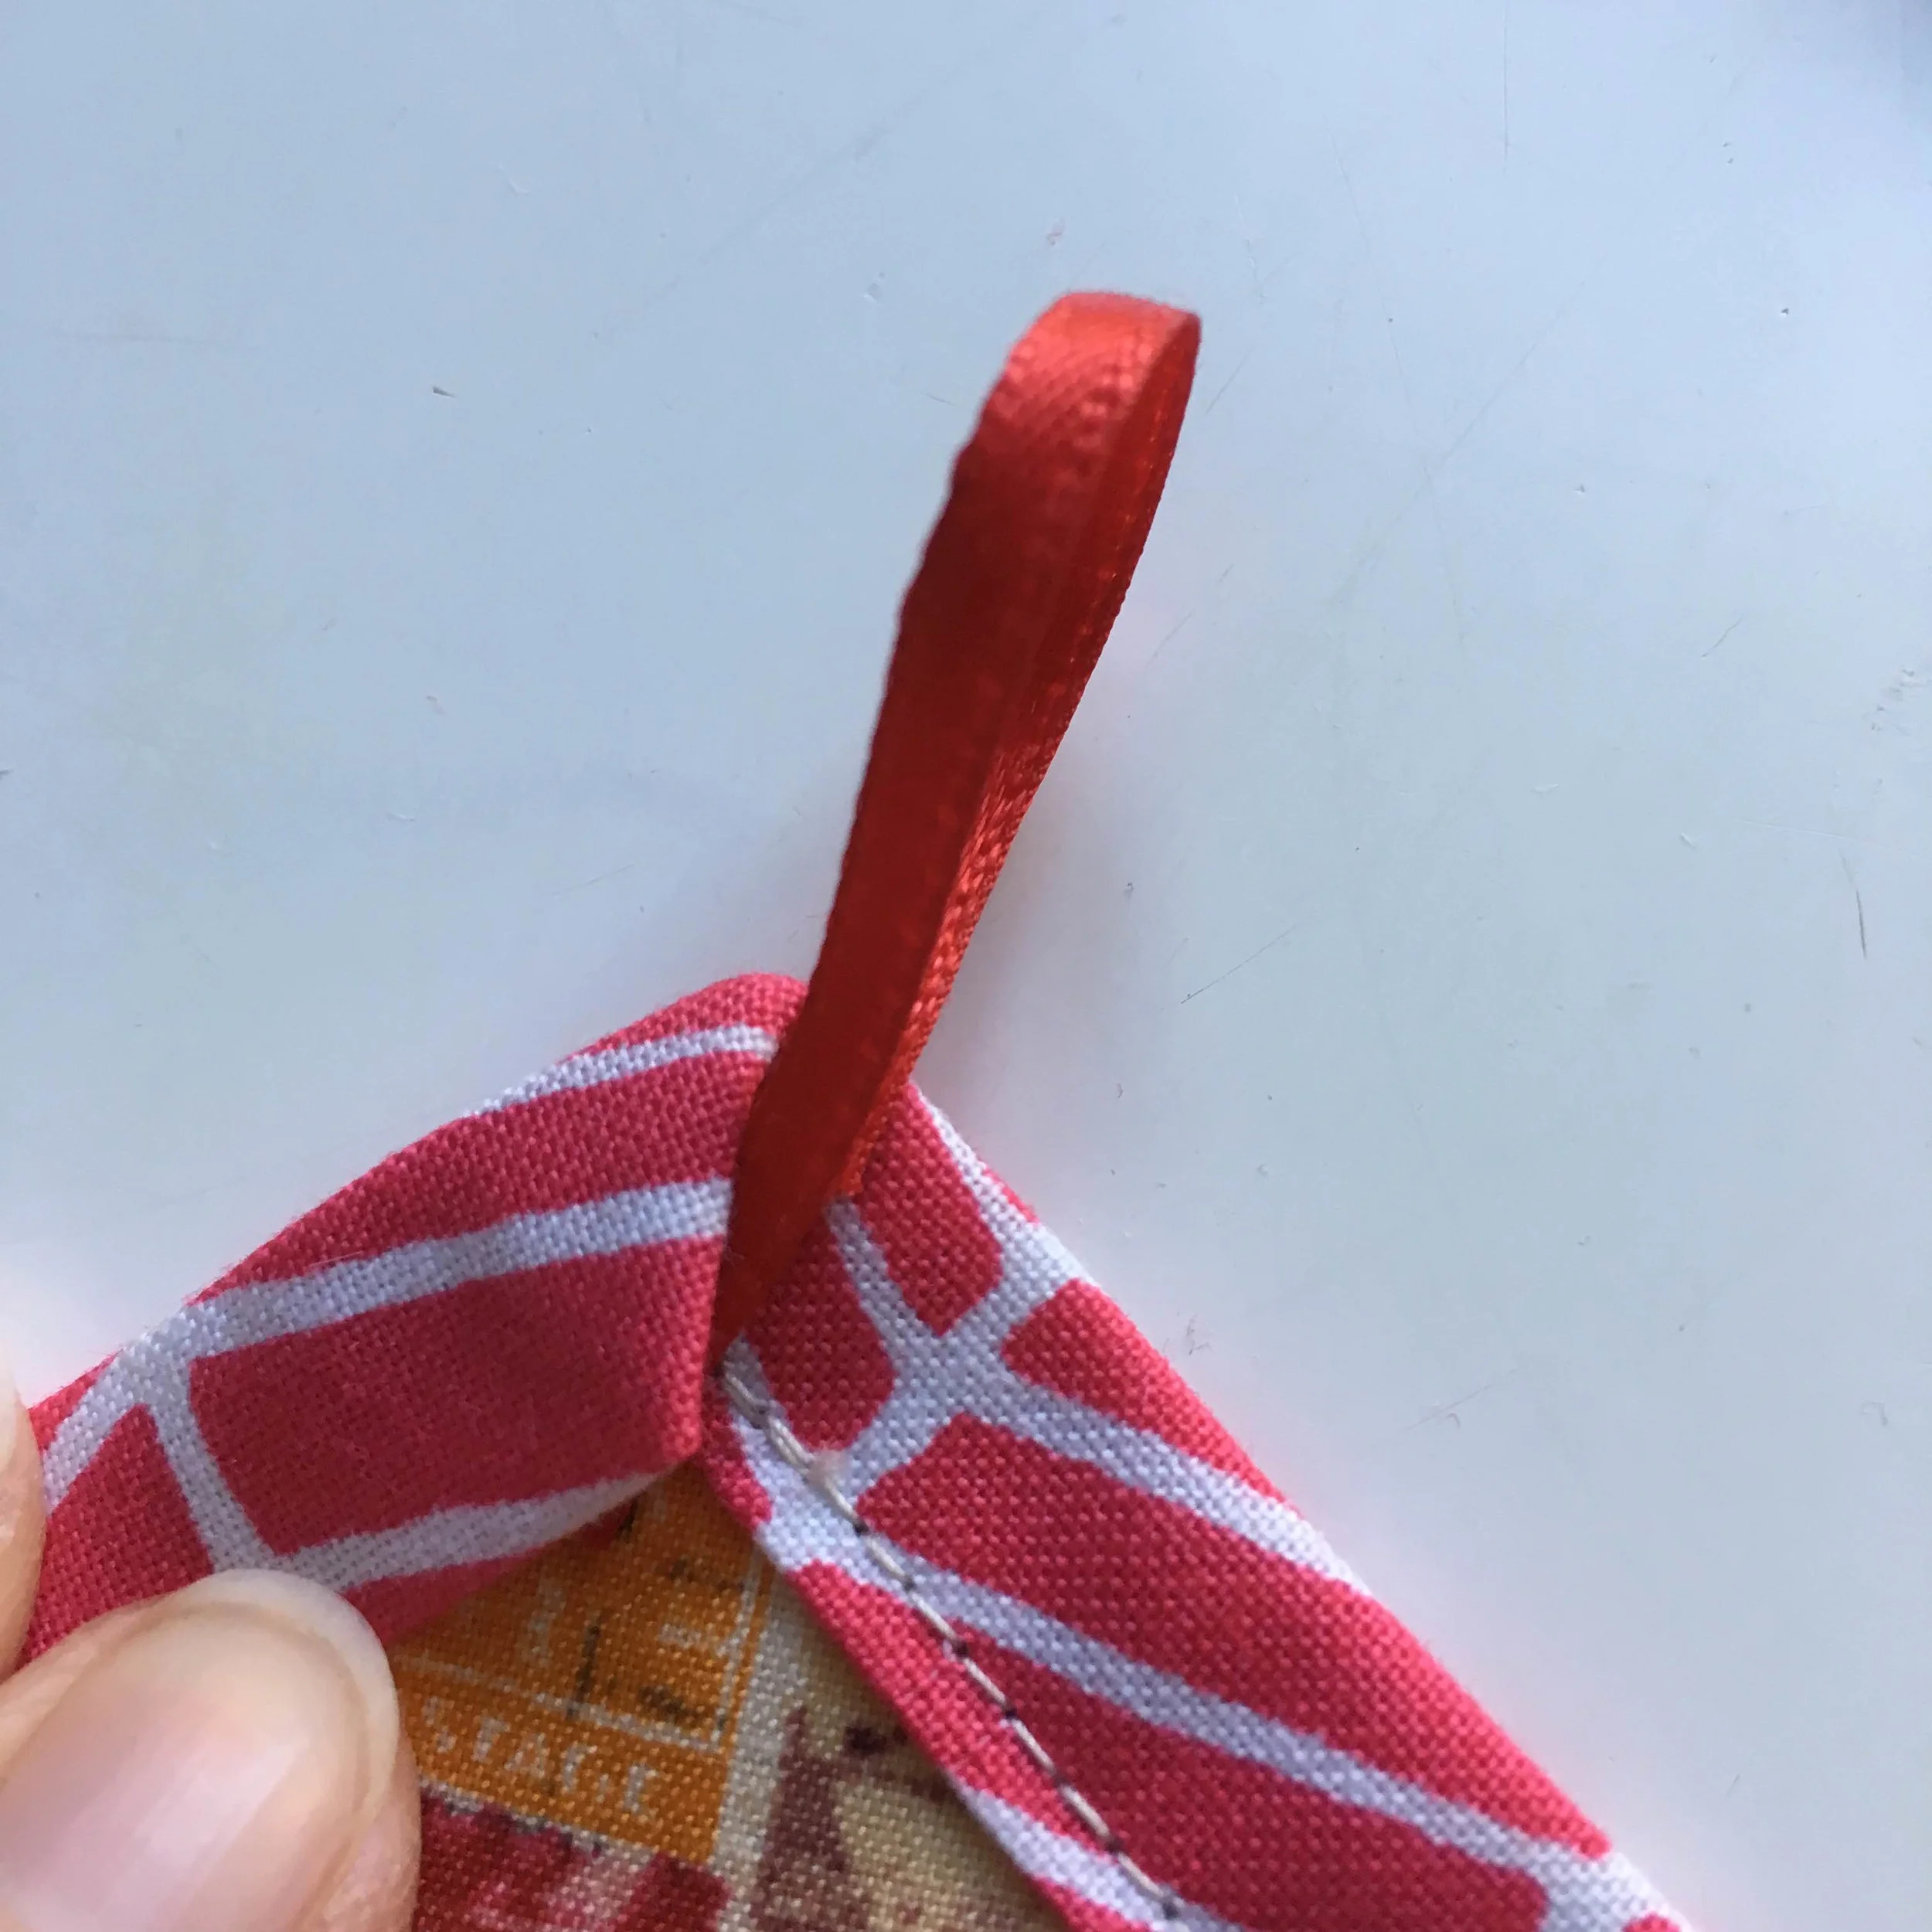
- Cut a piece of 1/8 inch ribbon about 2 inches long, fold in half
- Turn the envelope flap pieces so they are WRONG SIDES together
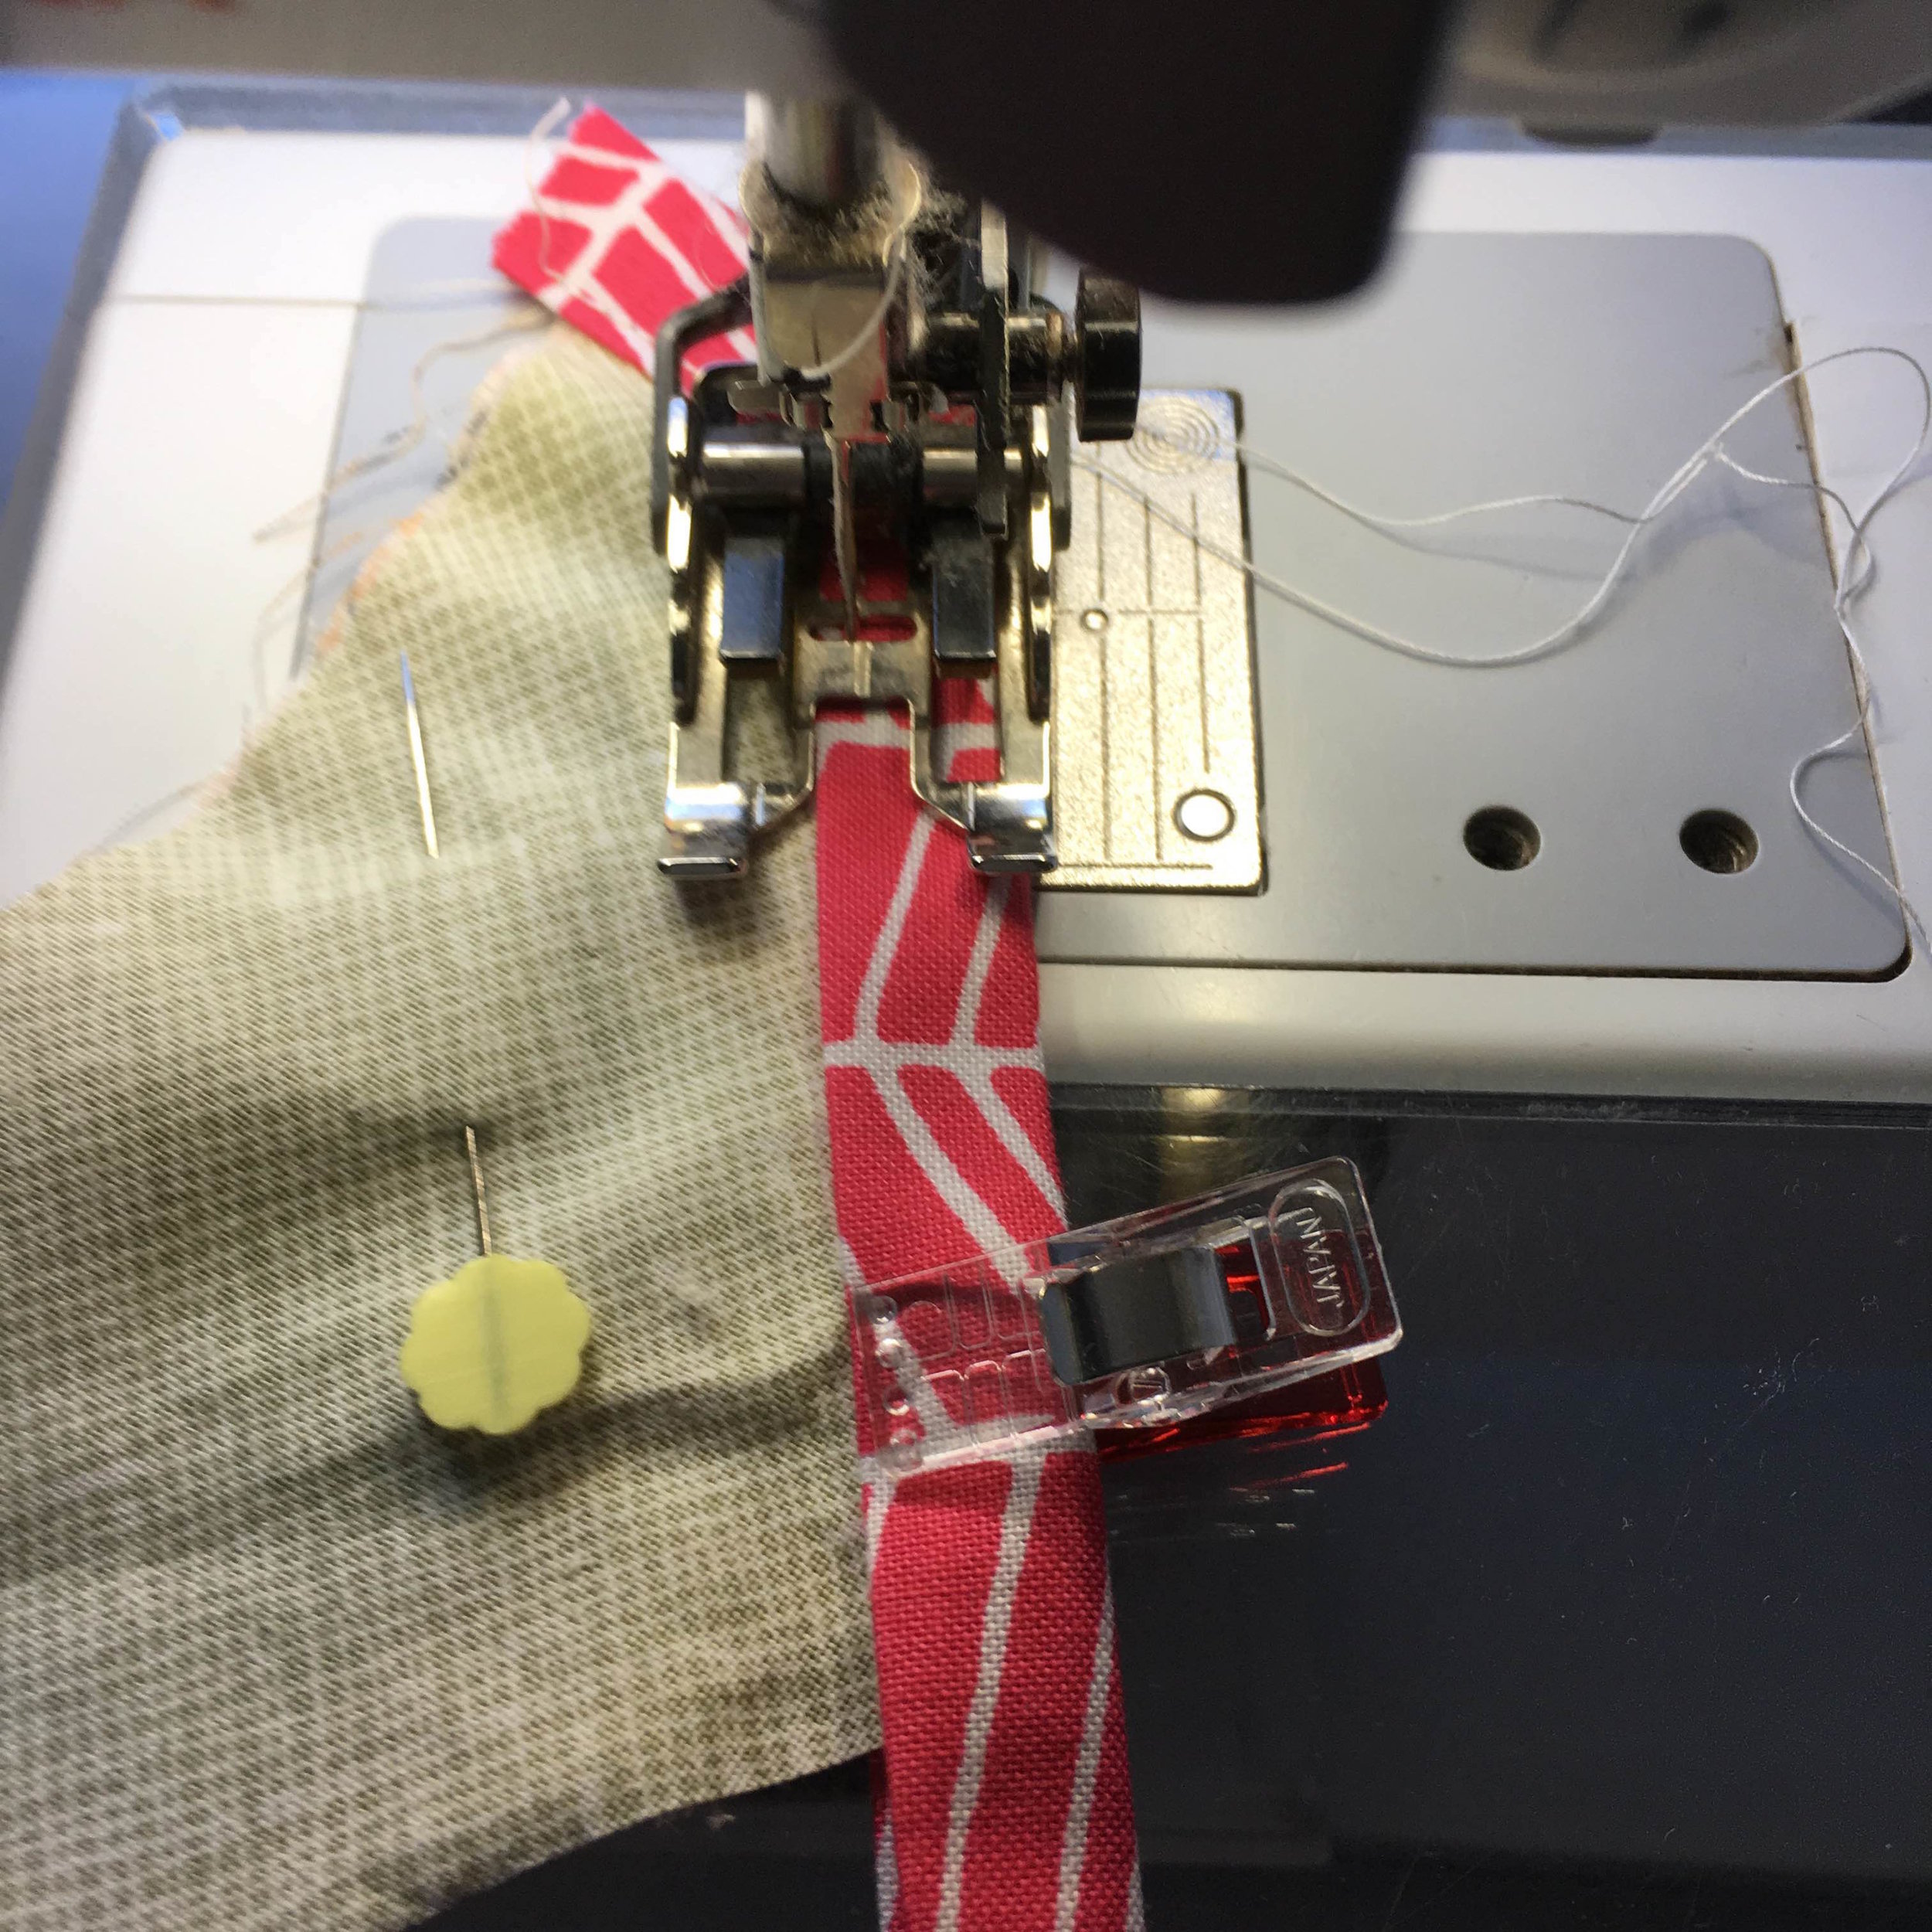
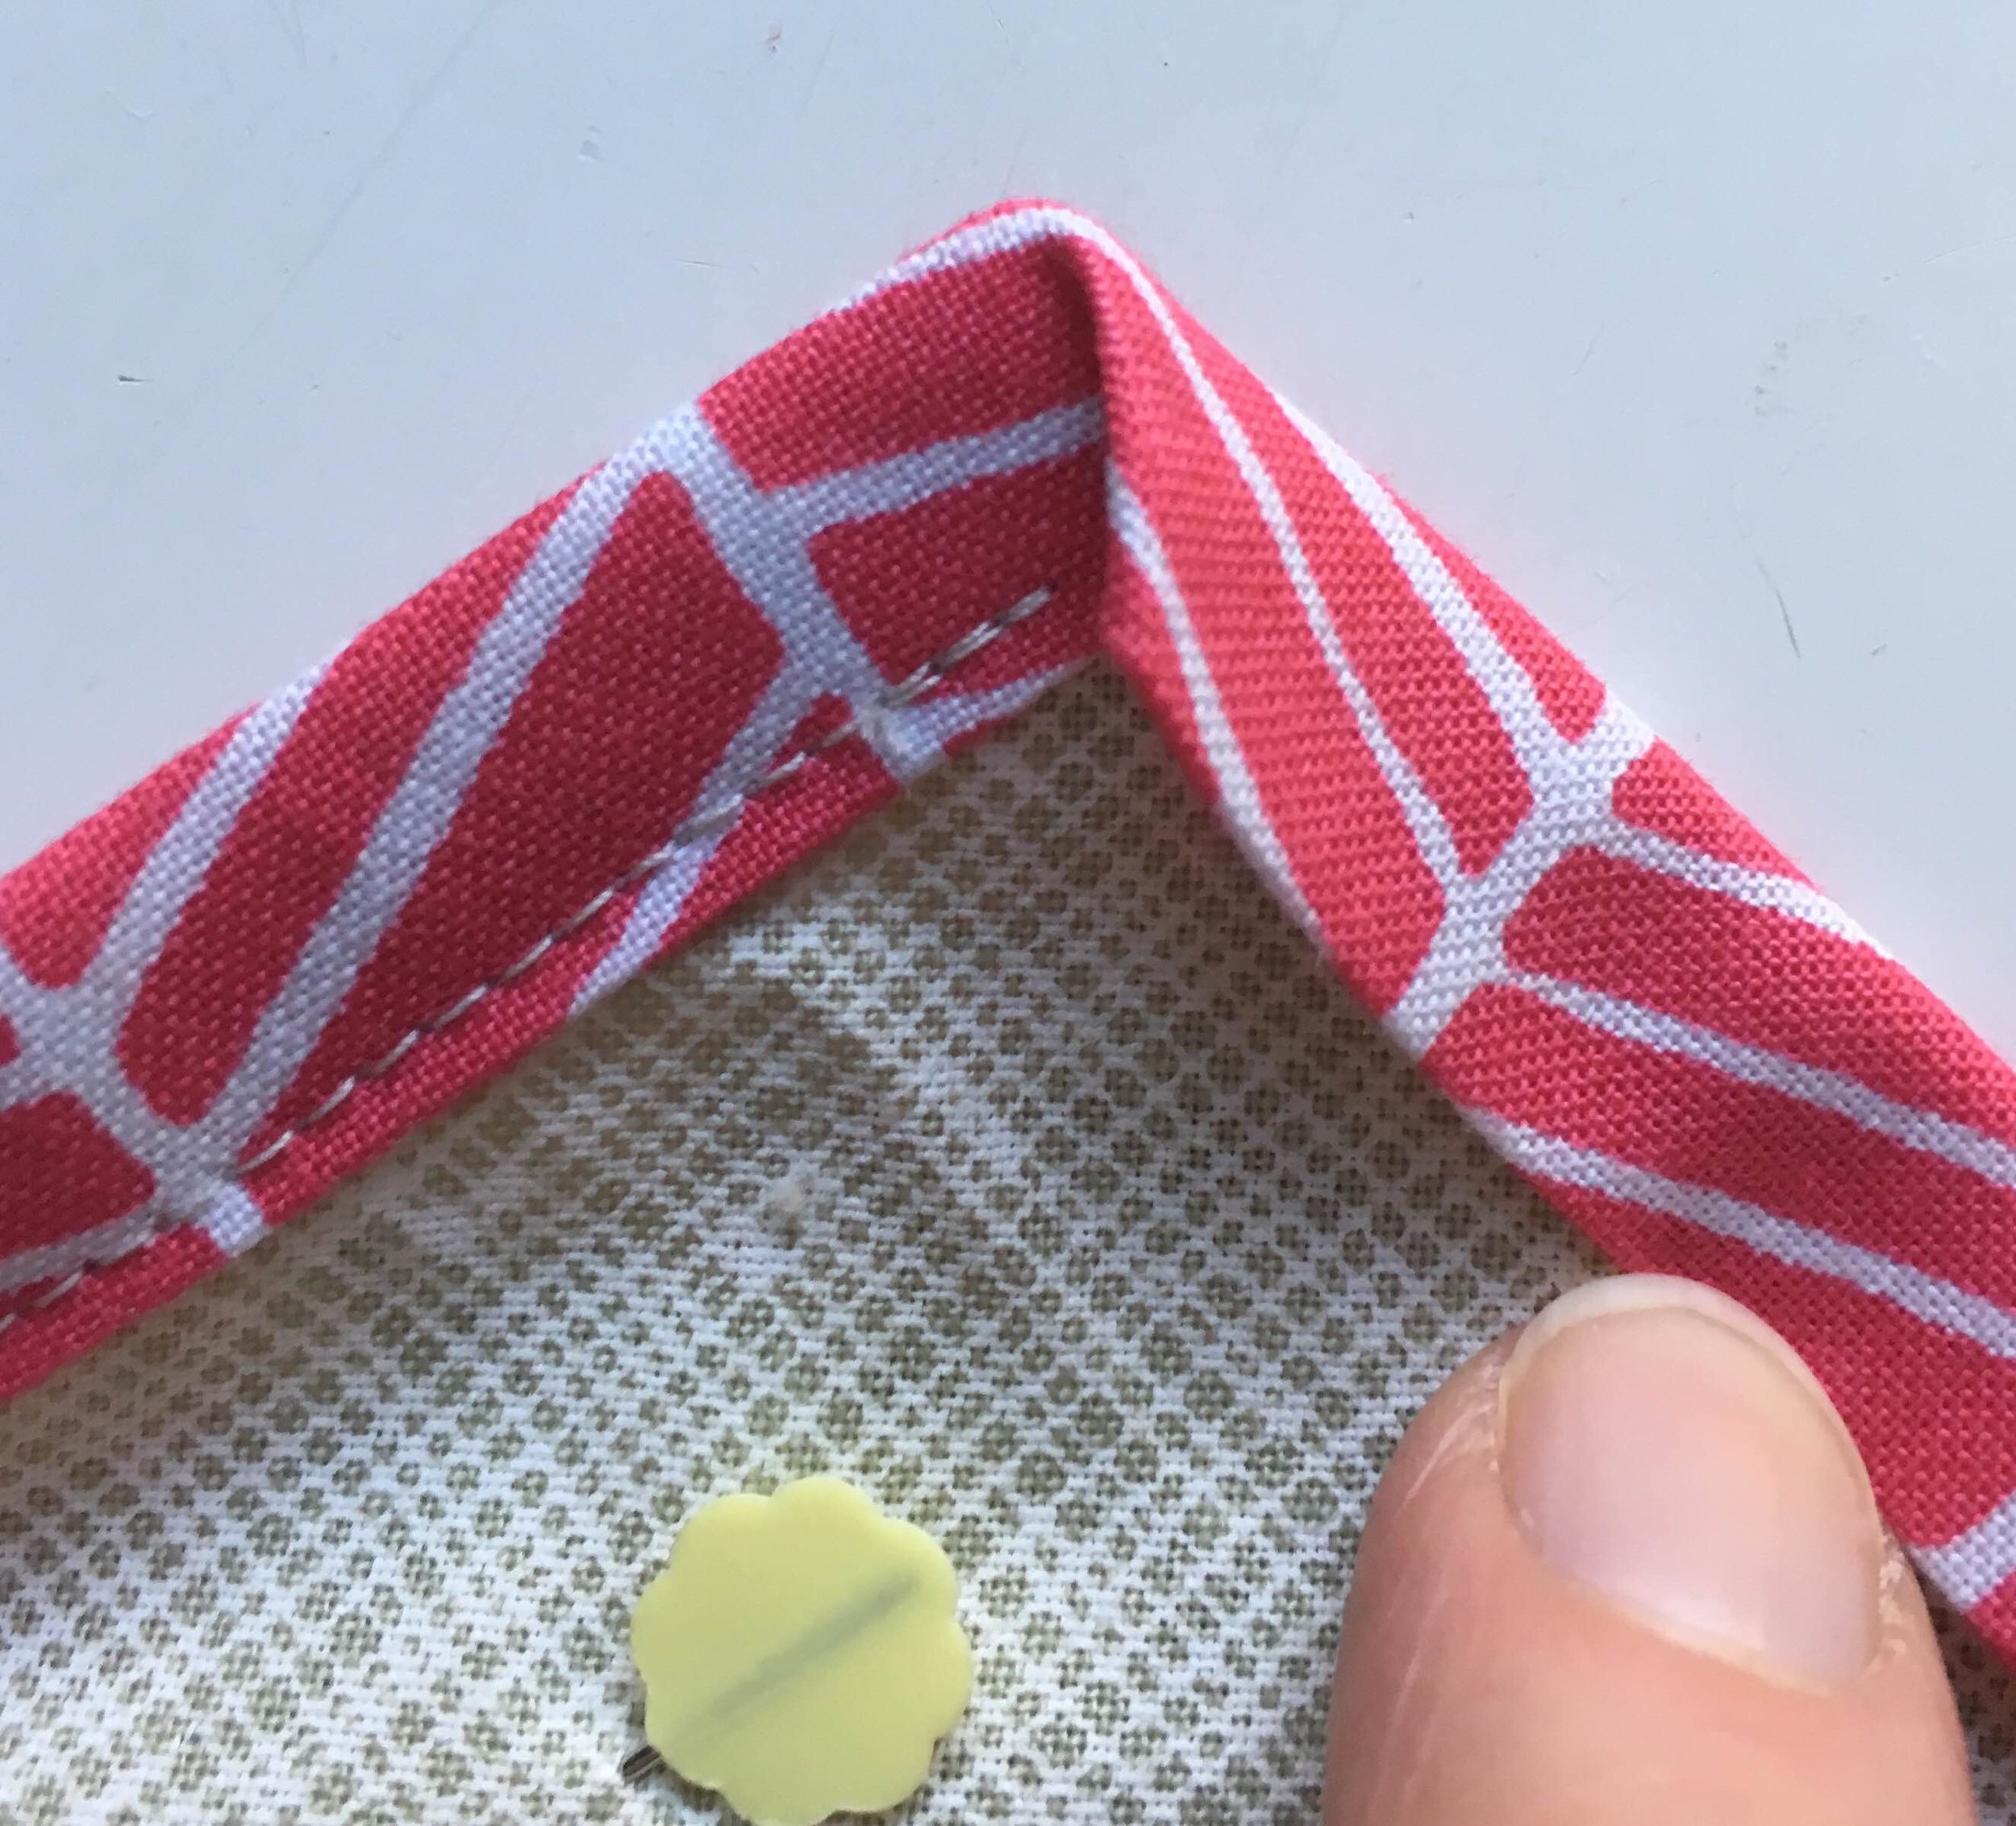
- Attach the 1/2" tape or binding to the two upper sides of the flap, leaving the BOTTOM EDGE OPEN. Miter the corners.
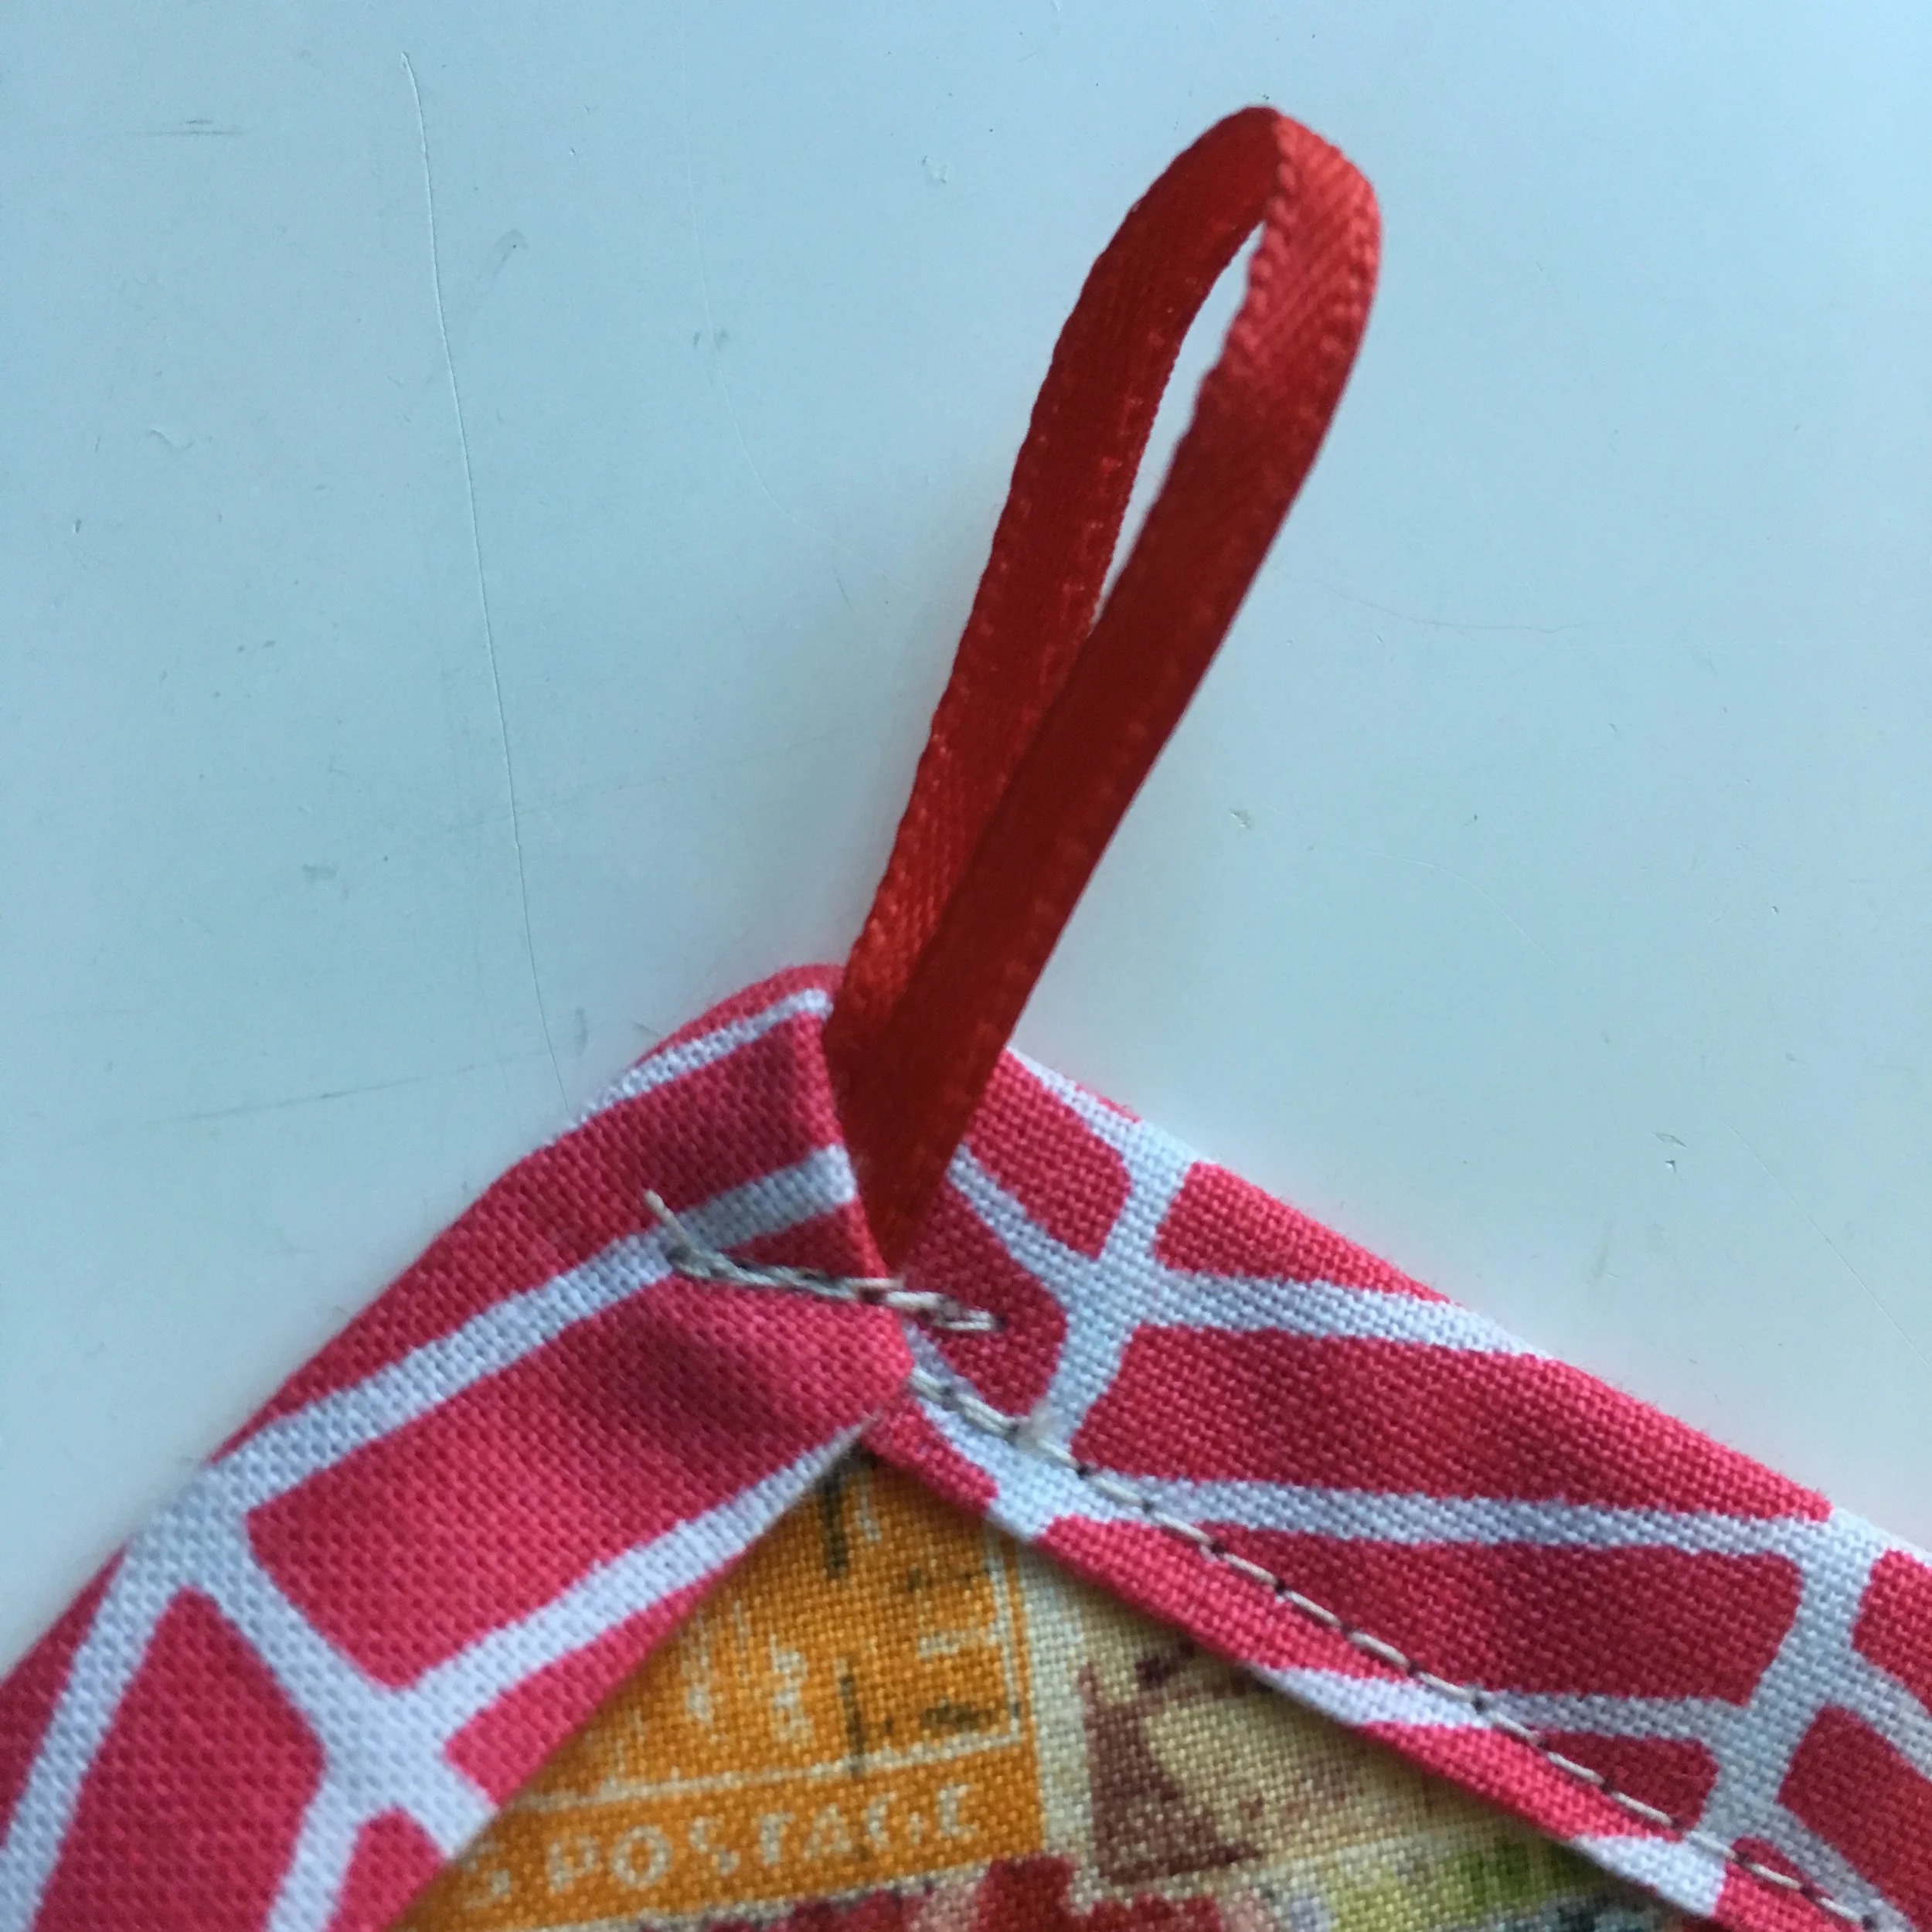
- Tuck the folded ribbon into the miter at the point of the envelope flap. Tack it down.
- Finish sewing the tape to the edges of the flap.
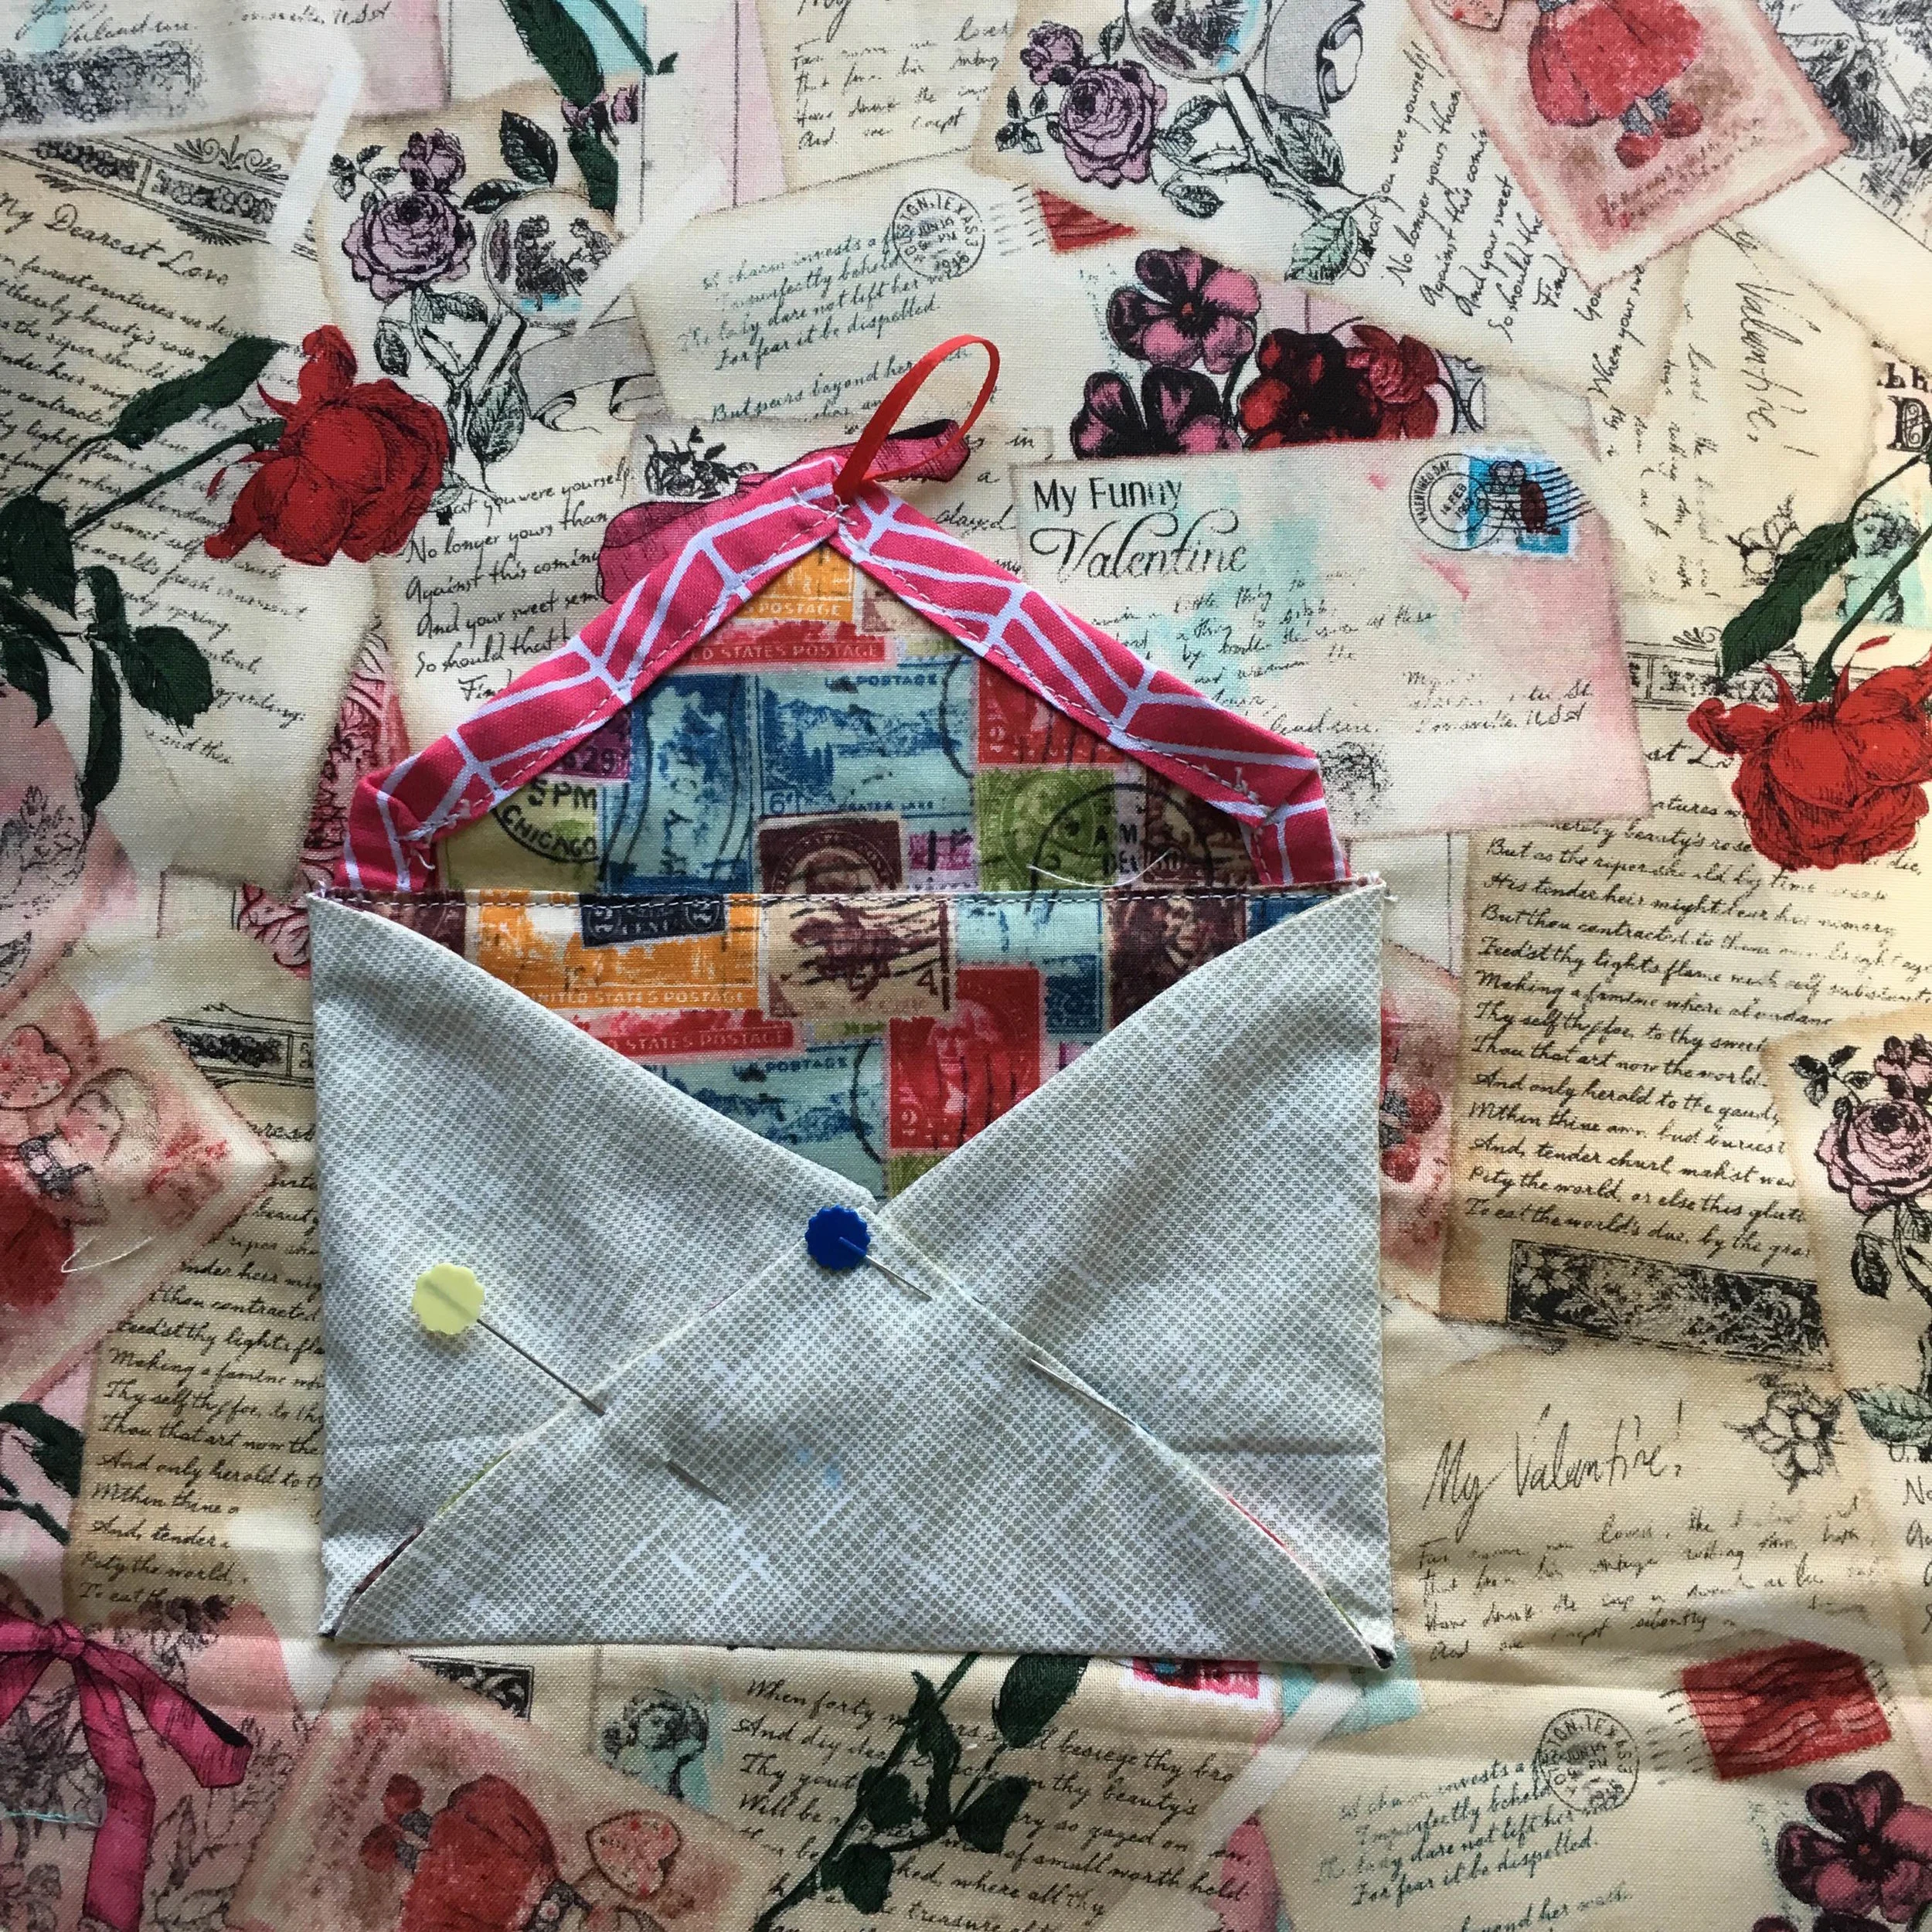
- Tuck the raw edges of the flap 1/4 inch into the opening at the top of the envelope body
- Pin in place
- Sew flap to the envelope body using a edging stitch
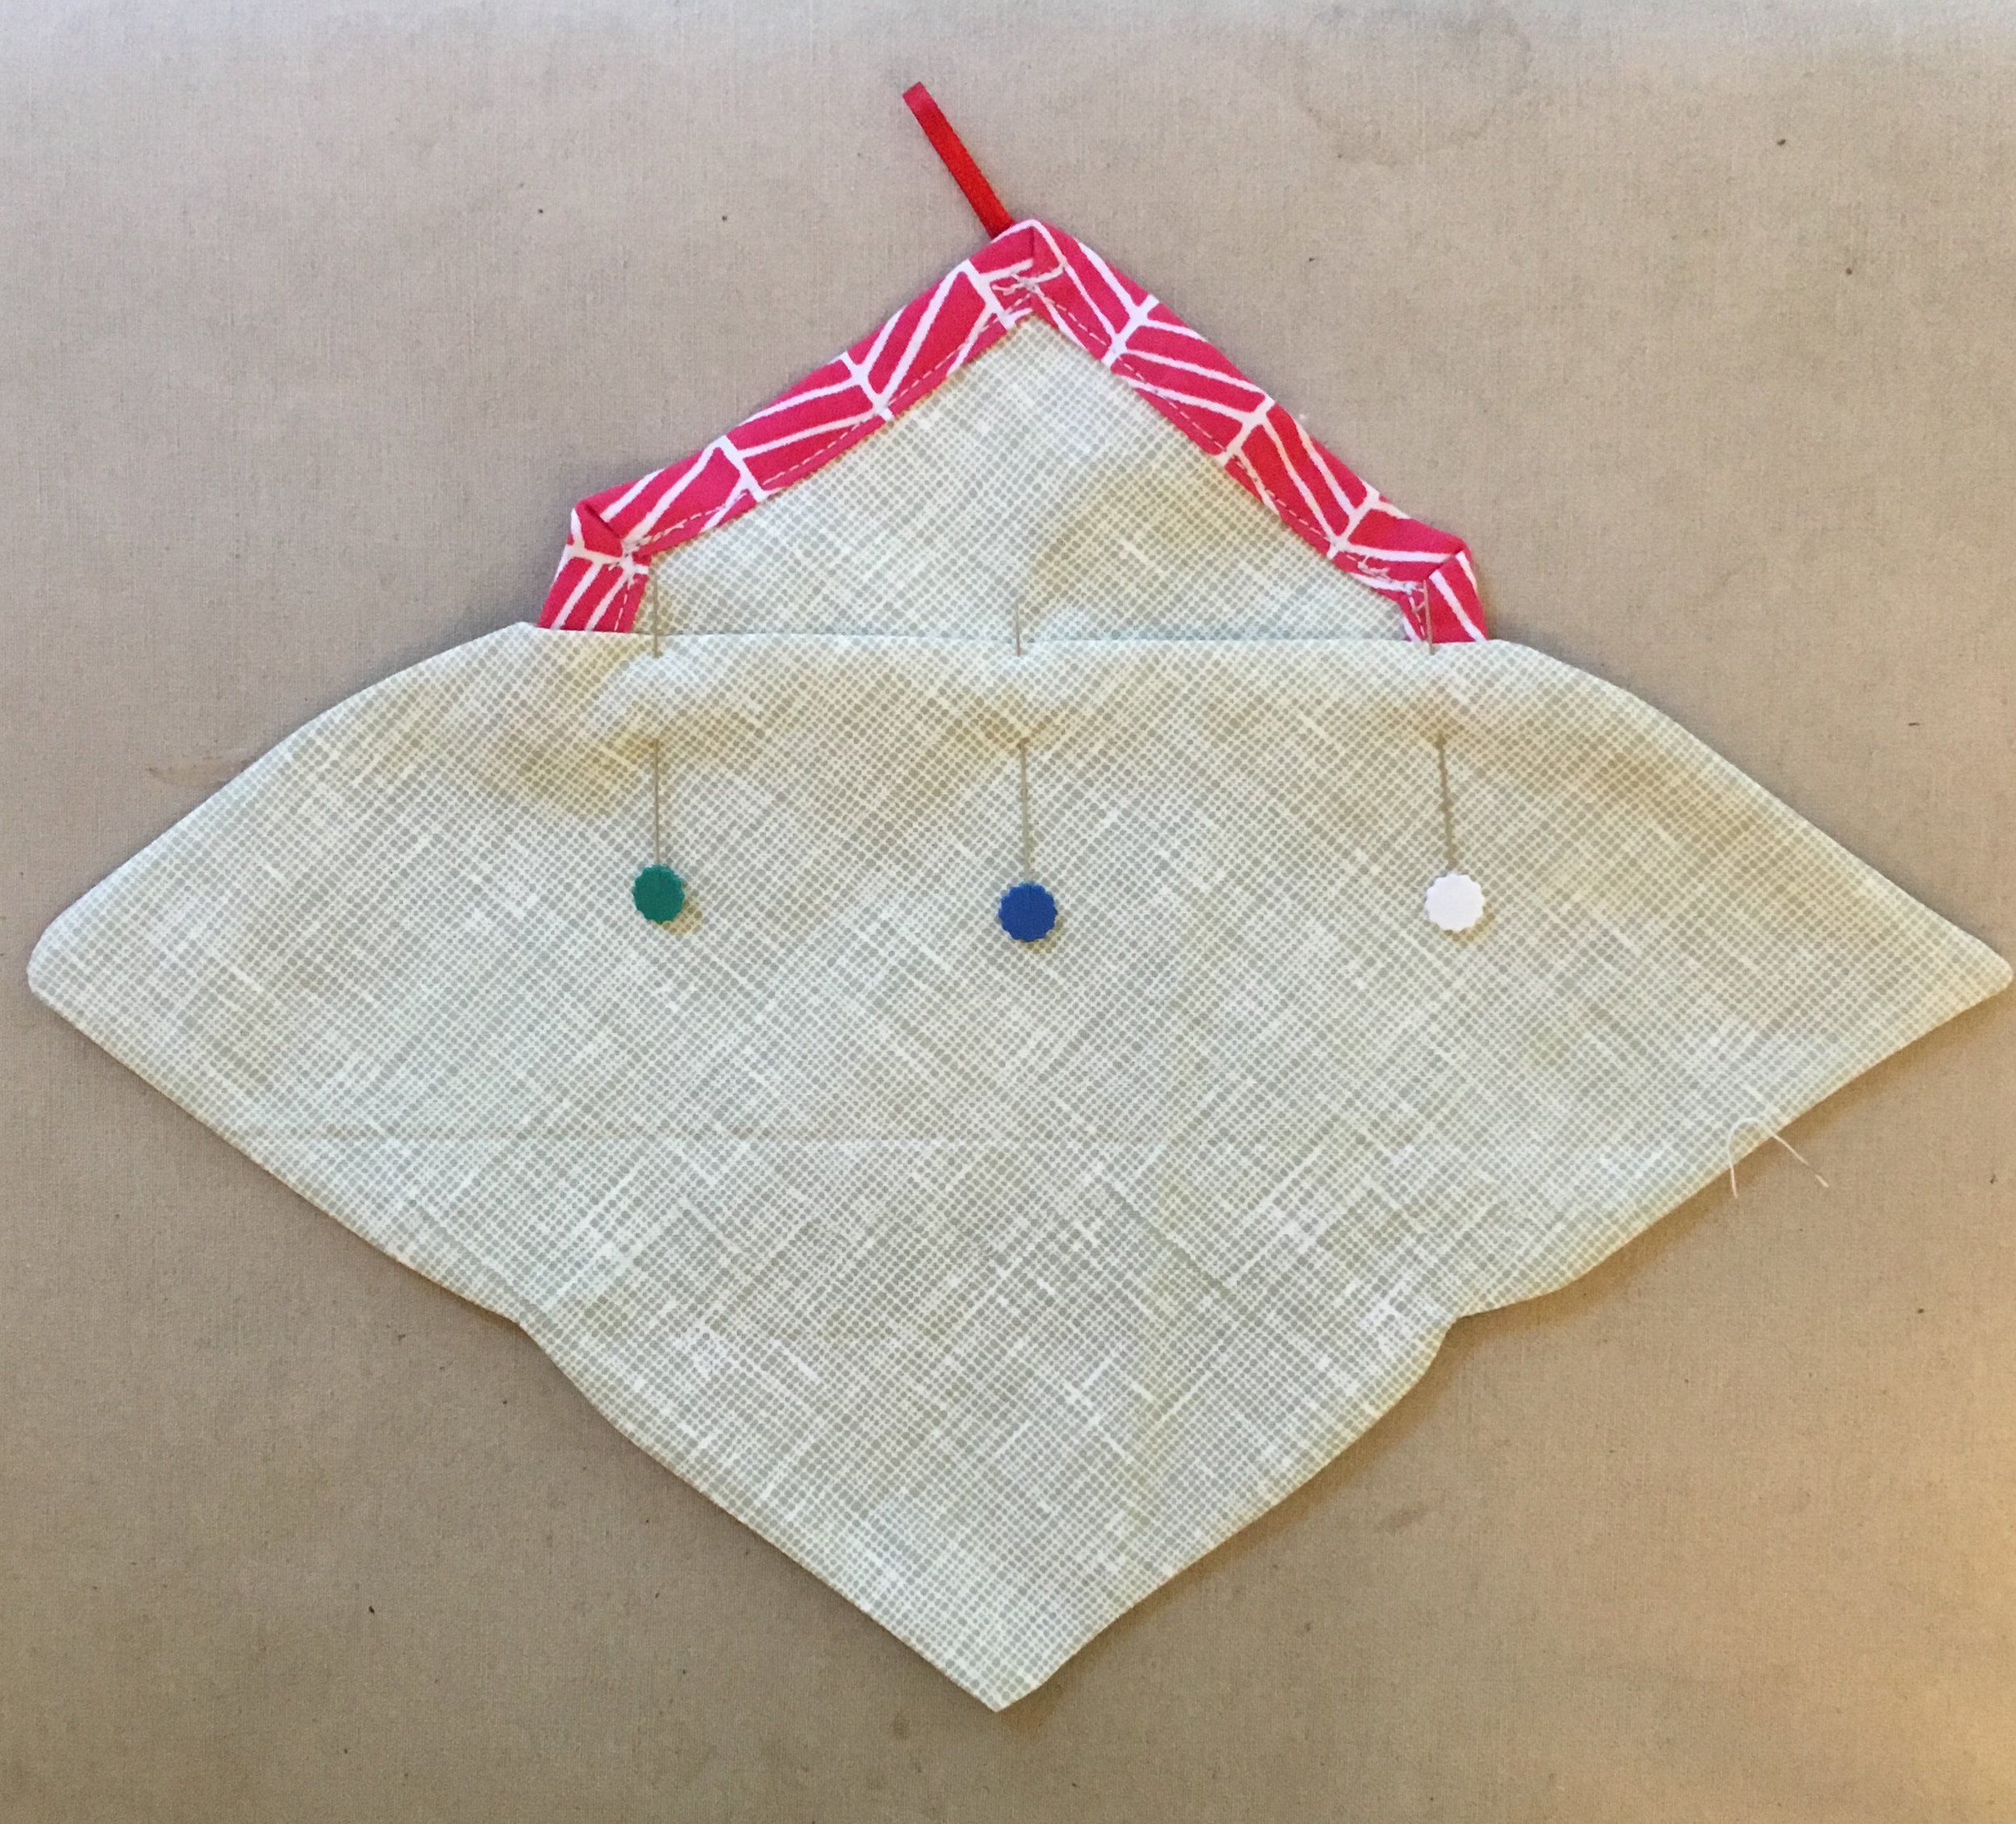
- On the INSIDE of your envelope, mark the Fold Lines using tailor's chalk or non-permanent fabric marking pen. TIP: Check your template paper envelope to see where the fold lines should be.
- Determine where you want the envelope on the front panel of your pillow. Pin completed the flat OPEN envelope to front pillow panel.
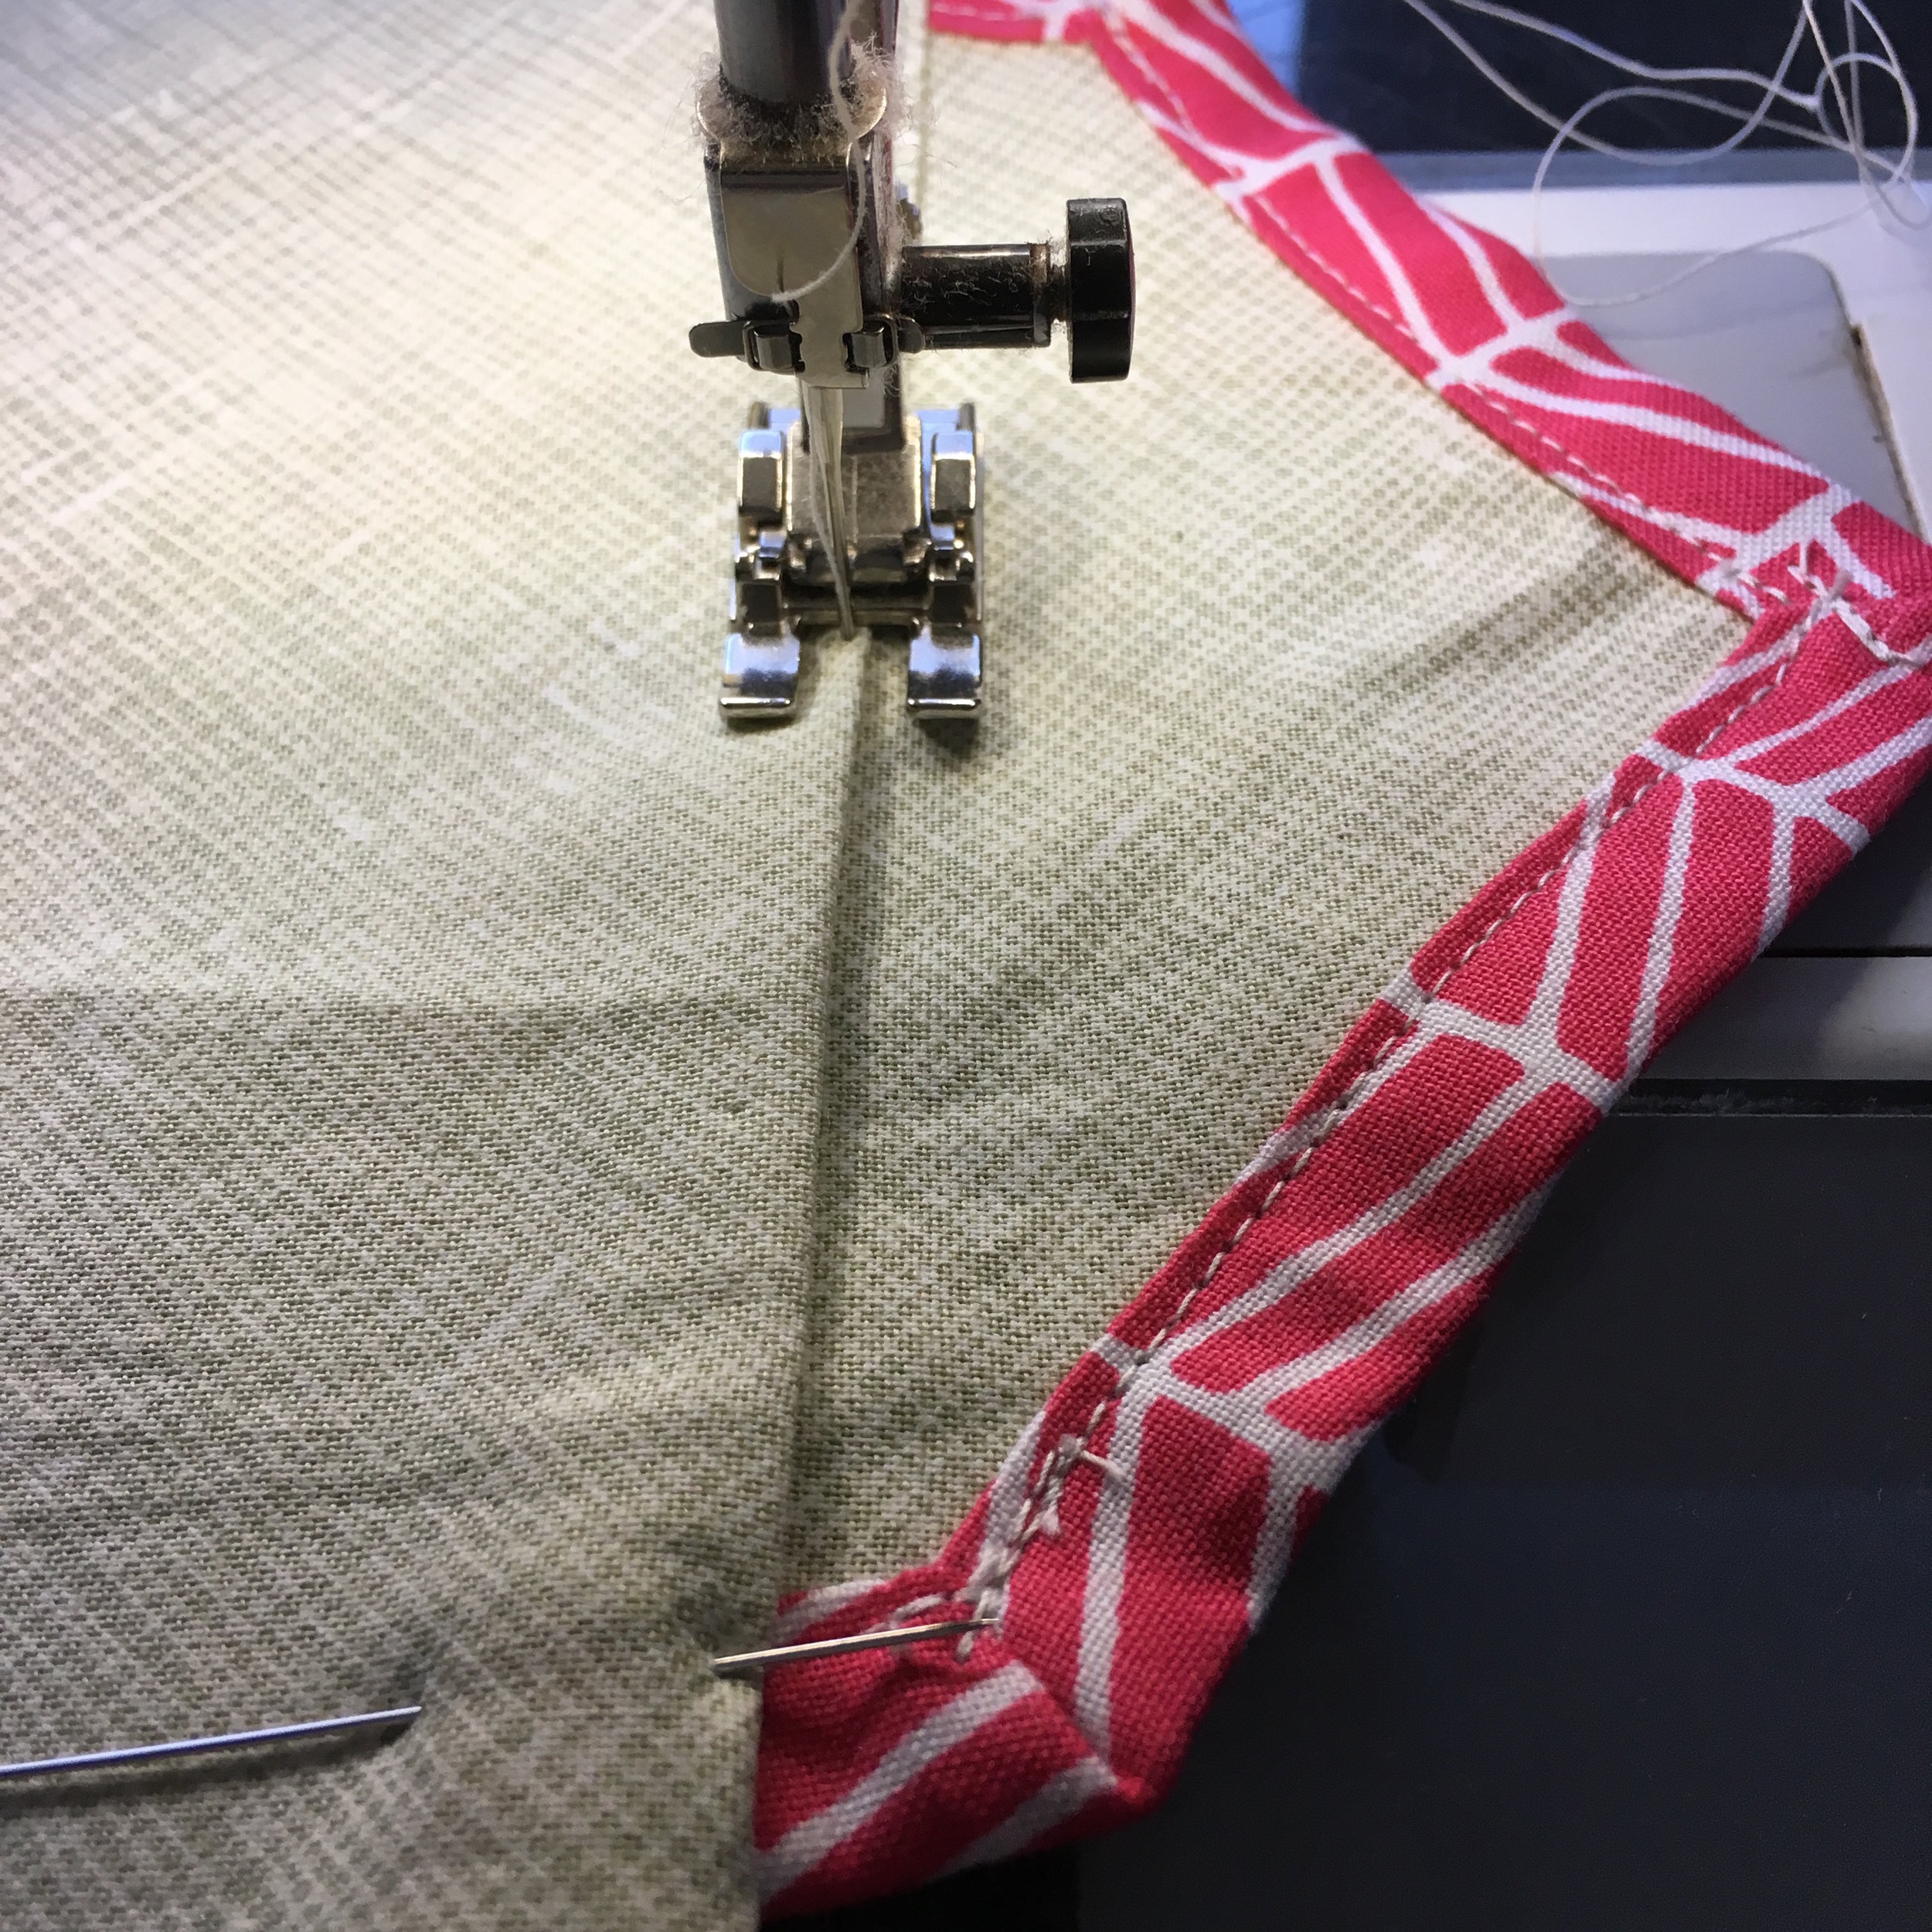
- Sew the open envelope to front pillow panel along the two side fold lines and bottom fold line. Don't sew across the top edge where the flap is.
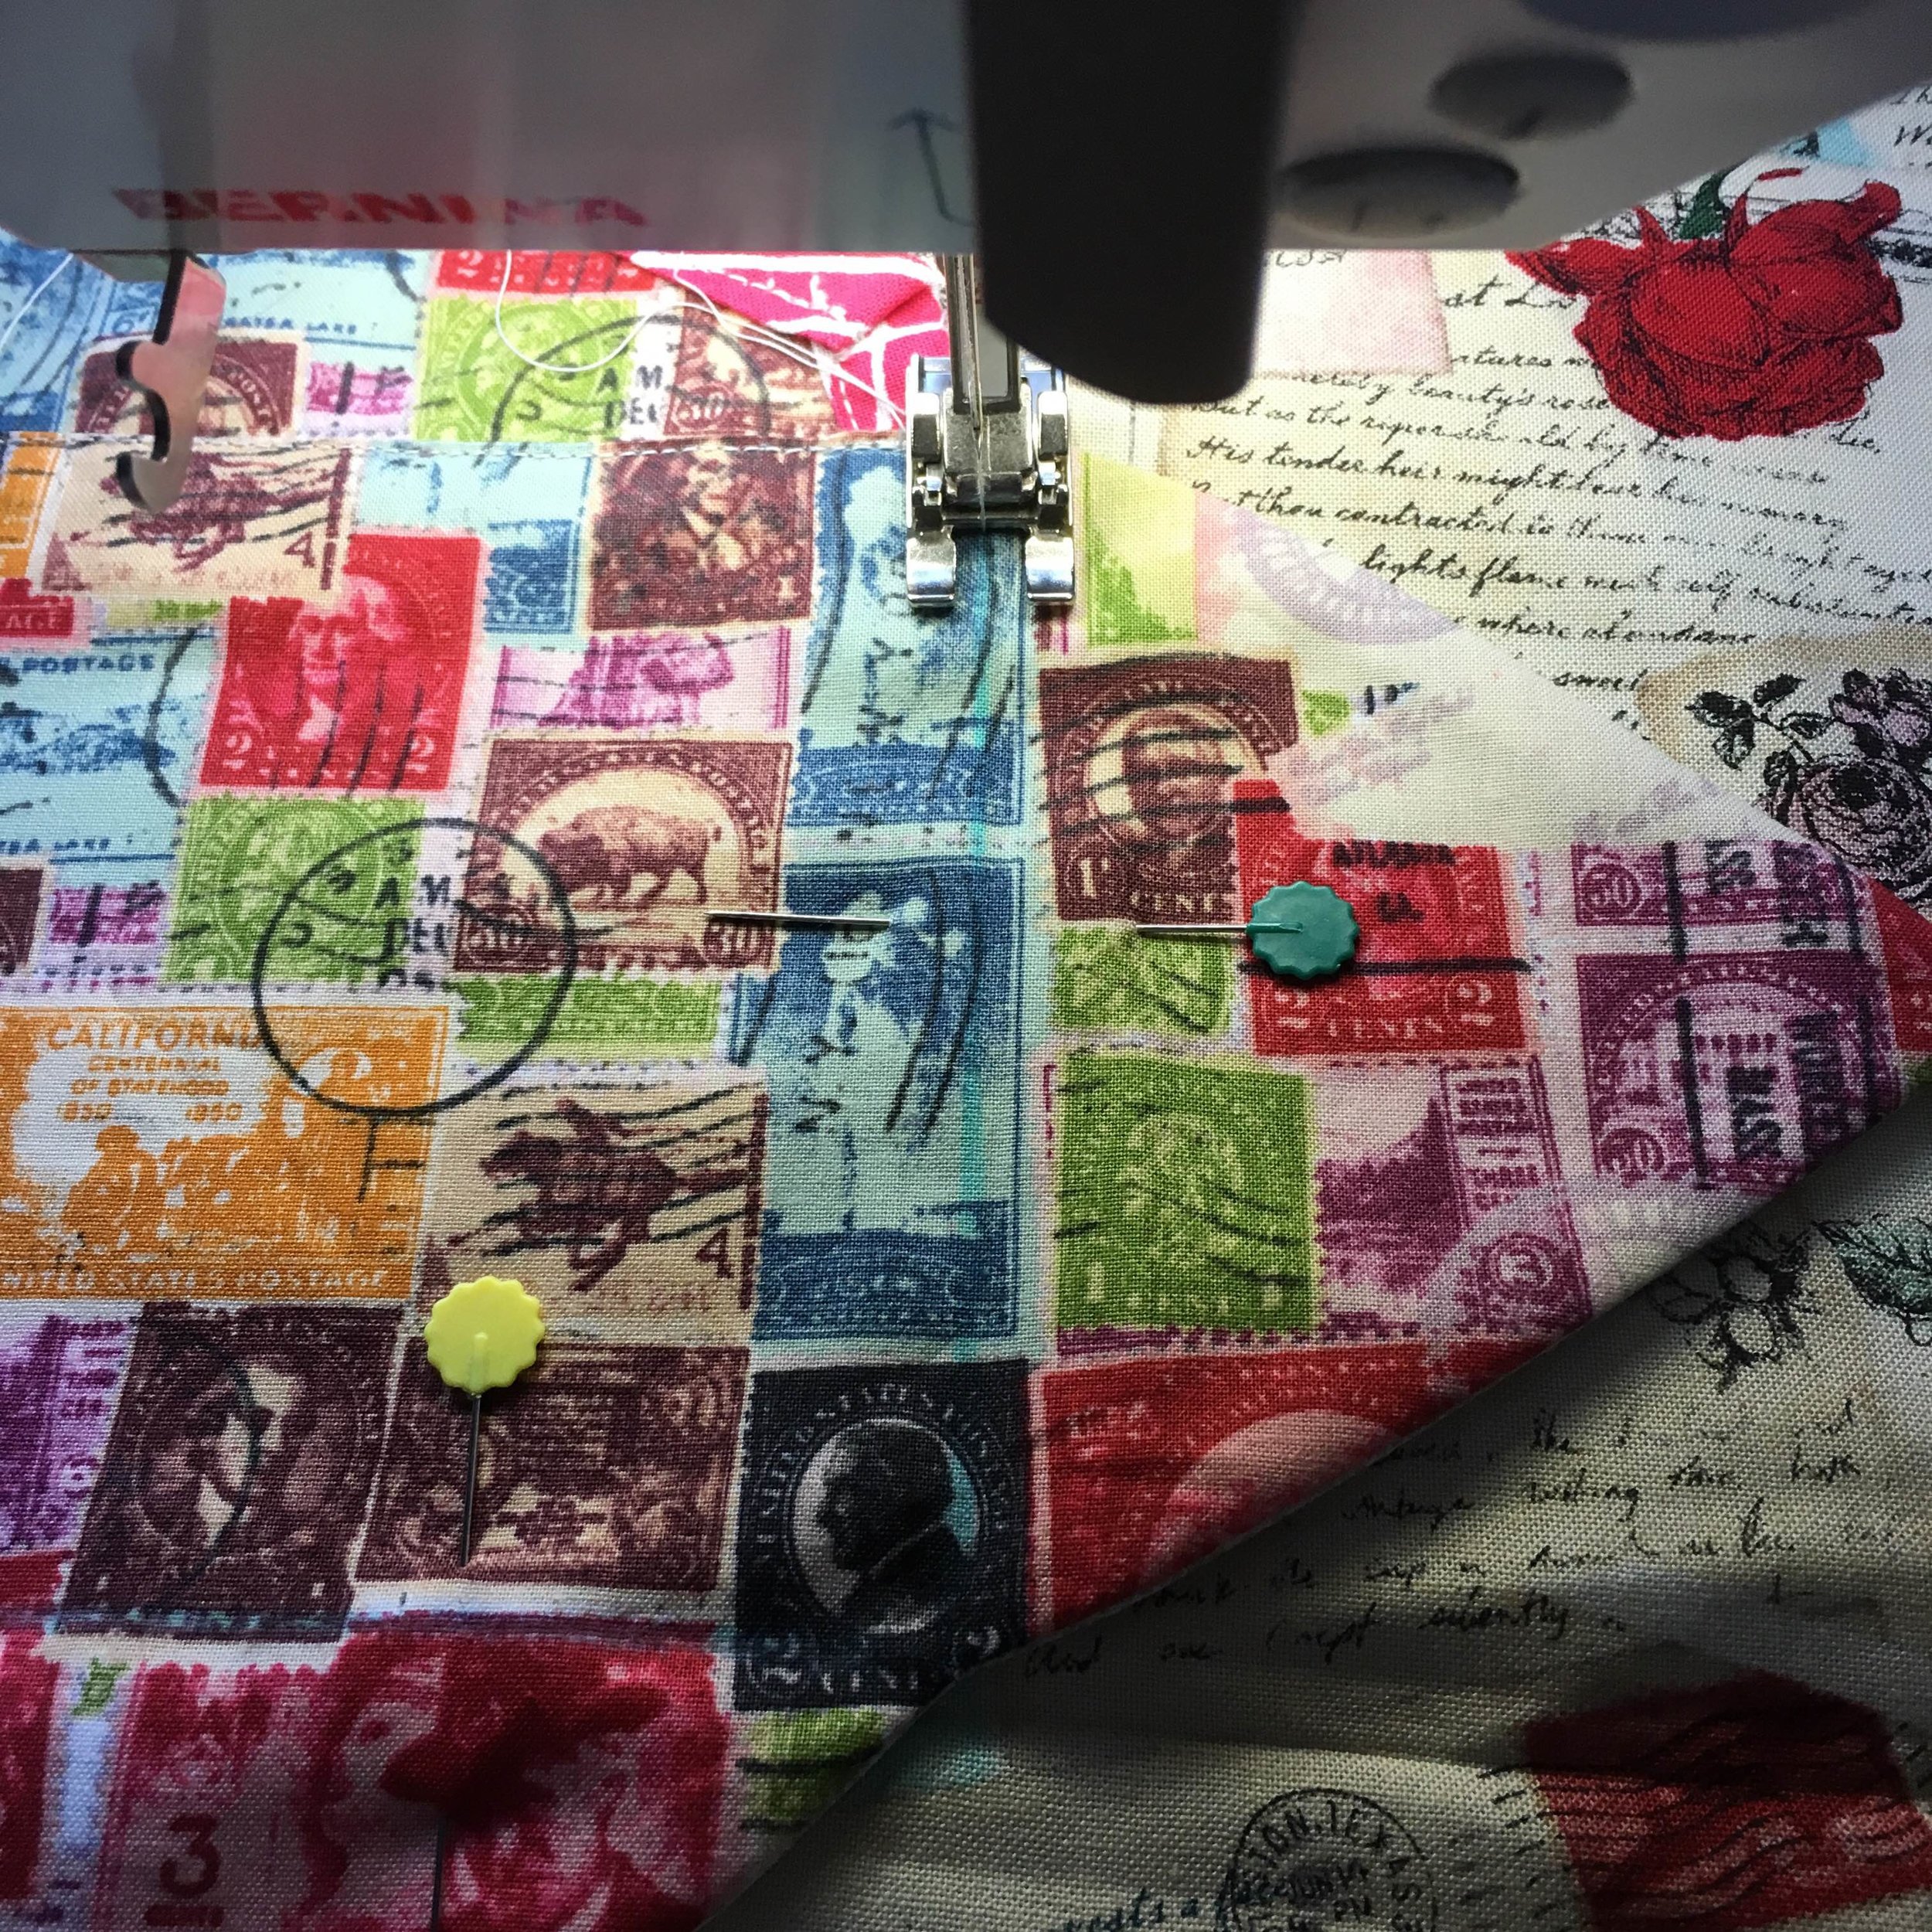
Sewing the flat, open envelope to front pillow panel. Note blue marking line, drawn along fold line of envelope body.
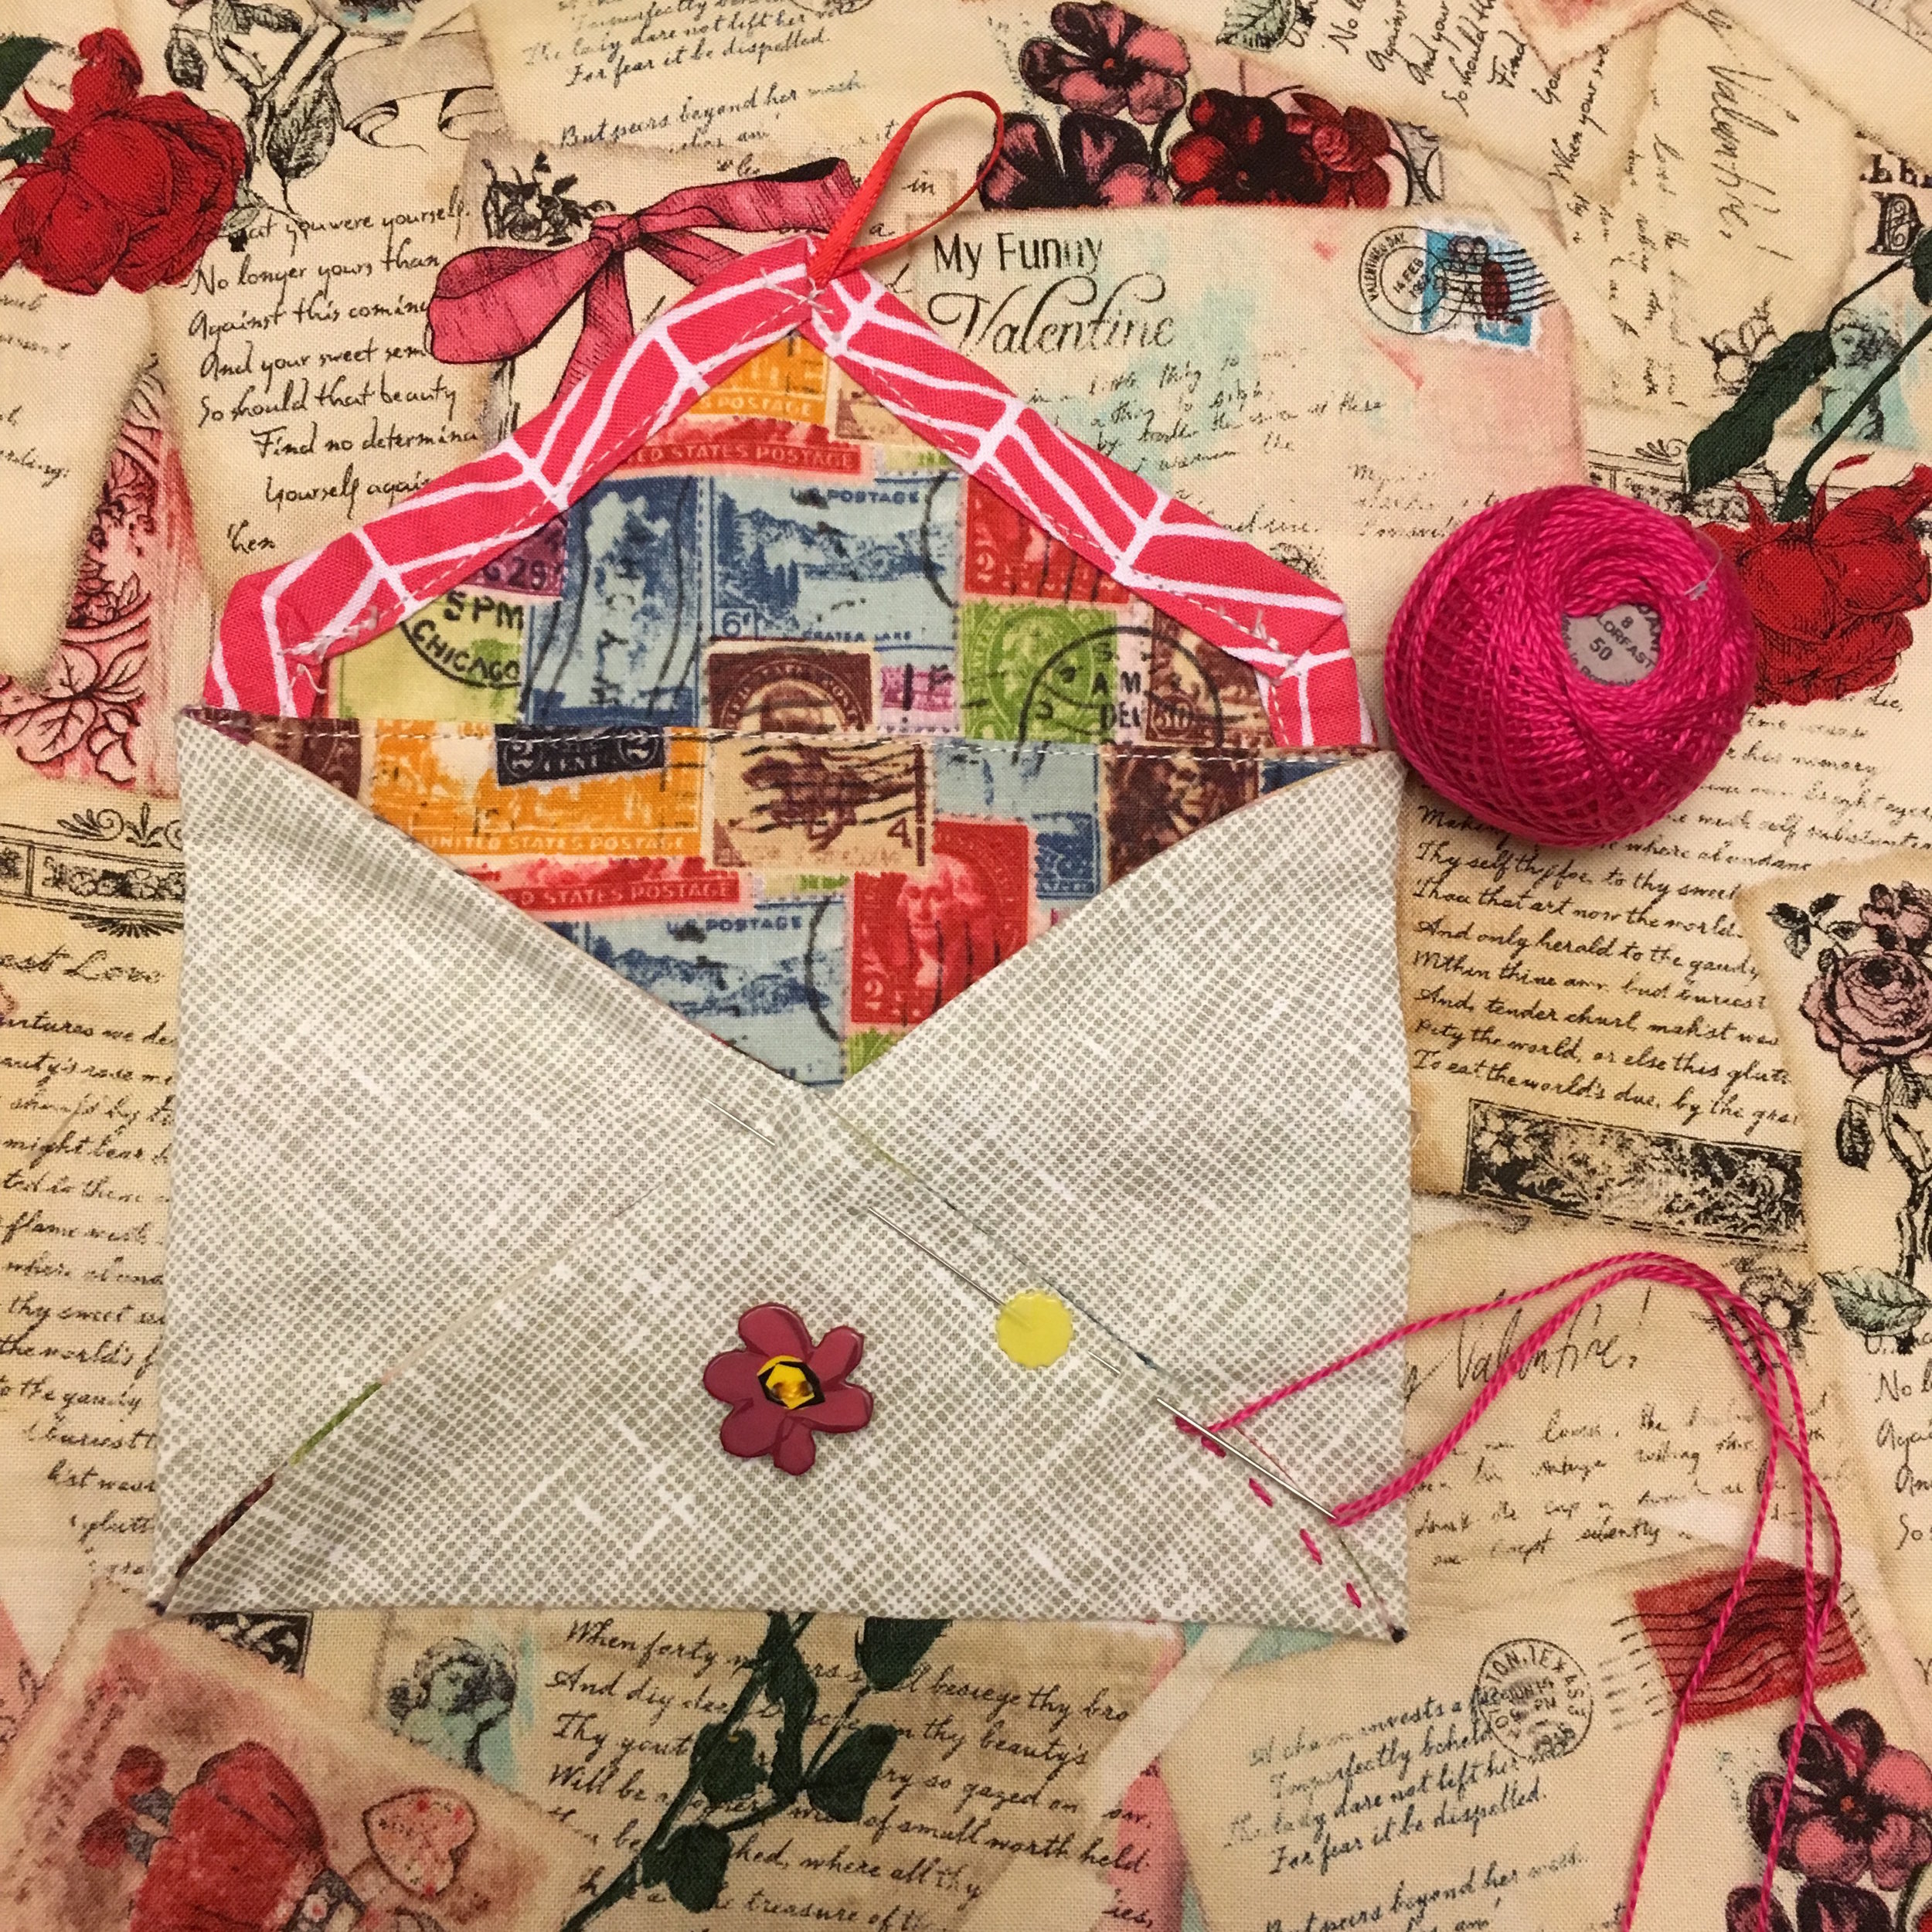
- Fold envelope and pin. Refer back to paper envelope template if needed.
- Sew on button
- Using the Perle cotton, stitch the envelope closed. Make sure you don't accidentally sew the front of the envelope to the back of the envelope!
- To make the pillow back: Fold one long raw edge down 1/4 inch both back pieces. Press. NOTE: If the design of the back fabric is directional, turn down the lower edge of the top half and the upper edge of the bottom half.
- Fold over again 1/4 inch. Press. Sew folds closed stitching close to the edge.
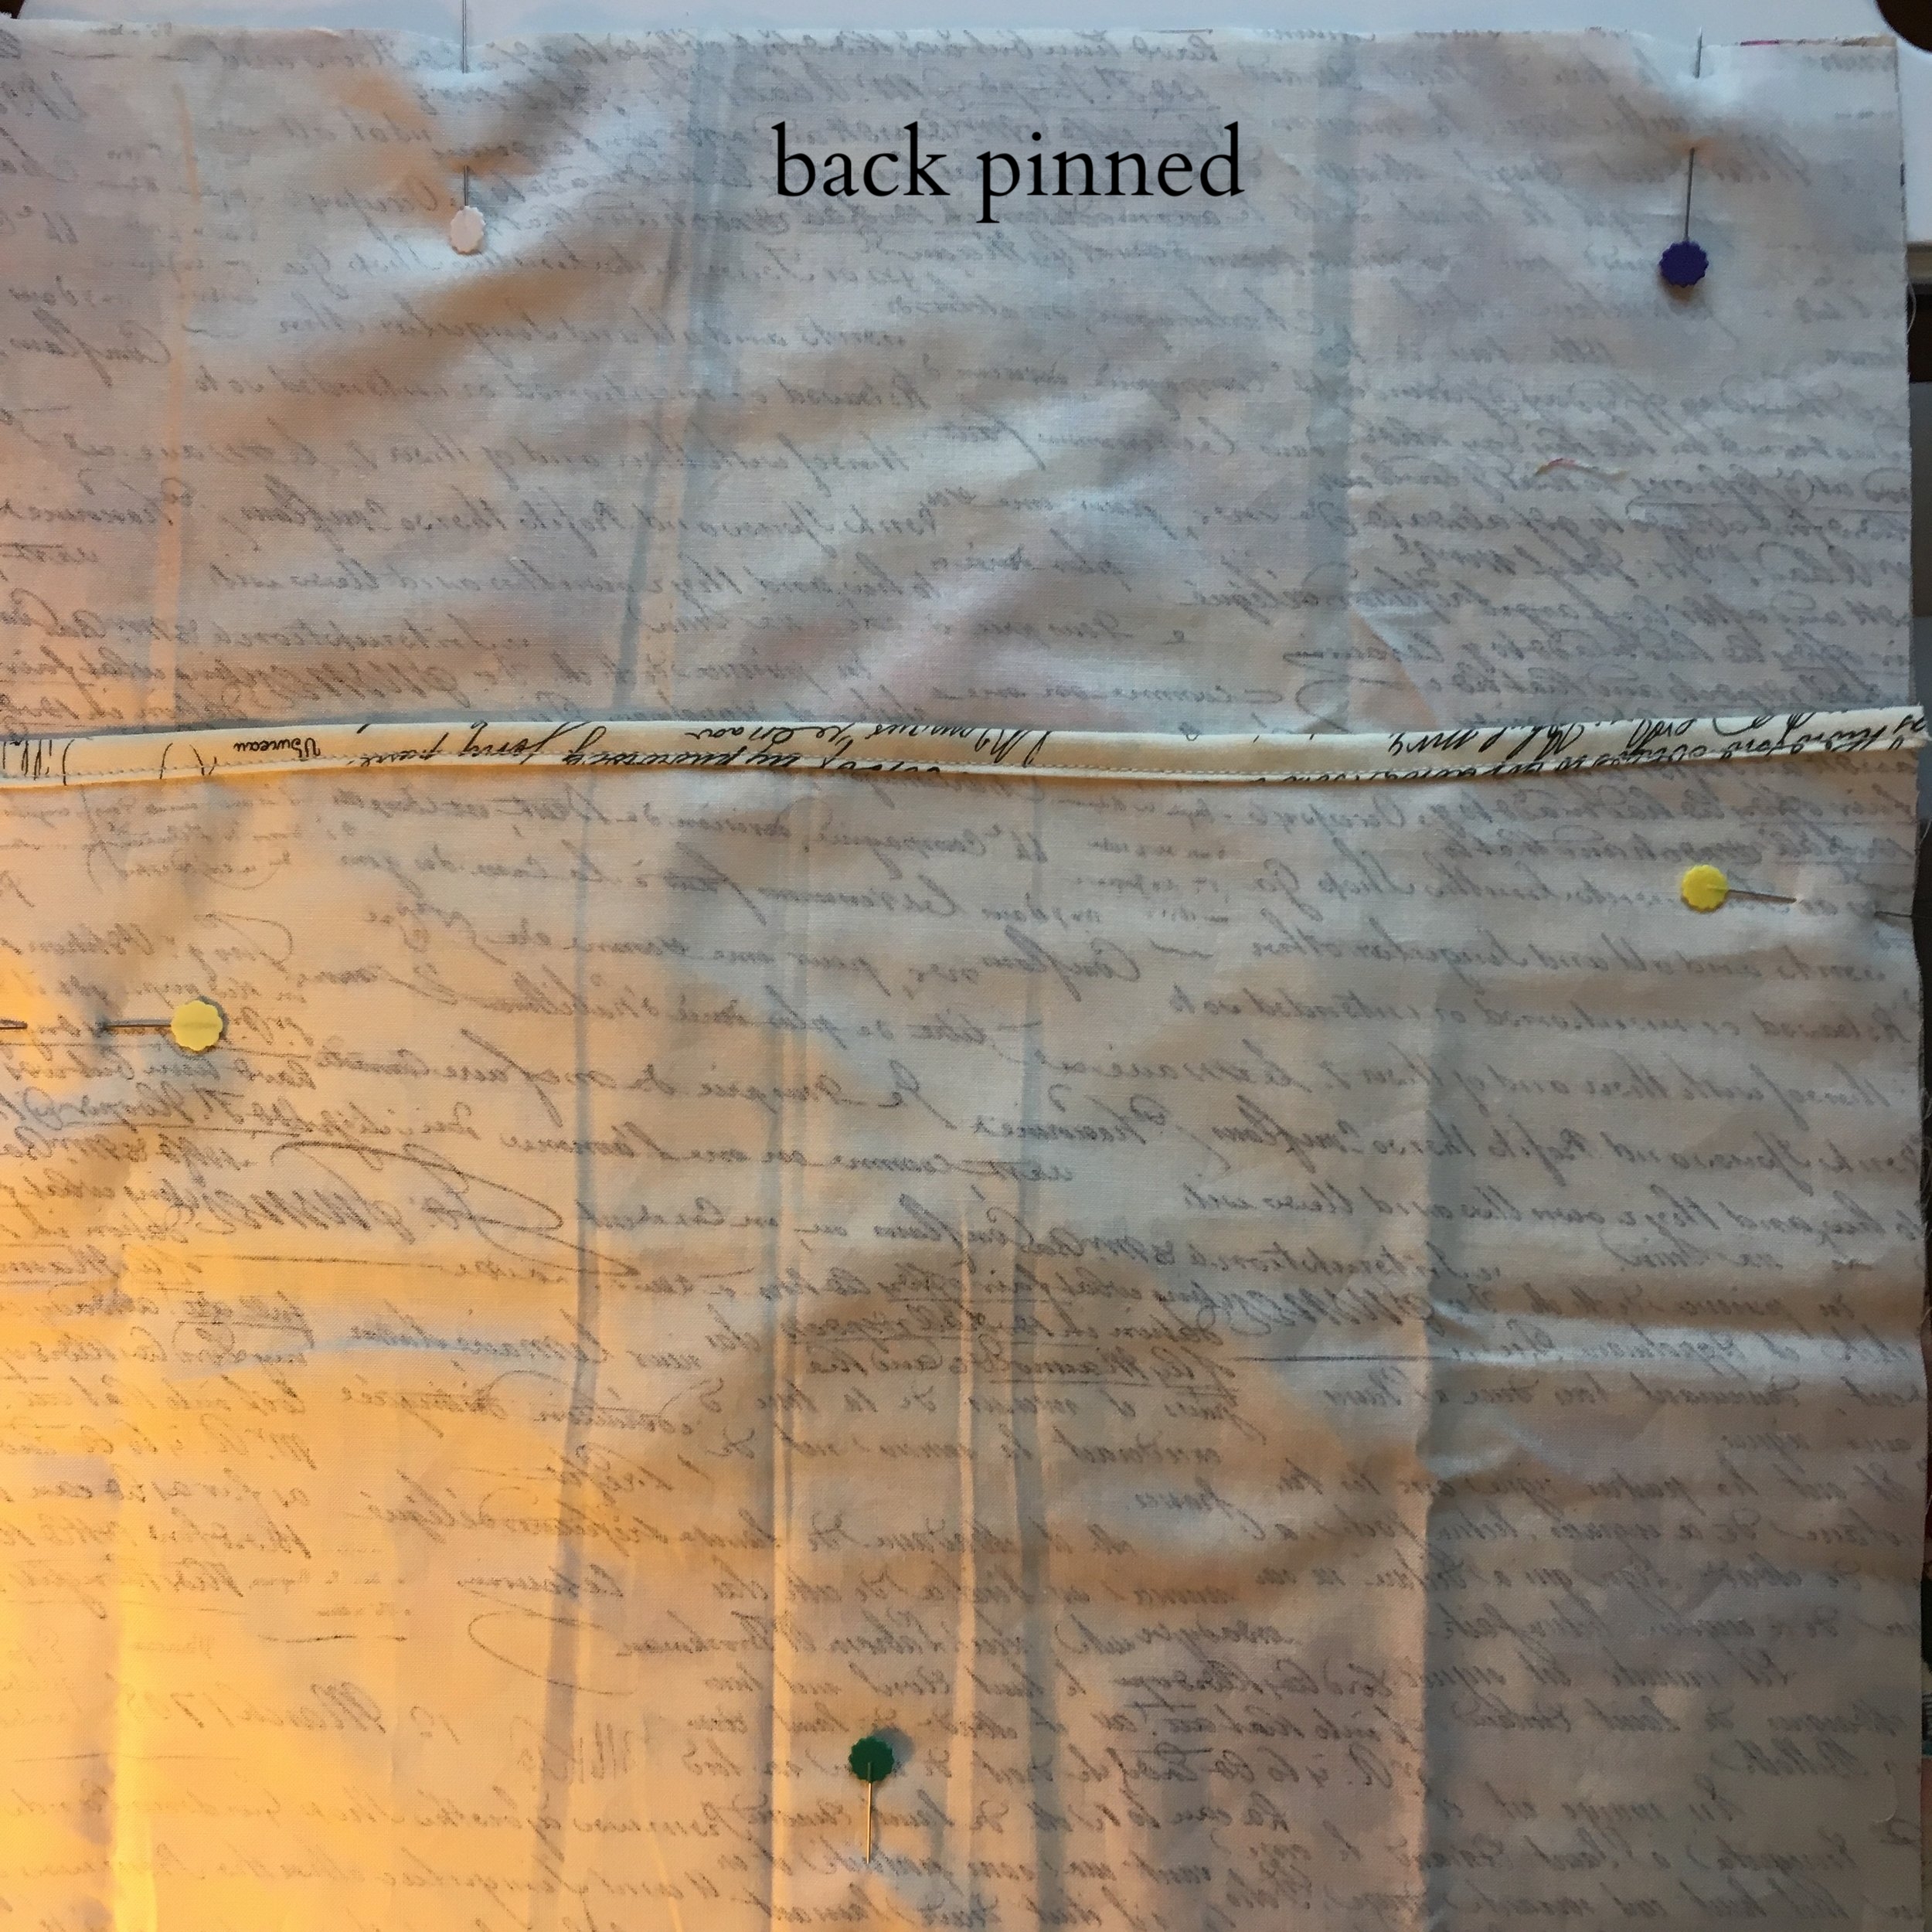
- Lay the upper half of the back on top of the front of the pillow, RIGHT sides together.
- Lay the bottom half of the back on top of the front of the pillow, overlapping the upper half of the back. Pin front and back pieces together.
- Sew SCANT 1/4 inch seam around all 4 sides of the pillow cover.
- Trim the corners. Turn right side out, making sure to fully turn the corners. Press.
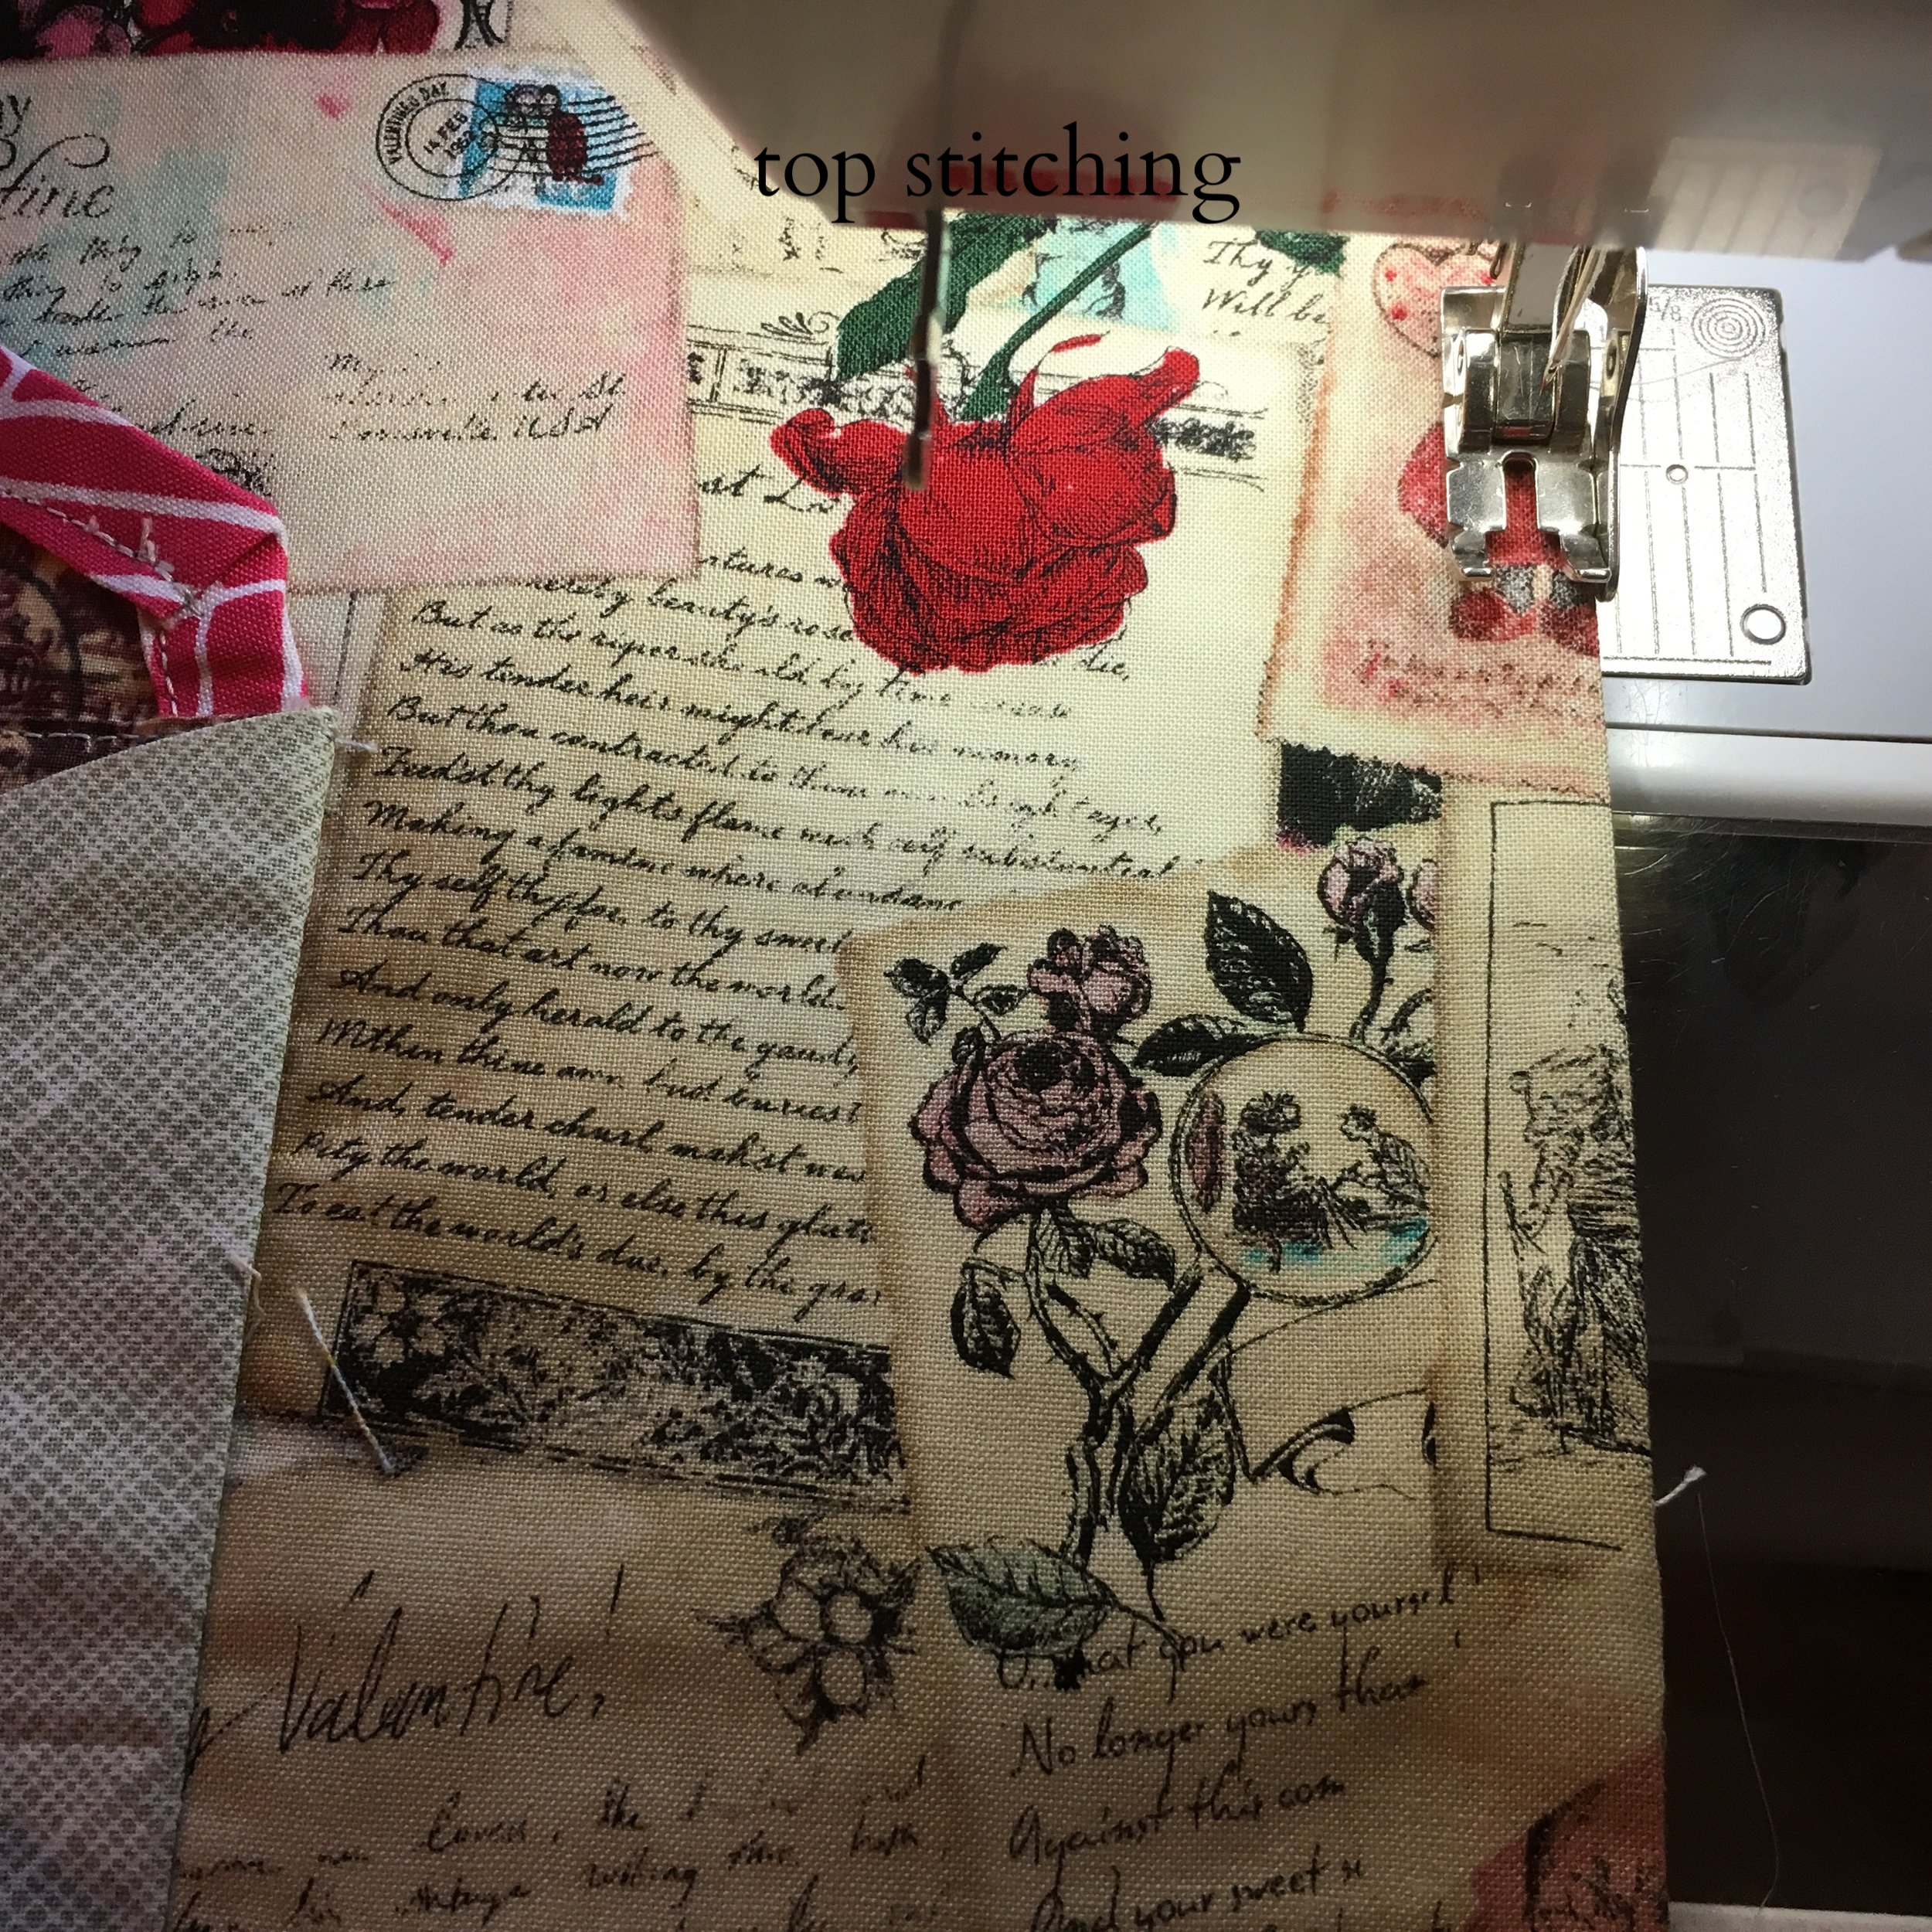
- On the outside of the pillow cover, top stitch 1/4 inch around all 4 sides on the front of the pillow. The top stitching will cover the raw edges inside the pillow cover.
- Insert the purchased pillow form.
- Write a note, tuck it in the envelope and leave it for someone special! You should also find a pocket behind the envelope--a place to hide a little present or a piece of chocolate!
Hope you enjoy your "Leave Me a Message" Envelope Pillow!
Suggestion: One of my friends thinks this would be a great place to keep a rosary, using it as a Prayer Pillow. I think that would another great way to use this pillow! Thanks for that idea, Janet!
The Fine Print: Copyright 2016 Judith Tucker. Feel free to use this tutorial to make pillows for friends and family. It's also fine to make a pillows to sell on craft table at a fair or quilt show. If you do sell pillow covers, please credit the design to www.sleepingdogquilts.com. Thanks! Use for commercial purposes is NOT allowed.